By George House/17,July,2025
Space planning in interior design turns a room brief into a workable layout. It establishes what each area must do, how people will move, what furniture and equipment must fit, and which decisions need to be coordinated before products are ordered.
A good plan is not simply an attractive furniture arrangement. It is a measured record of room dimensions, circulation, doors, windows, services, storage, lighting, accessibility and future change. This guide explains a practical workflow for homes, apartments, hotels and commercial interiors.

What Space Planning Must Resolve
Space planning connects the design intent to daily use. Before selecting finishes, identify the users, activities, occupancy, privacy needs, storage volume, equipment, service points and routes through the room. The layout should also account for fixed conditions such as structural columns, shafts, ceiling drops and window openings.
Use the following questions to define the brief:
- Who uses the space, at what time and for how long?
- Which activities need to happen together, and which need separation?
- What furniture, appliances, storage and technology are required?
- Where are daylight, views, power, plumbing, ventilation and data available?
- Which clearances are required by the applicable code, accessibility standard or operator?
- What may change during the expected life of the room?
Start With a Verified Existing-Conditions Plan
Measure the room rather than relying on a marketing floor plan. Record wall lengths, diagonals, ceiling heights and level changes. Locate door and window frames, sills, radiators, columns, beams, outlets, switches, drains, supply points and access panels. Note the depth of trims and skirtings where they affect built-in work.
Photograph every wall and give each image a room and elevation reference. If the project is still under construction, identify which dimensions are design values and which have been site-verified. A dated survey prevents an early layout from being mistaken for an installation drawing.

Build the Layout in Seven Controlled Steps
1. Define Activities and Adjacencies
List the activities in each room and rank the relationships between them. A dining area may need proximity to the kitchen, while a work desk may need separation from the television. For a hotel or apartment project, repeat the exercise by room type so shared rules can be documented without hiding unit-specific exceptions.
2. Create Zones Before Choosing Products
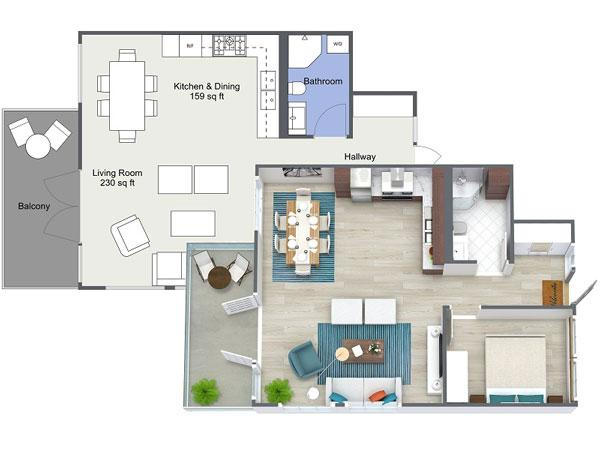
Mark activity, storage, circulation and service zones on a scaled plan. Test the largest required use condition, such as dining chairs pulled out, a bed with drawers open, or two people working at a kitchen island. Zoning first prevents a visually attractive product from consuming space needed for operation.
3. Protect Circulation and Accessible Use
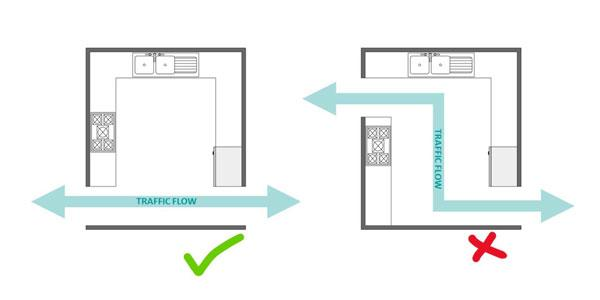
Draw the primary path from every entrance to each required destination. Keep door swings, drawers, chairs and temporary storage out of that path. Where accessibility rules apply, use the project jurisdiction and approved design criteria rather than a generic furniture rule. As a U.S. reference, the 2010 ADA Standards for Accessible Design include requirements for accessible routes, clear floor spaces, turning spaces and operable parts. They do not replace local review or the project professional’s responsibility.
4. Place Furniture at Its Working Size
Use actual product dimensions or a controlled maximum envelope, not an approximate icon. Include handles, reclining movement, chair pullback, cabinet doors and maintenance access. When preparing a custom furniture package, link every item code to the room plan, dimensions, material, finish and required quantity.

5. Coordinate Storage and Vertical Space
Storage planning begins with an inventory, not a generic cabinet depth. Separate daily, occasional and long-term storage; then allocate hanging, folded, drawer, shoe, luggage and utility zones. Coordinate built-ins with the cabinet and wardrobe package, wall construction, skirtings, outlets, sprinklers and ceiling services before finalizing elevations.
6. Layer Lighting Around Tasks
Map ambient, task and accent lighting after the furniture plan is stable. Check that pendants align with tables, reading lights serve the actual seating location, switches are reachable and tall storage does not obstruct fittings. Coordinate fixture references, control intent and ceiling locations through the project lighting package.
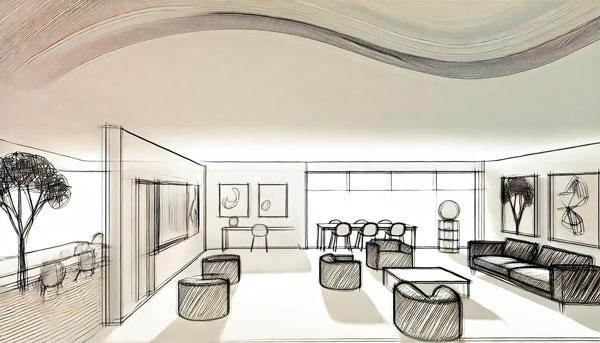
7. Coordinate Finishes and Transitions
Finish selection follows the functional plan. Confirm floor build-ups, thresholds, wet-area boundaries, expansion joints and changes between materials. Large-format floor and wall tiles may affect joint positions, falls, cutting zones and finished levels, so the setting-out plan should be reviewed with the room layout.
Space Planning Decision Table
| Decision | Minimum Input | Drawing or Record | Release Gate |
|---|---|---|---|
| Room function | Users, activities, occupancy | Room brief | Owner approval |
| Circulation | Openings, routes, code criteria | Dimensioned plan | Design review |
| Furniture | Item dimensions and operation | Furniture plan and schedule | Item references frozen |
| Built-in storage | Inventory, services, wall conditions | Plan, elevations and sections | Shop drawings approved |
| Lighting | Tasks, furniture, ceiling conditions | Reflected ceiling and controls plan | Fixture and location approval |
| Finishes | Material, build-up and transitions | Finish plan and sample schedule | Samples approved |
Common Space Planning Mistakes
- Planning from nominal room sizes: use verified dimensions and record tolerances.
- Drawing furniture without operation: show drawers, doors, chairs and access zones in use.
- Ignoring services: check outlets, plumbing, ventilation, controls and maintenance access.
- Using one layout for every unit: log mirrored, accessible and site-specific variants separately.
- Approving mood boards before scope: confirm function, dimensions and performance before finishes.
- Releasing products from a presentation plan: issue coordinated drawings and schedules with revision status.
Space Planning Checklist for Procurement
- Room names, numbers, unit types and revision date
- Verified dimensions and fixed-condition survey
- Approved furniture plan with item codes
- Door swings, circulation and required clearances
- Built-in storage plans, elevations and service coordination
- Lighting and controls coordinated to tasks and furniture
- Finish schedule, samples and transition details
- Open decisions, responsible party and required date
- Quantities, delivery sequence and room/package labels
From Layout to a Coordinated Material Package
The most useful space plan is traceable. Every product should connect to a room, item code, dimension, finish, quantity and approval record. Keep unresolved assumptions visible and revise related plans and schedules together. For a coordinated quotation, send the current drawings, room list, quantities, material references and programme through the building material procurement services workflow.