
By George House/28,Aug,2025
Standard shower dimensions are planning modules, not universal finished sizes. The usable shower floor, waterproofed footprint, curb or threshold, glass line, entry, fixtures and clear space outside the enclosure all affect whether the layout works.
This guide compares common residential modules and explains how to coordinate movement, accessibility, drainage, waterproofing and the surrounding bathroom. Final dimensions must follow the adopted local code, approved drawings, selected enclosure and responsible design professional.
Common Shower Planning Modules
| Nominal Module | Typical Planning Use | Critical Checks |
|---|---|---|
| 32 × 32 in (813 × 813 mm) | Compact enclosure where permitted | Actual internal floor, door projection and user comfort |
| 36 × 36 in (914 × 914 mm) | Common square planning module | Entry width, fittings and elbow room |
| 36 × 48 in (914 × 1219 mm) | More movement or a compact bench arrangement | Bench depth, controls, spray and enclosure support |
| 42 × 60 in (1067 × 1524 mm) | Larger walk-in residential shower | Splash control, drainage, heating and glass bracing |
| 60 × 30–32 in (1524 × 762–813 mm) | Common tub-replacement footprint | Drain relocation, entry and wall condition |
Dimensions may be quoted to studs, backer board, tile face, tray edge or glass centerline. State the measurement basis on the drawing. Use the space-planning guide to test the shower together with the toilet, basin, storage, door swing and circulation route.
Minimum Size and Local Code
Many jurisdictions adopt model-code provisions that define a minimum shower area, width or test circle, but the adopted edition and local amendments control. Product instructions can also require a larger support or waterproofing zone than the visible floor. Confirm the local rule before fixing walls, drains or prefabricated trays.
Do not treat a nominal tray size as the usable internal dimension. Wall finishes, framed glass, tracks, handles, seats and controls can reduce the clear space. Record both the construction opening and the finished internal dimensions.
Accessible Shower Planning
Accessible showers are defined systems rather than simply “larger showers.” Where the 2010 ADA Standards apply, Section 608 identifies transfer-type and roll-in configurations, entry conditions, seats, grab bars, controls and clear floor space. Review the official 2010 ADA Standards for Accessible Design and the project-specific accessibility basis.
- Confirm whether a transfer, standard roll-in or alternate roll-in compartment is required.
- Reserve the prescribed clear floor space outside the shower.
- Coordinate seat, grab bars, controls, hose and showerhead reach.
- Keep thresholds and floor transitions within the permitted profile.
- Check the complete accessible route, bathroom door and maneuvering space.
- Use compatible wall reinforcement for grab bars and seats.
Entry, Glass and Splash Control
Hinged, Sliding or Open Entry
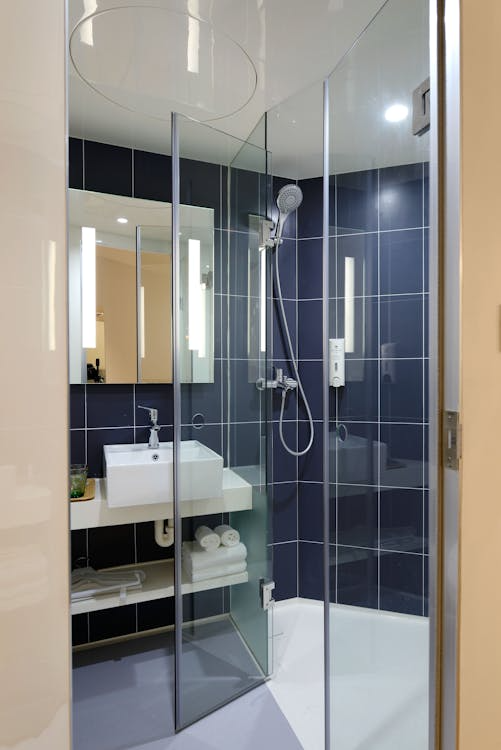
A hinged shower door needs a safe swing area and suitable hinge support. A sliding enclosure avoids the swing arc but reduces clear entry through overlapping panels. An open walk-in screen needs enough depth and glass return to control spray without trapping access to controls. Confirm the clear entry after handles, channels and seals are installed.
Glass Support and Safety
Specify safety glazing, glass thickness, edge treatment, hardware, bracing and fixing substrates as a coordinated enclosure. Avoid locating unsupported glass or hinges where the wall has no suitable structure. Show niches, grab-bar backing and concealed services before drilling or fabrication.
Drainage and Waterproofing
Plan the waterproofed assembly before selecting visible finishes. Coordinate floor slope, drain type, waste location, membrane, corners, penetrations, curb or recessed transition and connection to surrounding walls. Large-format tiles can be difficult to slope to a central point drain; a linear drain may simplify falls but introduces its own outlet, cleaning and waterproofing details.
The wet-area package should be coordinated with the sanitary ware selection, including mixer, outlet, hand shower, floor drain, niche and accessories. Verify service pressure, flow, hot-water capacity and maintenance access.
Ventilation, Materials and Maintenance
- Size and locate mechanical ventilation for the complete bathroom, not only the shower.
- Choose slip-resistant floor finishes appropriate to the project and cleaning regime.
- Confirm tile, grout, sealant and substrate compatibility with the waterproofing system.
- Provide access for traps, concealed valves or serviceable equipment where required.
- Consider water hardness, glass coating, joint layout and replaceable seals.
- Use efficient fixtures without assuming that a larger enclosure needs more outlets.
The U.S. Environmental Protection Agency’s WaterSense showerhead guidance explains efficiency and performance considerations for labeled showerheads. Fixture selection still needs to match the local plumbing system and user requirements.
How to Measure the Shower Area
- Record the structural and finished dimensions at several heights.
- Check walls for plumb, corners for square and the floor for level variation.
- Mark the waterproofed footprint, glass line and usable internal floor.
- Locate drain center, waste route, supplies, valves and outlets.
- Measure the entry, external clear floor space and any door swing.
- Record curb, recess, threshold and finished-floor transitions.
- Show seat, grab bars, niches, shelves and backing requirements.
- Confirm ceiling height, lighting, ventilation and glass bracing.
- Coordinate tile module, joints, slope and drain position on an enlarged drawing.
Shower BOQ and RFQ Checklist
- Plans, elevations, dimensions and required accessibility configuration
- Tray or site-built base, curb, recess and waterproofing system
- Drain, waste, slope, membrane and test requirements
- Wall and floor substrates, tiles, trims, grout and sealant
- Glass panels, door type, hardware, bracing and safety glazing
- Mixer, outlets, hand shower, controls, valves and service access
- Seat, grab bars, niches, accessories and concealed backing
- Ventilation, lighting and electrical-zone coordination
- Samples, shop drawings, installation scope and warranties
For renovation work, use the renovation planning guide to sequence demolition, substrate repair, services, waterproofing, testing and finishes. To request coordinated material quotations, submit drawings and the complete wet-area schedule through the building material procurement services process.
Dimension the Complete Wet Area
Good standard shower dimensions balance the user, enclosure, clear floor space, drainage and waterproofing—not just a nominal tray size. Freeze the layout only after the local code, product data, structure, services and finished dimensions agree. Review surrounding furniture and finishes in the building material product range when coordinating the wider bathroom package.




