A bathroom fixture schedule template records the fixtures required in each room and connects their quantities to product models, water and waste connections, accessories and review records. Use it alongside bathroom plans, elevations and manufacturer drawings so that a product selection can be traced to its intended location and installation requirements.
The accompanying Excel workbook includes blank registers and a separate filled example. It is designed for room-by-room reviews, sanitary ware quotations and coordination before ordering. Start with the available information, then identify the model, connection or approval details that still need confirmation.
Download the Bathroom Fixture Schedule Template in Excel
Use Bathroom-Fixture-Schedule-Template.xlsx to organize bathroom fixtures without putting every technical detail into one wide worksheet. The workbook keeps room quantities separate from the product register and links the supporting records through stable identifiers.
| Worksheet | What to record |
|---|---|
| Room Fixtures | A unique Line ID, room, Fixture ID, quantity and current review reference |
| Product Register | Fixture type, manufacturer, exact model, finish and supporting product documents |
| Plumbing Connections | Water, waste and other connection requirements linked to a room fixture line |
| Accessories | Related parts, supply responsibility, quantity basis and compatibility confirmation |
| Approval Log | Review ID, item reference, document revision, reviewer, decision and date |
| Revision Log | What changed, which records are affected and the drawing or document revision |
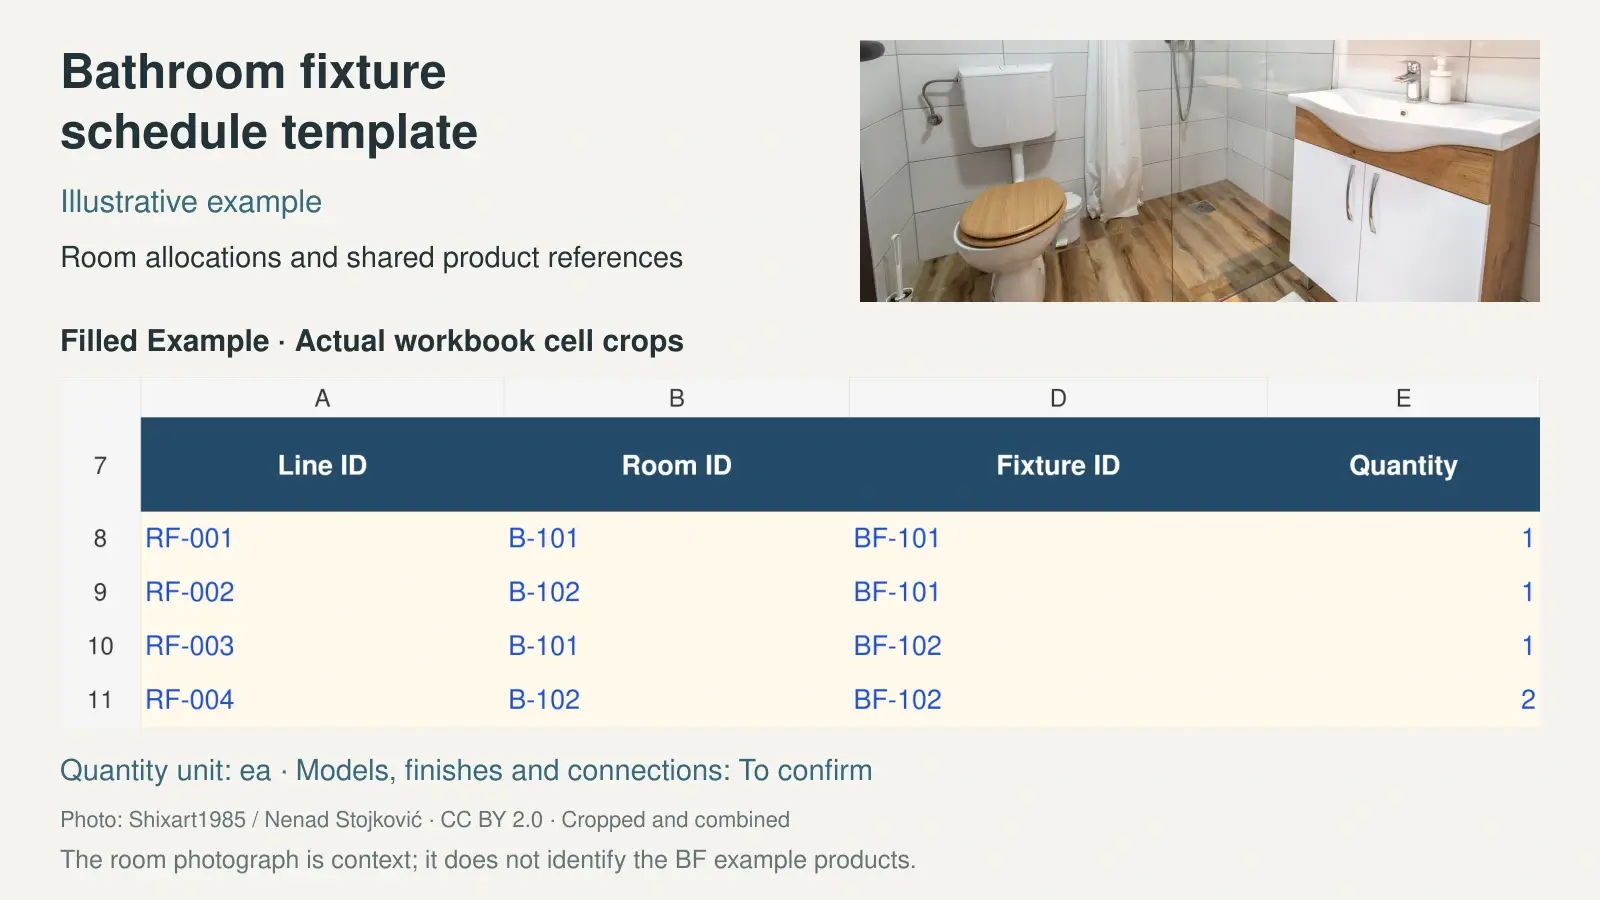
| Filled Example | Fictional room allocations showing how the records connect |
| Read Me | Field guidance, workbook limits and the sequence for completing the registers |
Review Filled Example first, then enter your project in the blank registers. Keep the example separate from live quantities. A completed spreadsheet supports coordination; the responsible project team still needs to review the selected products, layouts, connections and release requirements.
Set Up Room References and Fixture Tags
Separate a product reference from a room allocation
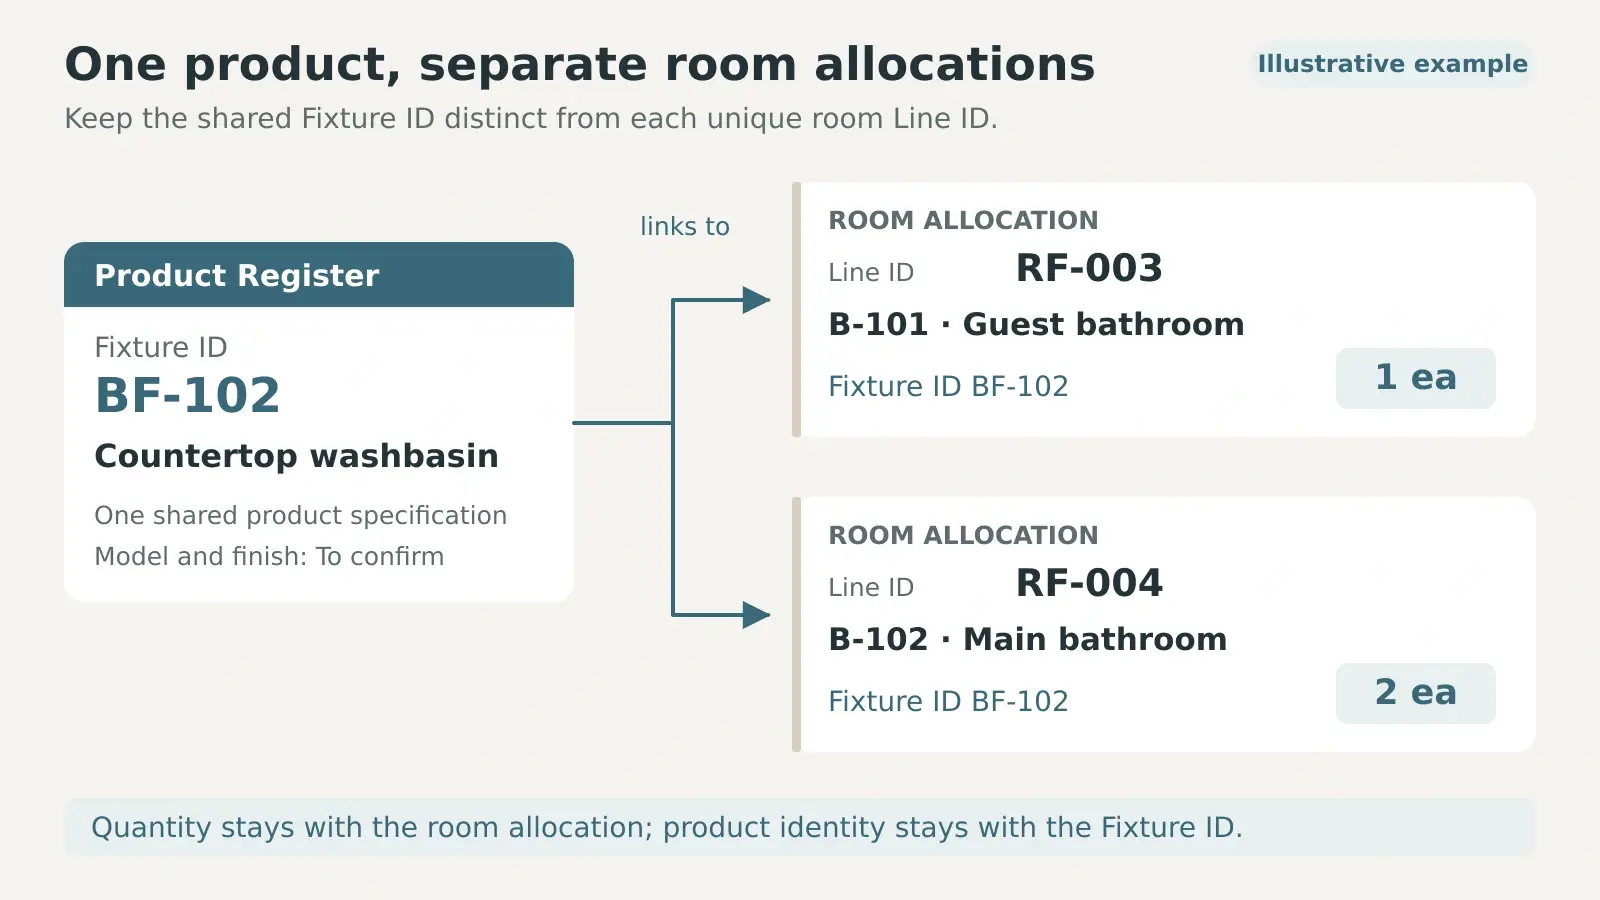
Use a Fixture ID for a defined product selection and a Line ID for its allocation to a particular room. The same basin model can appear in several bathrooms, but each room needs its own quantity and drawing reference. A unique Line ID lets a connection note or review record point to the correct location.
For example, BF-102 can identify one basin selection. RF-003 assigns that basin to room B-101, while RF-004 assigns it to B-102. Changing a quantity in B-102 should not change the B-101 allocation. If the model, finish or configuration differs, create a separate Fixture ID or document the revised selection clearly before reusing the reference.
Link the schedule to plans and elevations
Use the same room identifiers as the current bathroom drawings. Record the drawing number, detail or elevation reference and revision where they affect the item. Check that every scheduled fixture has a location and that every fixture tag on the drawings has a schedule record.
Keep wall, floor and ceiling material codes in the finish schedule template and cross-reference them when they affect fixture installation. For instance, a revised wall finish can change the finished face used to set out a concealed body. The fixture record should lead the reviewer to the relevant section and current finish build-up.
Record Models and Plumbing Connections
Identify the exact product and configuration
Enter the manufacturer, full model or order code, finish code and mounting arrangement when selected. Retain the product data reference and revision or retrieval date. A catalogue image alone may leave out the outlet configuration, tap-hole arrangement, overflow, concealed body or installation parts.
Review the fixture categories and coordination inputs in our sanitary ware project guide. For a wall-hung toilet, identify the bowl and its compatible supporting system, cistern, flush control and required fittings as separate components where appropriate. For a basin, coordinate the tap arrangement, waste and vanity or worktop interface with the actual selected models.
Mark an unselected model as To confirm and record the open decision. Do not use a similar product's dimensions to complete the row. If an alternative changes the mounting, connection, finish or accessories, update the affected records and send that scope for review.
Record water and waste connections separately
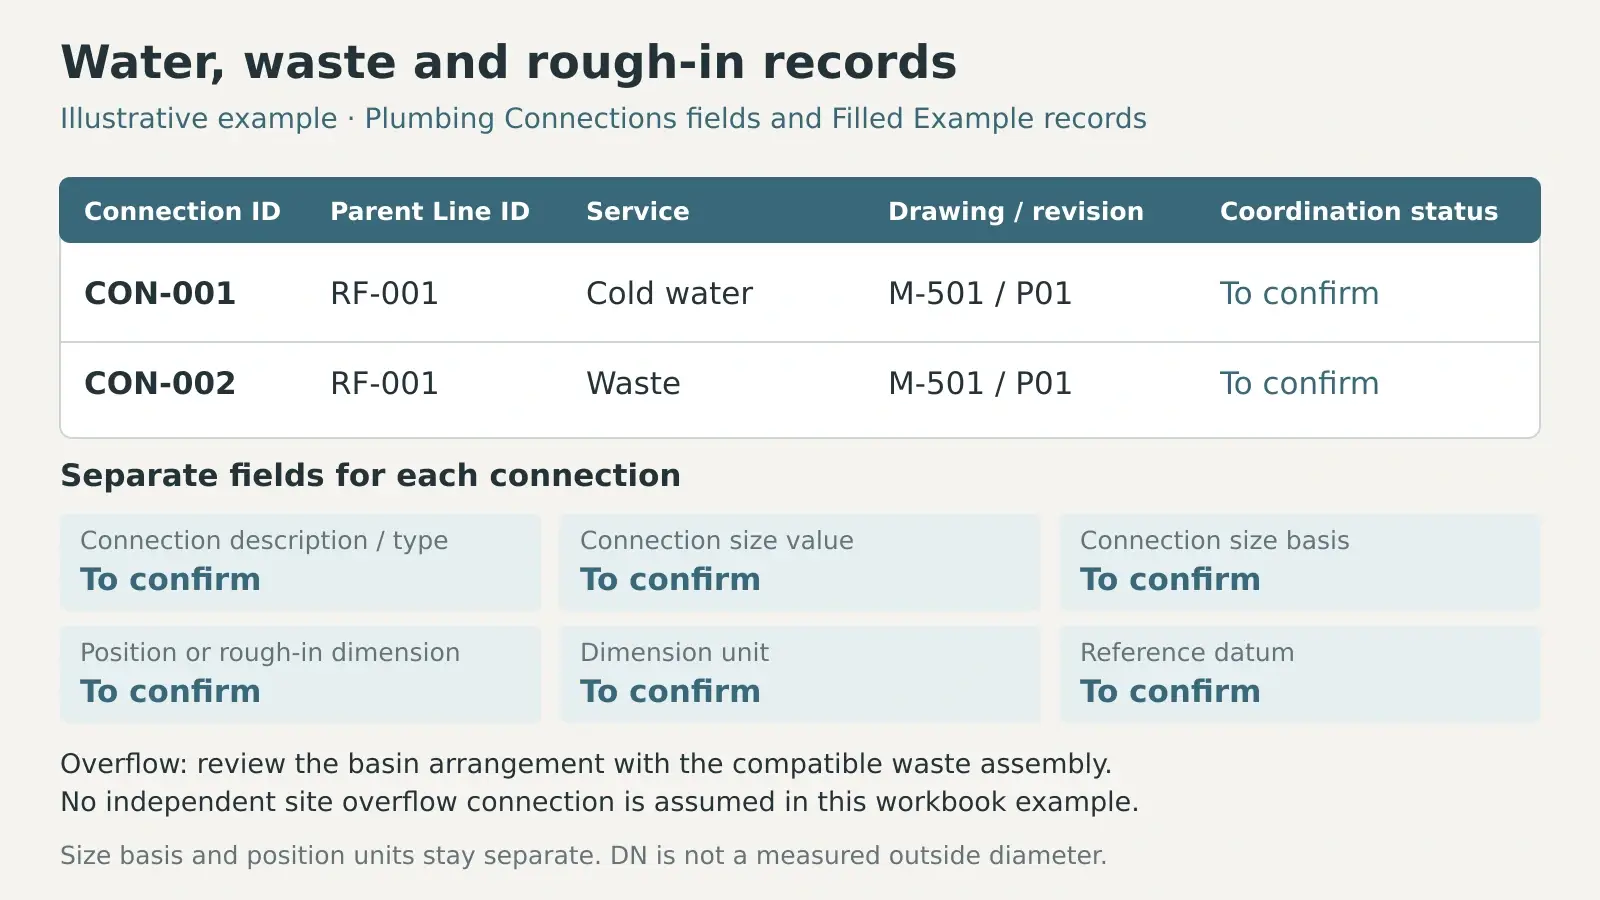
Use Plumbing Connections for the relevant service at each Line ID. Separate hot water, cold water, mixed water and waste information as applicable. Where an overflow is integral to the fixture, record the compatible waste and overflow assembly rather than assuming a separate site connection. Give each actual connection its own identifier so that several services can relate to one fixture without being compressed into a single note.
Record the connection size and its stated convention, thread or connection type, location reference and supporting drawing. Keep a nominal pipe designation such as DN separate from a measured outside diameter. Store dimensional units explicitly and do not treat an inch connection label as an exact millimetre diameter. Leave unverified values open for confirmation with the plumbing team.
The connection record identifies the selected product's interface and the coordinated project requirement. Pipe sizing, gradients, venting and system design belong in the plumbing design. A generic fixture schedule cannot establish those requirements by itself.
State the datum for each rough in dimension
Write what the dimension measures and where it starts. A distance from the finished wall face differs from one taken from framing; an elevation above finished floor differs from one above a structural slab. Link the set-out dimension to the model drawing and the bathroom plan, elevation or section that controls it.
Our wall-hung and floor-mounted toilet comparison explains how drainage position, concealed cisterns, support and service access affect the installation scope. For baths, use the bathtub dimensions and installation guide to identify the layout checks, then confirm the drain location, support and connection details from the selected model's installation documents.
List Accessories and Define Supply Responsibility
Connect each accessory to the correct fixture line
Give separately coordinated parts their own accessory records and link them to the parent Line ID. Depending on the selection, these may include basin wastes, traps, taps, isolation valves, toilet seats, frames, cisterns, flush plates, shower bodies, trim or mounting kits. Record the exact part model when it is confirmed.
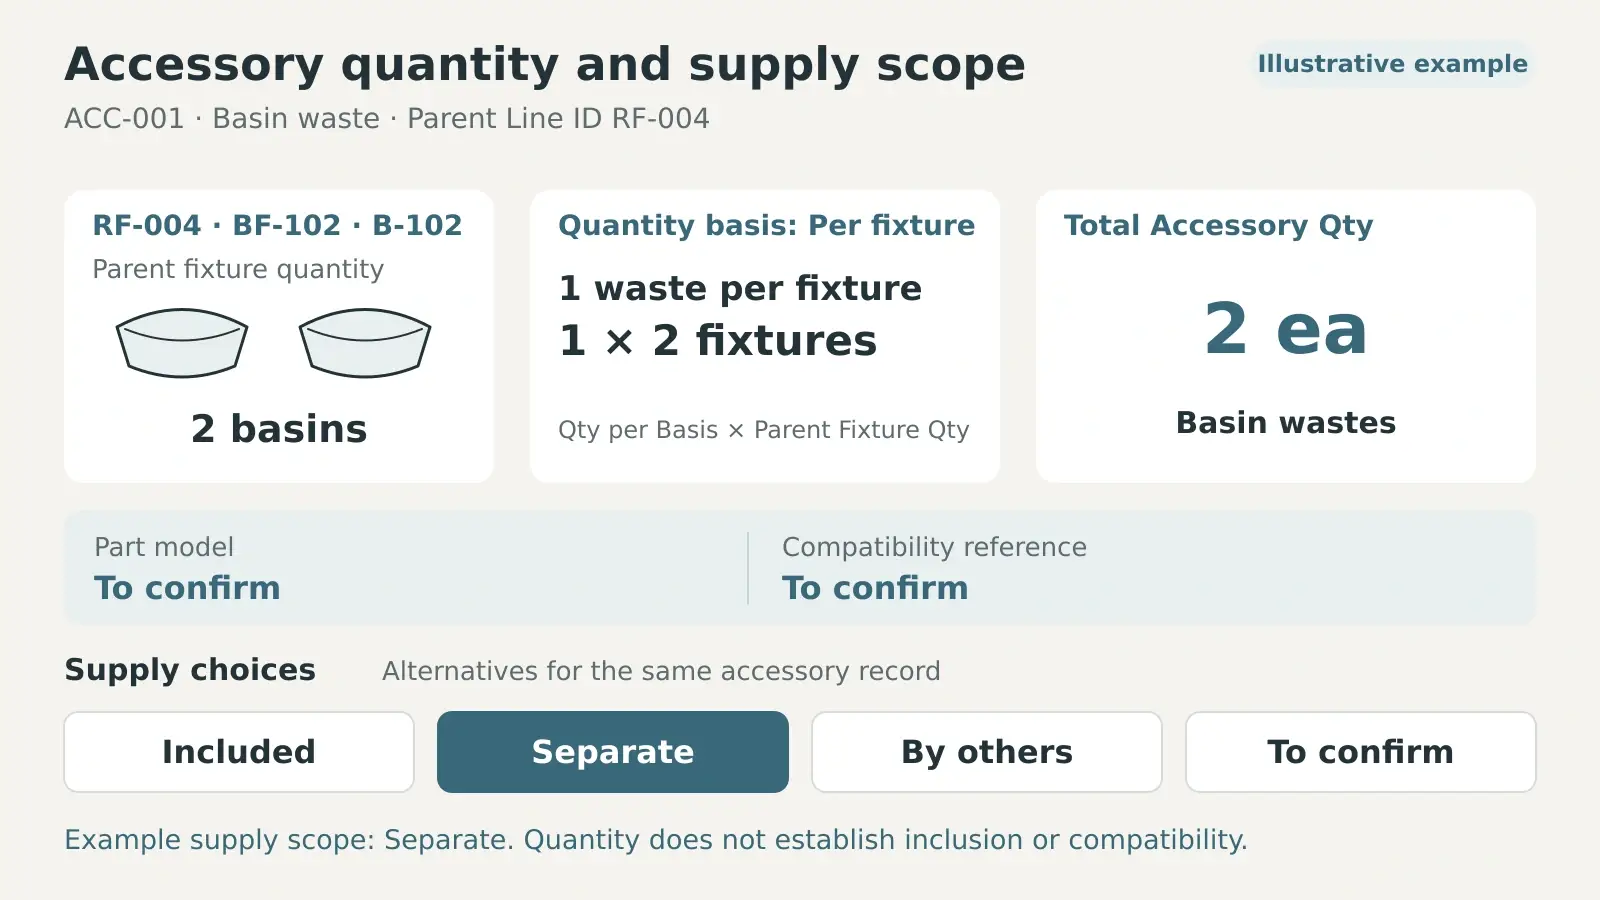
For each part, distinguish Included, Separate, By others and To confirm. Identify the responsible supplier or trade and retain the compatible combination or supporting document reference. An accessory can be compatible yet excluded from the quotation. A matching finish name also does not establish that components from different product ranges are interchangeable.
Define whether the quantity is per fixture or per line
Use the workbook quantity basis Per fixture or Per line before calculating totals. Two basins in one room may need two wastes. For a shared room accessory, use one designated parent line and count it once with Per line rather than repeating it against every fixture. In the filled example, RF-004 has two basins. An accessory entered as one waste per fixture therefore totals two, provided that combination is confirmed for the selection.
Avoid counting a part twice because it appears both in the fixture package and in a separate accessories list. Compare the accessory register with the supplier's included-parts list and quotation. Keep an unresolved supply responsibility visible until the relevant party confirms it.
Follow the Filled Bathroom Fixture Schedule Example
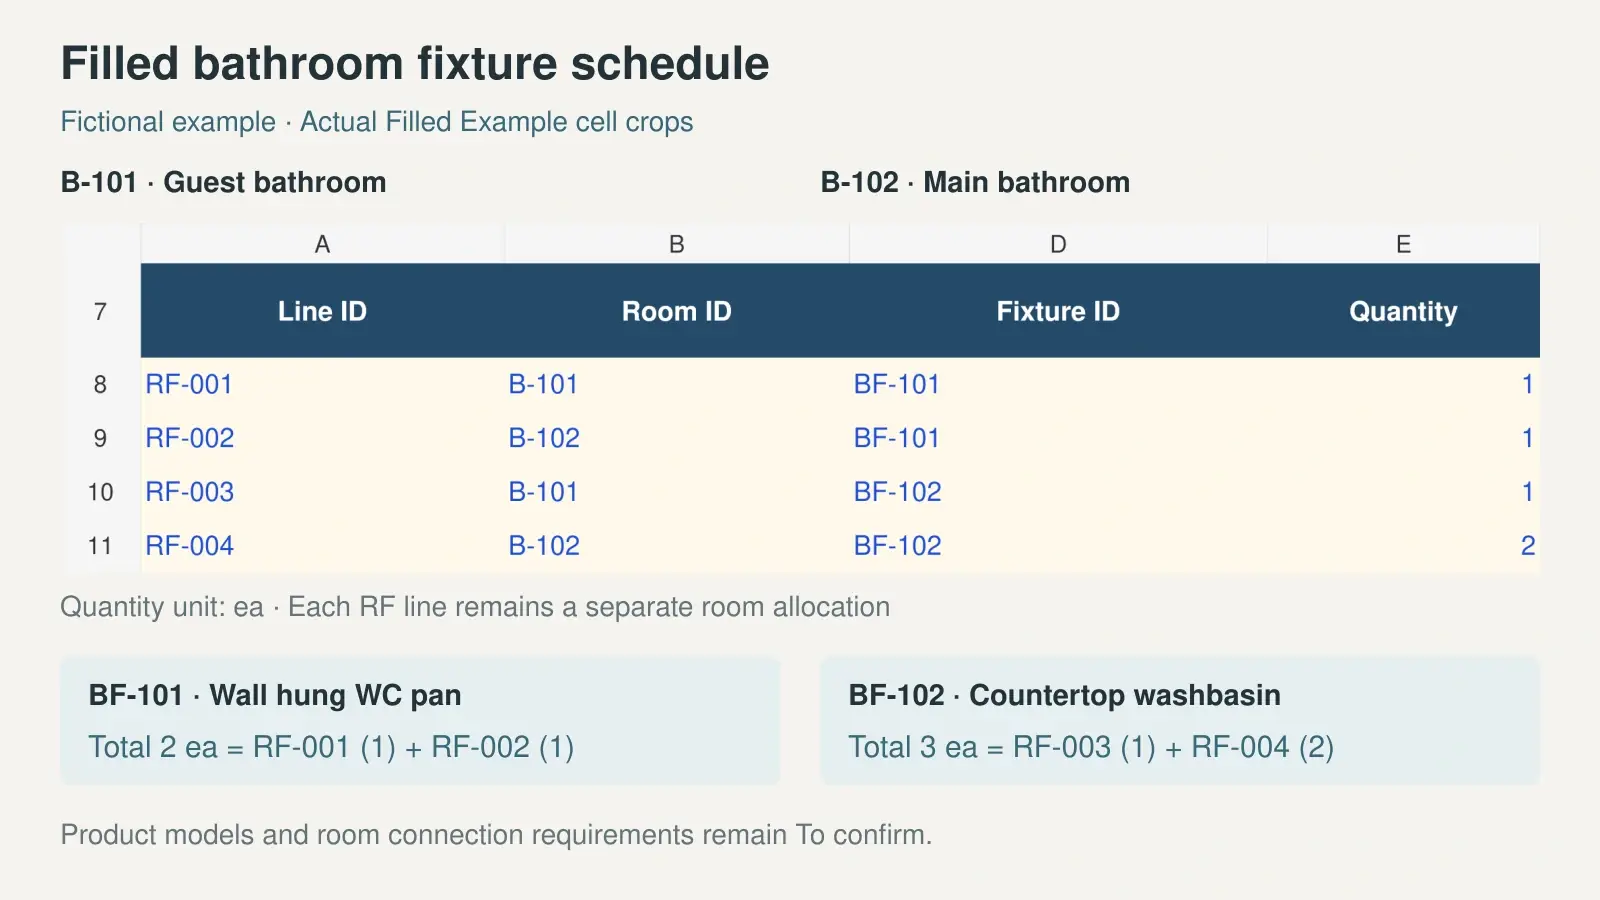
The example uses two fictional rooms and two provisional product references. It demonstrates record relationships rather than a completed sanitary ware specification. Manufacturer, model, finish and rough-in details still need project confirmation.
| Line ID and room | Fixture reference and quantity | Coordination point |
|---|---|---|
| RF-001 in B-101 | BF-101 wall-hung toilet, quantity 1 | Confirm the compatible support, cistern and connection records |
| RF-002 in B-102 | BF-101 wall-hung toilet, quantity 1 | Reuse the product reference while checking the second room's installation |
| RF-003 in B-101 | BF-102 countertop basin, quantity 1 | Link the tap, waste and worktop information to this allocation |
| RF-004 in B-102 | BF-102 countertop basin, quantity 2 | Use the room quantity when calculating accessories per fixture |
BF-101 appears in two rooms, giving two toilets across those allocations. BF-102 totals three basins. The room lines retain the location and quantity, while Product Register holds the shared product selection. Record exceptions explicitly rather than assuming that repeated rooms have identical service positions.
For a shower allocation, add the selected control body, visible trim, outlets and relevant service records. Check their location against the shower layout and finished-dimension guide and the project drawings. Identify any separate power or control requirements in the supporting documents when the chosen equipment needs them.
Track Approvals and Revisions Before Ordering
Record what the reviewer actually accepted
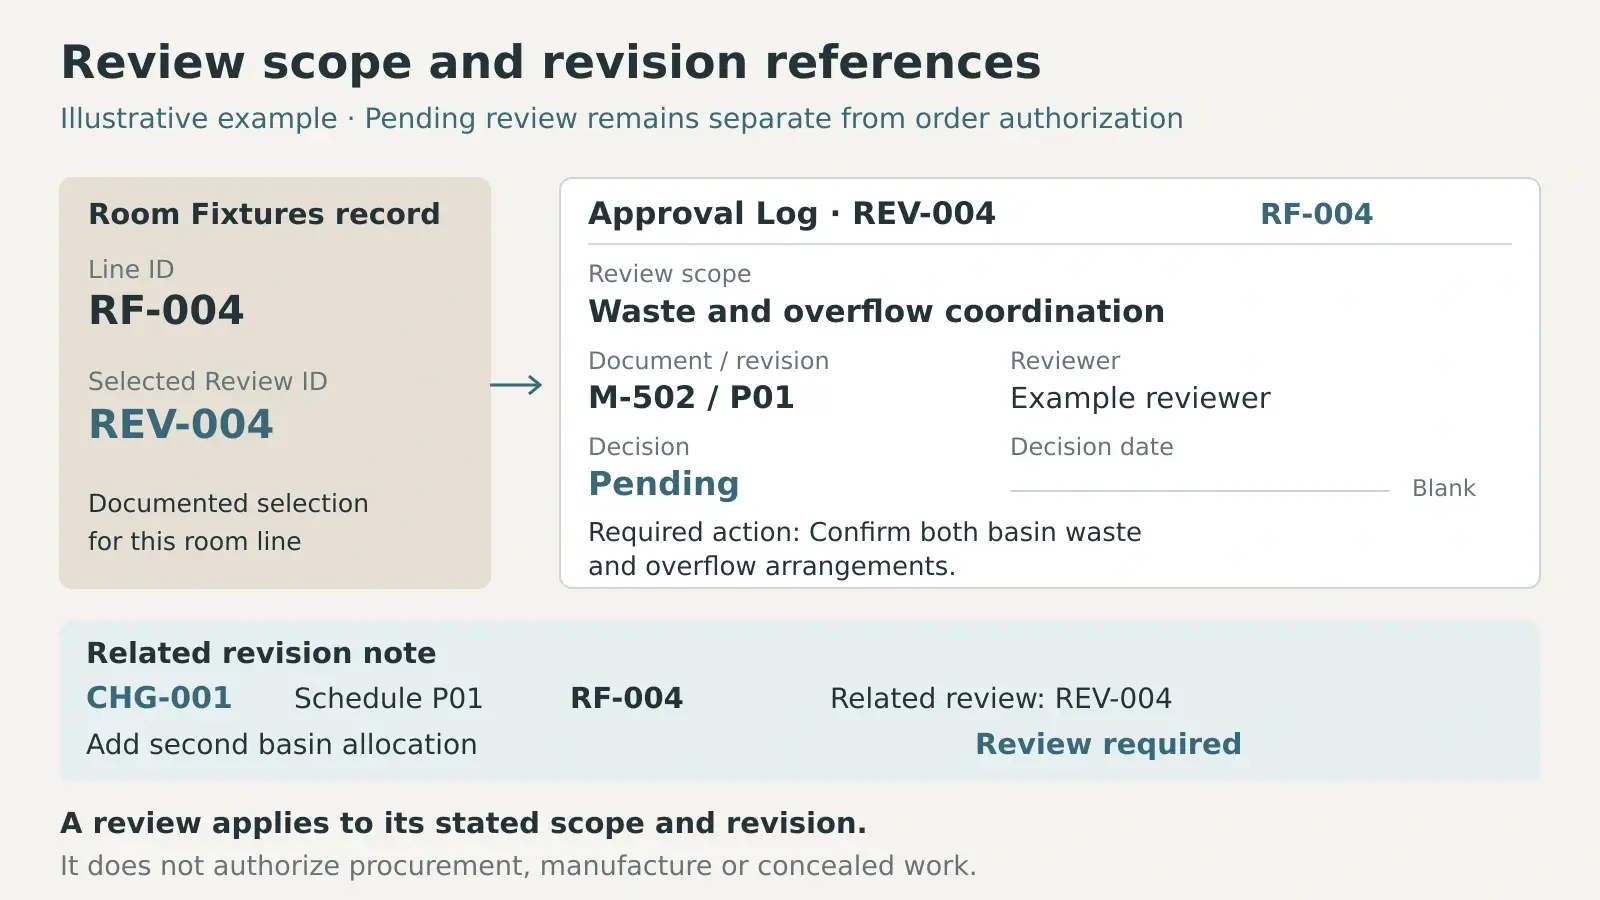
An approval record needs a reference, scope and document revision. Record who reviewed the model, sample, drawing or connection detail, the decision, its date and any conditions. A finish approval does not establish that the plumbing connections were reviewed. Keep those scopes distinguishable even when one submission covers several items.
Use the Selected Review ID on Room Fixtures to reference the applicable review record. Confirm that it still relates to the current product and drawing revisions. Keep superseded reviews in the log and create a new record for a changed submission rather than overwriting the earlier decision.
Review the complete package before release
Before placing an order, reconcile room quantities with the current drawings, confirm product and accessory models, close the relevant connection questions and check the required approvals. Confirm supply responsibilities, lead times and release instructions separately. An accepted review decision is not, on its own, an instruction to buy.
Use Revision Log to explain changes to room allocations, models, quantities, connections, accessories or approvals. Identify the affected records and drawing revision, then recheck related quantities and review references. Our drawing and sample coordination services describe the information that can be organized for a project review.
To prepare a sanitary ware quotation, send your bathroom fixture schedule and drawings. Include room quantities, selected or proposed model references, finishes, service information, accessories, project location and delivery stages. Identify the fields that remain open so that the quotation can state its assumptions and exclusions clearly.
Frequently Asked Questions
What should a bathroom fixture schedule include
Include the room, a unique allocation reference, fixture type, product reference, quantity, mounting and finish information. Add water and waste connections, accessory supply, supporting drawings and review records where they affect selection or installation. The Excel workbook separates those records so they can be updated without losing their relationship.
Can the same fixture tag appear in several bathrooms
Yes, when it identifies the same product selection. Use a unique Line ID for each room allocation and keep that room's quantity and drawing reference. Create a separate product reference when a model, finish or configuration needs to be distinguished.
Is this the same as a plumbing fixture schedule
The information overlaps. This template focuses on room allocations, product selection and procurement coordination. A plumbing design schedule may also specify design duties, loads, flow or other technical requirements. Coordinate both records with the responsible designer and the selected manufacturer's documents.
Does an approved fixture schedule mean the order can be released
Only the project's agreed release process can establish that. Confirm the approval scope, current revision, quantities, included components, commercial terms and any outstanding conditions before release. The workbook records reviews and open information; it does not issue an order or certify the bathroom layout.