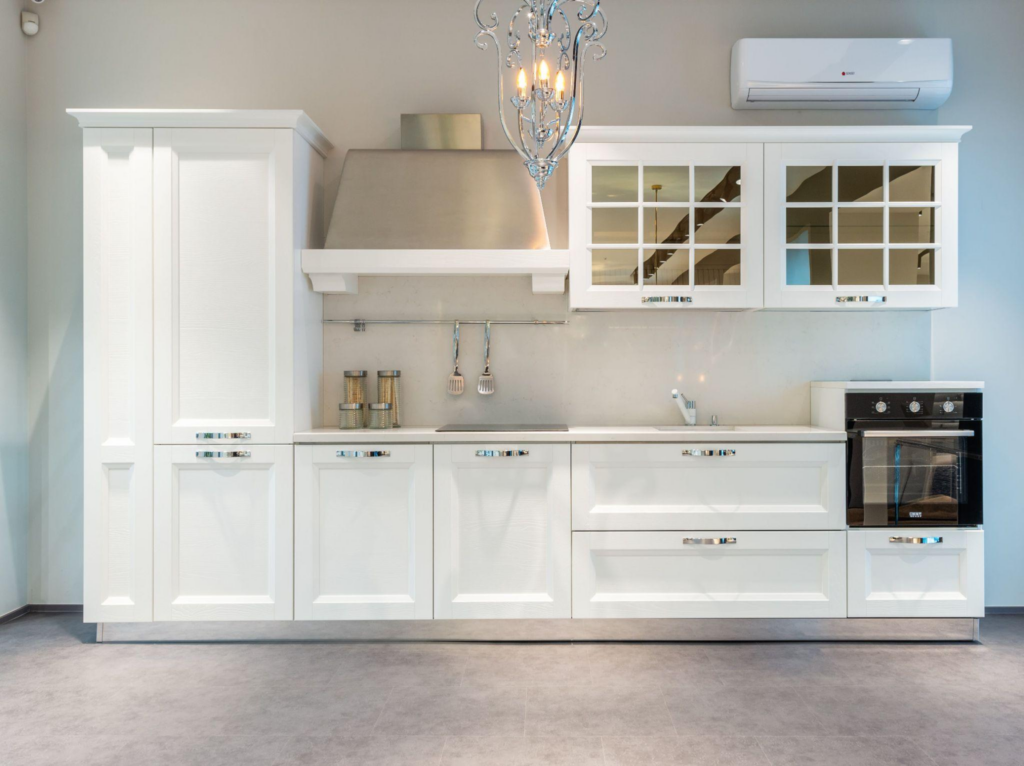
Upper cabinet placement has to work with the room, the cabinet system and every item below or beside the cabinet. A familiar spacing value can help during an early sketch, but it cannot resolve a faucet that opens into a cabinet, a range hood that requires a different mounting height, a refrigerator door that strikes an end panel, or a light profile that reduces the clear space above the worktop.
A reliable layout starts from finished datums and selected equipment. It checks the counter, sink, cooking zone, refrigerator, windows, lighting, outlets, backsplash, services and door movement before production. The final information belongs in coordinated elevations and shop drawings, not only in a general note on the floor plan.
This guide focuses on where an upper cabinet fits within each kitchen zone and how its interfaces are released for fabrication. Use the upper cabinet height guide for detailed height measurement and standard-spacing guidance. Use the kitchen cabinet height guide when the whole elevation must coordinate base, wall and tall units.

Upper Cabinet Placement at a Glance
The table is an early coordination map. It identifies the issue that controls each zone and the evidence needed before the cabinet is released. Any reference dimension must be checked against the actual product, finished room and governing project requirements.
| Kitchen zone | Early planning reference | Main interface risk | Release evidence |
|---|---|---|---|
| Counter and preparation area | An 18 in or about 457 mm counter-to-cabinet space is a common starting point | Tall appliances lids lighting and backsplash reduce usable space | Finished counter level appliance envelope reflected ceiling plan and backsplash detail |
| Sink and window area | No single cabinet-bottom level applies to every sink | Faucet movement window trim moisture and task lighting | Sink and faucet data window schedule elevation and service locations |
| Range or cooktop | Do not use the general counter spacing | Heat combustible surfaces hood capture and duct route | Selected cooking-appliance and ventilation installation instructions plus local requirements |
| Over the range microwave | Cabinet height and depth are model specific | Attachment height hinge clearance ventilation and service access | Current microwave instructions cabinet section and outlet or duct position |
| Refrigerator or tall appliance | Coordinate top cabinet with the exact appliance envelope | Ventilation hinge rise door swing pull-out depth and service space | Manufacturer data door-swing diagram and adjacent filler or panel detail |
| Corner end or doorway | Place from the actual opening and handle envelope | Door collisions inaccessible fillers and wall variation | Plan elevation hardware schedule and site survey |
Use References as Starting Points
A typical dimension is useful only when its start and end points are clear. For example, counter-to-cabinet space means the distance from the finished worktop surface to the underside of the cabinet or its lowest attached component. If a valance or light projects below the cabinet, the usable opening is smaller than the cabinet-box dimension. Record both when they matter.
Record the Controlling Input for Every Zone
A cabinet schedule should not say standard height where a model-specific clearance, window head, faucet arc or user reach controls the answer. Name the source beside the dimension: approved elevation, equipment installation sheet, reflected ceiling plan, finish detail or site survey. This makes a later revision traceable.
Separate Placement From a Standard Height Chart
This Page Owns Zone Specific Interfaces
Upper cabinet placement describes the cabinet's relationship to the activity and equipment around it. The important questions are whether a door can open, whether the work surface remains usable, whether heat and ventilation clearances are satisfied, whether lighting can be installed and serviced, and whether the cabinet can be fixed safely to the wall.
The Measurement Guide Owns the Height System
The dedicated upper cabinet height guide covers measurement from finished floor and counter, common spacing references, cabinet top levels and installation checks. Keeping that role separate prevents two pages from repeating the same standard-height answer. This page instead follows the kitchen by zone and resolves the interfaces that can change the placement.
Establish Finished Datums Before Placement
Confirm Finished Floor and Finished Counter Levels
Begin with the finished floor datum for each cabinet run. Add the base support, cabinet box and complete worktop build-up to establish the finished counter. Do not place an upper cabinet from an unfinished floor and then add screed, tile, timber or another finish without revising the elevation.
If the floor changes material within the kitchen, record the transition and finished levels. An island and a perimeter run may not share the same substrate or tolerance. The wall cabinet still needs to relate to the final work surface used below it.
Survey the Wall and Ceiling at Several Points
Measure wall length, corners, ceiling level, beams, bulkheads, window openings, service points and out-of-plumb conditions at more than one location. The cabinet top, filler and scribe strategy should respond to the lowest ceiling point and the actual wall plane, not only the nominal room dimension.
Use the standard kitchen cabinet size guide to distinguish cabinet-box dimensions from installed position. A cabinet that fits the schedule can still fail on site if fillers, door clearance, wall variation or lifting space were not included.
Place Upper Cabinets Above Counters and Preparation Areas
Protect the Usable Work Zone
The common 18 in or about 457 mm space above a finished counter is a planning reference, not a mandatory answer. Check the user's tasks, worktop depth, cabinet depth, lighting, backsplash, outlets and any appliance stored on the counter. A deeper cabinet or projecting handle can make the workspace feel tighter even when the vertical distance is unchanged.
Confirm that frequently used preparation areas have light and head clearance. If a cabinet is lowered to improve reach, test whether the user can see and work at the rear of the counter and whether small appliances can operate safely. If it is raised, confirm that daily shelves and handles remain practical.
Test Countertop Appliances in Their Operating Position
Record the full operating envelope of coffee machines, mixers, blenders, rice cookers and other equipment. A product may fit when closed but need more height for a hinged lid, removable tank or raised attachment. Show the equipment on the elevation or keep its zone free of a low cabinet.
Coordinate Cabinets Above Sinks and Windows
Check Faucet Movement and the Wet Zone
The sink does not create one universal cabinet height. Check the faucet body, pull-out hose, handle movement, filter tap, soap dispenser and any shelf or dish rack below the cabinet. Allow access for cleaning and future replacement. Avoid an arrangement where the faucet can strike the cabinet, light or valance.
Moisture and steam around the sink also affect materials and detailing. Confirm that cabinet edges, undersides, lighting profiles and nearby finishes suit the specified use and maintenance plan. Product data and the project specification should support the choice rather than a general durability claim.
Resolve the Window Before Centering the Cabinet Run
A window can control the bottom and top alignment of adjacent cabinets. Verify the structural opening, frame, architrave or reveal, sill, operable sash, blind pocket and handle. Decide whether cabinets align with the window head, the broader cabinet run or a separate design datum, then show the result in the elevation.
Coordinate Cabinets Above a Range or Cooktop
Use the Selected Installation Instructions
Cooking clearances are equipment specific. GE Appliances general clearance guidance gives one manufacturer example of 30 in between a cooktop surface and the bottom of an unprotected wood or metal cabinet, while also directing users to the model installation instructions. Treat this as an example, not a universal project value. The selected range or cooktop manual, the selected ventilation product, local requirements and the cabinet material condition must agree.
Coordinate the Hood or Over the Range Microwave
A hood may be wall mounted, built into a cabinet or installed beneath it. Check width, depth, capture area, mounting height, duct route, electrical connection, access and the position of adjacent doors. The Whirlpool range hood dimension guide illustrates why hood width, cooking-surface width and the selected installation height must be reviewed together.
For an over the range microwave, the cabinet is also part of the appliance support and installation zone. GE over the range microwave guidance gives a manufacturer example of 66 in from the floor to the bottom of the attaching cabinet and 30 in from the cooktop to that cabinet, while requiring the specific model instructions for depth and other details. Do not transfer that arrangement to another product without checking its current instructions.
| Cooking-zone item | What to confirm | Evidence before cabinet release |
|---|---|---|
| Range or cooktop | Surface level fuel type side and overhead clearances controls and rear condition | Current installation instructions and local project requirements |
| Under cabinet hood | Mounting height width depth duct route power access and service removal | Hood manual cooking-appliance manual reflected ceiling plan and cabinet section |
| Built in hood insert | Insert cut-out liner ventilation path cabinet material and access panels | Approved hood data custom cabinet detail and electrical or duct coordination |
| Over the range microwave | Attaching-cabinet height and depth hinge clearance outlet ducting and fastener locations | Exact model instructions wall condition and cabinet support detail |
| Adjacent wall cabinets | Door swing handle projection heat exposure filler width and alignment | Elevation hardware schedule and appliance envelopes |
Fit Upper Cabinets Around Refrigerators and Tall Appliances
Allow for Ventilation Service and Door Movement
Use the exact refrigerator or appliance data, including overall case size, required air space, hinge rise, door thickness, handle projection, full door angle, drawer pull-out and connection zone. A cabinet above the appliance may fit the nominal width and still prevent a door from opening far enough to remove a drawer or shelf.
Provide access to water filters, valves, outlets and serviceable components. Avoid fixing a cabinet or panel in a way that traps the appliance. If a top cabinet is deeper than the nearby wall cabinets, show how its underside, side panels and doors align with the appliance and adjacent run.
Use Fillers and Panels to Protect Operation
A side filler or finished panel can separate a door from a wall, tall unit or projecting handle. Its width must come from the selected hinge and appliance movement, not appearance alone. Confirm the visible joint, scribes and installation sequence before setting the cabinet width.
Reserve Space for Lighting Backsplash Outlets and Services
Coordinate the Light Profile and Wiring Route
Under-cabinet lighting changes the real underside level. Show the light, diffuser, channel, valance, driver, cable entry and switching route. Check whether the fitting can be installed and replaced after the cabinets and backsplash are complete. Avoid visible wiring and avoid placing a driver where shelves or heat make service difficult.
Set the Backsplash and Outlet Strategy Together
Tile modules, stone upstands, wall panels and grout joints influence the finished visual datum. Coordinate the cabinet bottom with the approved finish layout where alignment matters. Confirm outlet, switch and data positions against cabinet sides, shelves, lighting and appliance plugs so faceplates are not cut by a cabinet edge or hidden behind equipment.
Plan Reach and Accessibility
Put Daily Storage and Operable Hardware Within Practical Reach
Reach depends on the user's body, approach, counter depth, cabinet depth and shelf position. Store frequently used items where the intended users can reach them safely. Pull-down shelves, drawers and alternative storage zones can be more effective than lowering every wall cabinet. Coordinate handle position and the opening mechanism using the cabinet hinge types guide.
Apply Accessibility Standards Only to the Relevant Scope
Where a U.S. ADA scope applies, the U.S. Access Board ADA Standards describe reach ranges and how an obstruction changes the allowable high reach. For example, an unobstructed forward or side reach generally uses a 15 to 48 in range, while reach over a counter or other obstruction has additional limits. These criteria apply to defined facility and element scopes. They are not a universal residential upper-cabinet formula. Confirm the governing accessibility brief and jurisdiction for the project.
The NKBA Kitchen and Bath Planning Guidelines provide broader professional planning context for clearances, equipment location and accessible design in U.S. and Canadian practice. Use the edition and code context required by the project rather than treating a planning recommendation as the applicable law.
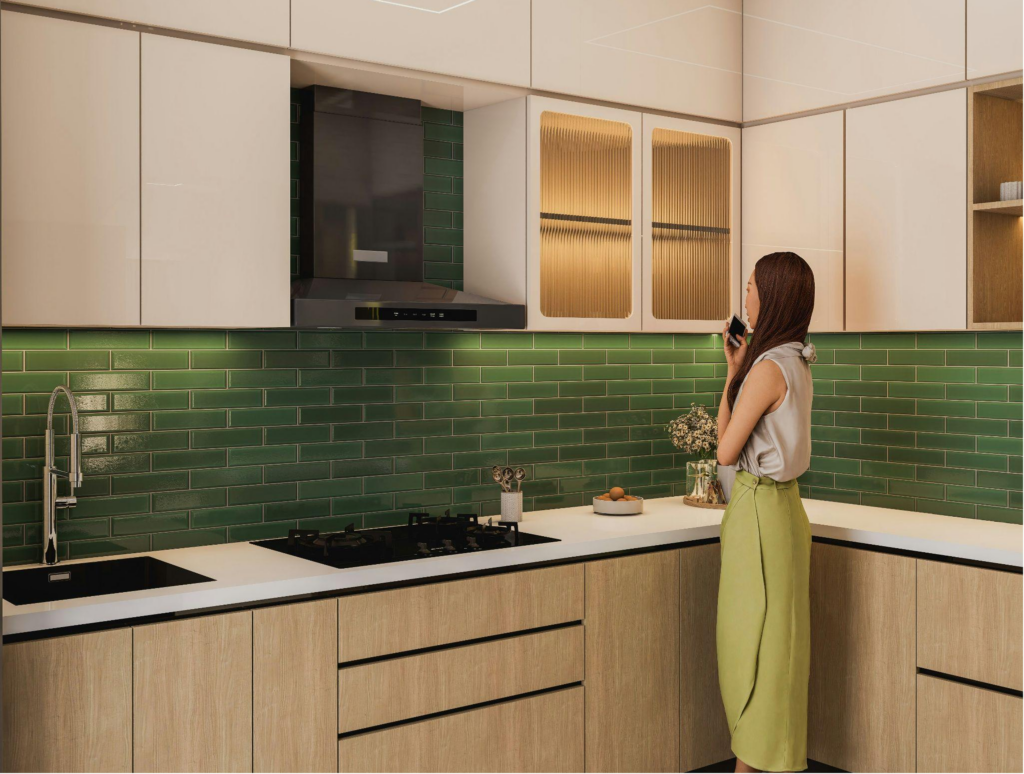
Measure and Set Out Upper Cabinet Placement
- Confirm which surfaces are unfinished and which are finished. Establish a labelled finished-floor datum for every cabinet run.
- Survey wall length, ceiling level, corners, windows, trims, beams, bulkheads and service points at several locations.
- Set the base support, cabinet box and complete worktop build-up to establish the finished counter level.
- Obtain exact sink, faucet, range, cooktop, hood, microwave, refrigerator and countertop-appliance information.
- Mark the proposed cabinet bottom and top, then add lighting, valances, backsplash and outlet positions.
- Draw door, handle, hinge and appliance movement. Check corners, walls, tall units, windows and adjacent doors for collisions.
- Check user reach, frequently used storage and any project-specific accessibility requirements.
- Record open items, revision status and the evidence controlling each critical dimension before production release.
Use a laser or level to establish a consistent line, but keep a dimensioned survey and photographs tied to the plan. A control line without a documented finished datum can still place the cabinet incorrectly.
The kitchen design page shows how room dimensions, appliance locations and cabinet functions come together in the full layout. Use that broader plan to verify that a local cabinet adjustment does not create a problem elsewhere in the kitchen.
Approve Placement in Elevations and Shop Drawings
Show a Complete Vertical Dimension Chain
The elevation should show finished floor, finished counter, cabinet bottom, cabinet top, ceiling or soffit, worktop build-up and the position of any light or valance. Sections should show cabinet depth, wall condition, fixing zone, backsplash build-up and equipment interfaces. Use the same datums across plans, elevations, sections and schedules.
Control Open Items and Revisions
Mark missing appliance models, pending finishes, unconfirmed service points and survey assumptions as open items. Do not hide them inside a general note. When an input changes, revise every affected view and identify the current issue for approval. Fabrication should use one clearly released drawing set.
| Release item | Drawing or record should show | Why it matters |
|---|---|---|
| Datums and levels | Finished floor counter cabinet bottom cabinet top and ceiling or soffit | Prevents mixed start points and cumulative vertical errors |
| Equipment | Exact model envelope clearance ventilation connection and door movement | Protects fit safe use service and replacement |
| Openings and finishes | Window trim backsplash build-up outlets lights and visible joints | Coordinates the cabinet with completed architectural work |
| Doors and hardware | Swing hinge handle lift system filler and adjacent movement | Prevents collisions and inaccessible storage |
| Structure and fixing | Wall substrate fixing zone backing fastener basis and access | Supports safe installation and site verification |
| Approval control | Revision comments open items approver and release status | Prevents production from an obsolete or incomplete record |
The procurement and coordination services page outlines how scope review, product selection, drawings, samples, production follow-up, inspection and packing can be organized. The release record should state who supplies each input and who approves the final cabinet information.
Coordinate Installation Details
Verify the Wall Substrate and Fixing Zone
Cabinet placement is not complete until the installer knows where and how the unit can be fixed. Confirm the wall construction, backing, services and allowable fastener zones. The cabinet supplier and responsible project professional should resolve fixing requirements for the actual cabinet load and substrate. Do not rely on a generic fastener claim.
Plan Fillers Scribes Corners and End Conditions
Walls and ceilings vary. Fillers and scribes absorb tolerances and protect door movement, but they also change visible alignment and storage width. At corners, show the opening sequence and handle envelopes. At exposed ends, confirm the finished panel, overhang and relationship to worktop, backsplash and appliances.

Common Upper Cabinet Placement Mistakes
- Measuring from an unfinished floor and failing to revise the cabinet level after the floor or worktop build-up changes.
- Repeating one 18 in counter spacing across sinks, ranges, hoods, microwaves and tall appliances without checking each interface.
- Using a general online dimension instead of the selected appliance and ventilation installation instructions.
- Ignoring faucet movement, window trim, blind pockets, lighting profiles, outlets and backsplash modules.
- Checking an appliance only in its closed position and missing lid, door, drawer, hinge or service movement.
- Lowering cabinets for reach without testing visibility and usable work space, or raising them without checking daily access.
- Omitting fillers, scribes and wall variation from the cabinet schedule and then reducing the opening on site.
- Releasing production while appliance models, service positions or drawing revisions remain unresolved.
Upper Cabinet Placement FAQ
How High Should an Upper Cabinet Be Above a Counter
An 18 in or about 457 mm counter-to-cabinet space is a common planning reference, but the final distance depends on the finished counter, cabinet depth, appliances, lighting, backsplash, outlets, tasks and user reach. Use the upper cabinet height guide for the complete measurement method.
Can a Cabinet Be Installed Above a Sink
Yes, when the layout allows practical use and maintenance. Check faucet height and movement, window or mirror conditions, lighting, moisture exposure, shelf access and the visual alignment of adjacent cabinets. There is no single sink-specific cabinet height for every project.
How Should Cabinets Be Placed Above a Range
Use the selected range or cooktop instructions, the selected hood or microwave instructions and the governing local requirements. Confirm clearances, cabinet material, hood capture, ducting, power and access together. Do not substitute the general counter spacing.
Should Upper Cabinets Align Across Every Kitchen Zone
Not always. A continuous bottom or top line can create a calm elevation, but a range hood, window, sink, appliance or accessibility requirement may need a controlled change. Show the transition intentionally and check door, trim and finish relationships.
What Must Be Approved Before Upper Cabinets Are Ordered
Approve the finished datums, site survey, cabinet sizes, appliance models, sink and faucet, hood or microwave, window details, lighting, backsplash, outlets, door movement, fillers, fixing basis and current drawing revision. Identify any remaining open item before fabrication starts.
Prepare the Upper Cabinet Placement Brief
A useful brief combines room information, equipment data and approval responsibility. Send the dimensioned plan and elevations, finished floor and counter levels, ceiling survey, cabinet schedule, appliance installation sheets, sink and faucet data, window and finish details, lighting and electrical layouts, hardware selections, accessibility requirements and required delivery sequence.
To request a coordinated review, send your drawings and appliance list. George House Material can review the available scope, identify missing interfaces and organize the cabinet information needed for quotation, shop drawings, production follow-up, inspection, packing and shipment. Final technical approval remains with the responsible project parties and the applicable product instructions and requirements.