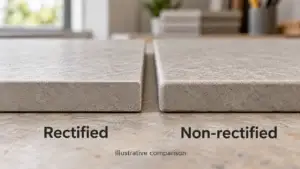
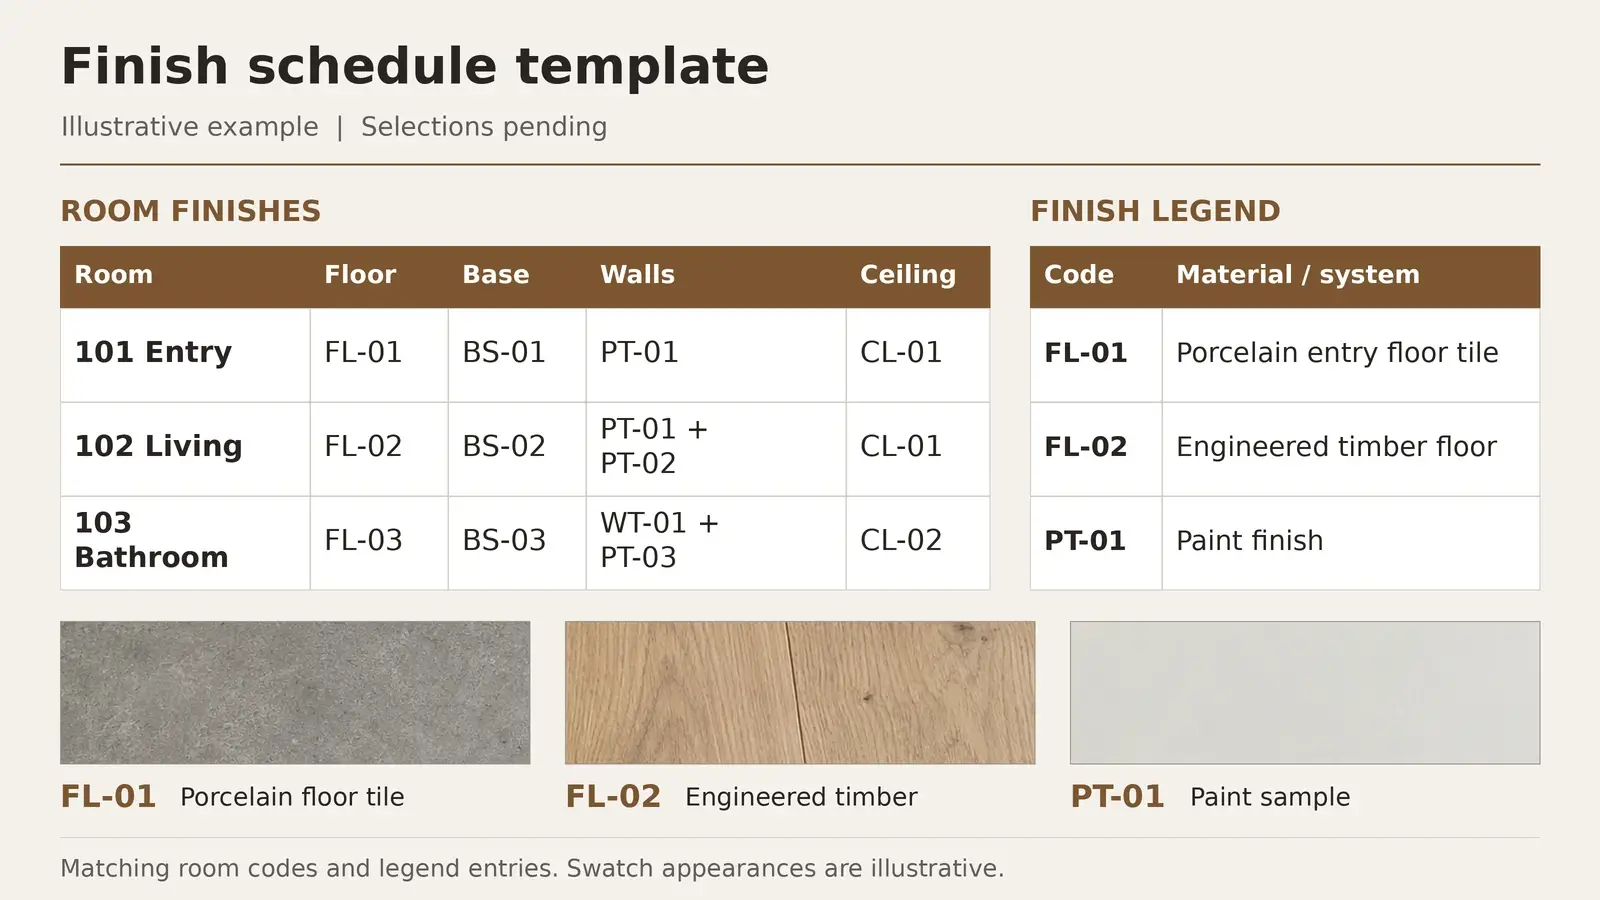
A finish schedule template records which finish belongs on each room surface and connects that location to a defined material code. A useful schedule covers floors, base or skirting, walls and ceilings, then links each code to product details, samples and drawing references. This gives designers, contractors and suppliers a common reference when reviewing selections and preparing a quotation.
Use the Excel template below to build a room finish schedule, maintain a separate finish legend and record reviews and revisions. The filled examples in this guide show how the parts work together. They are illustrative selections, with product details and approvals still to be confirmed.
Download the Finish Schedule Template
Download the finish schedule template in Excel
The workbook contains instructions, blank room and material records, an approval register, a revision log and an example sheet. Start with the blank sheets and use the example only as a guide. You can work in Excel or import the workbook into Google Sheets; check the imported formatting and dropdowns before using it for a project.
Keep the editable master for updates and issue a dated PDF when the team needs a fixed review copy. Agree who maintains the master and who can approve changes before circulating it.
What Is a Finish Schedule
A finish schedule is a room or location based record of the materials and surface treatments specified for a building. A code such as FL-01 identifies a finish in the room table; the finish legend explains the material, product, color, dimensions and other details behind that code.
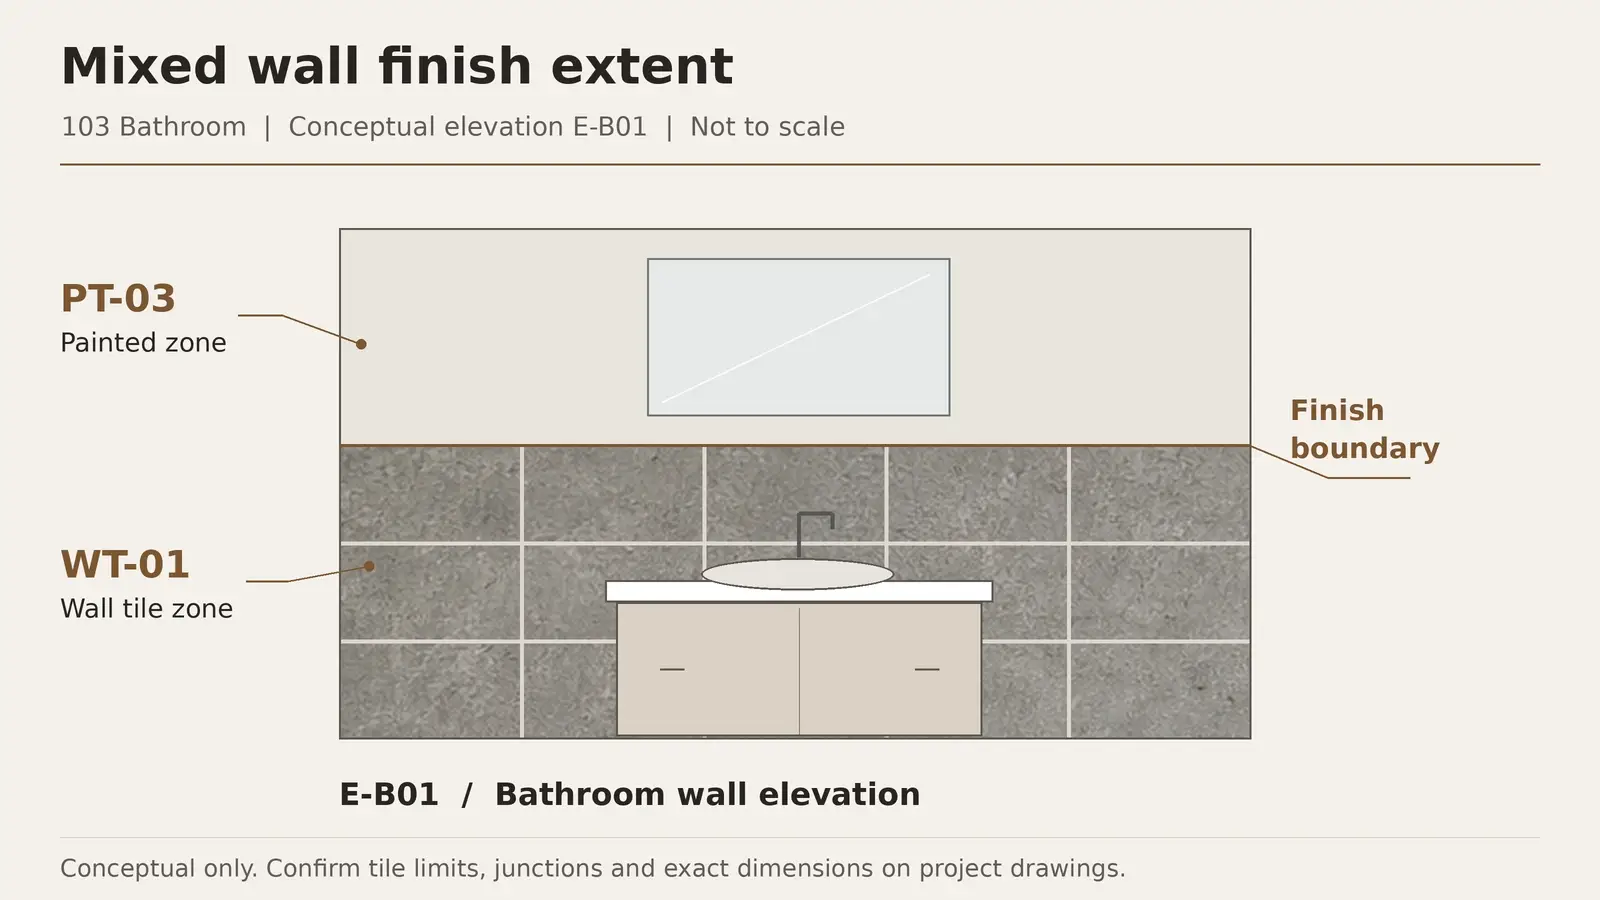
For example, a bathroom may use one tile for the floor, another on the shower walls and painted surfaces elsewhere. The schedule assigns the finishes, while plans and elevations show their boundaries, heights and transitions. Read the schedule with those drawings and the relevant specifications.
Finish Schedule and Other Project Schedules
The document name alone does not define its scope. Confirm whether your project includes built-in cabinetry, countertop finishes and door finishes in the room schedule or records them separately.
| Document | Main purpose | Related information |
|---|---|---|
| Room finish schedule | Assign finishes to room surfaces | Room numbers, finish codes and location references |
| Finish legend | Define each finish code | Material, product, color, size and sample reference |
| FF&E schedule | Identify furniture, fixtures and equipment | Item codes, dimensions, quantities and technical details |
| BOQ or material takeoff | Measure and describe the required work | Quantities, units and the agreed measurement basis |
| Procurement schedule | Plan decisions, orders and deliveries | Required dates, lead times and release responsibilities |
Cross-reference a door, cabinet or fixture schedule when it contains the detailed specification. Duplicating the same product description across several documents creates more places for a later change to be missed.
Finish Schedule Example for Three Rooms
The following room finish schedule example uses short codes to keep the room table readable. The wall entries are simplified for the article; use separate wall-face columns or an elevation reference where a room has more than one treatment.
| Room | Floor | Base | Walls | Ceiling | Location note |
|---|---|---|---|---|---|
| 101 Entry | FL-01 | BS-01 | PT-01 | CL-01 | Check floor transition on finish plan |
| 102 Living | FL-02 | BS-02 | PT-01 and PT-02 | CL-01 | PT-02 on north feature wall only |
| 103 Bathroom | FL-03 | BS-03 | WT-01 and PT-03 | CL-02 | Show tile extent on bathroom elevations |
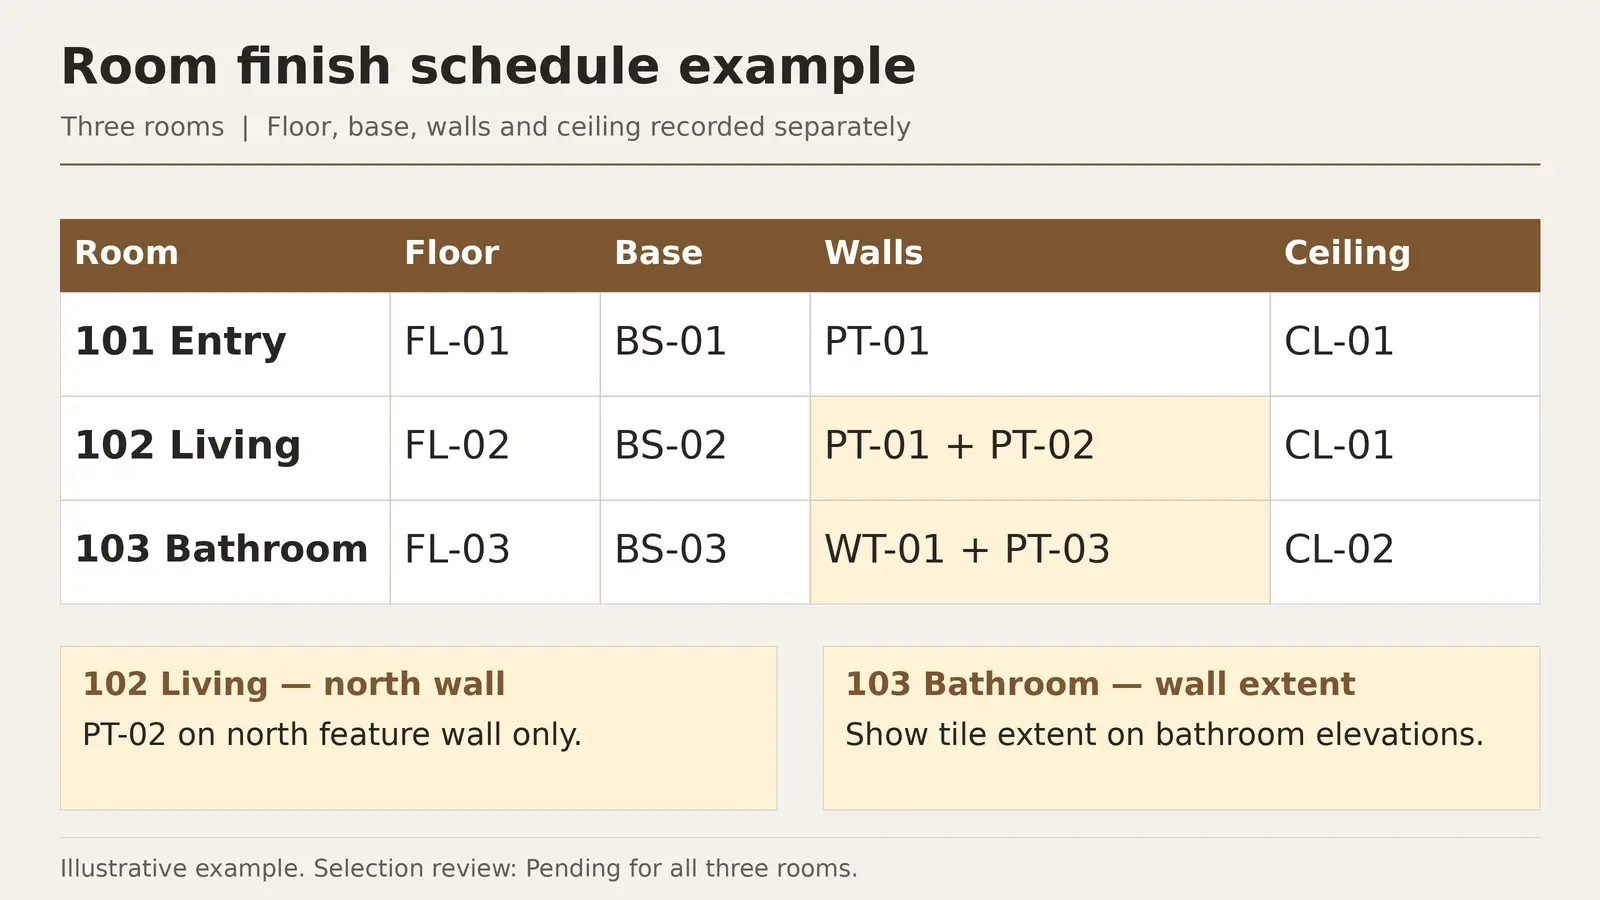
These codes and room numbers are examples, not a specification for a particular project. No product, installation system or approval is established by this table.
Define the Codes in a Separate Finish Legend
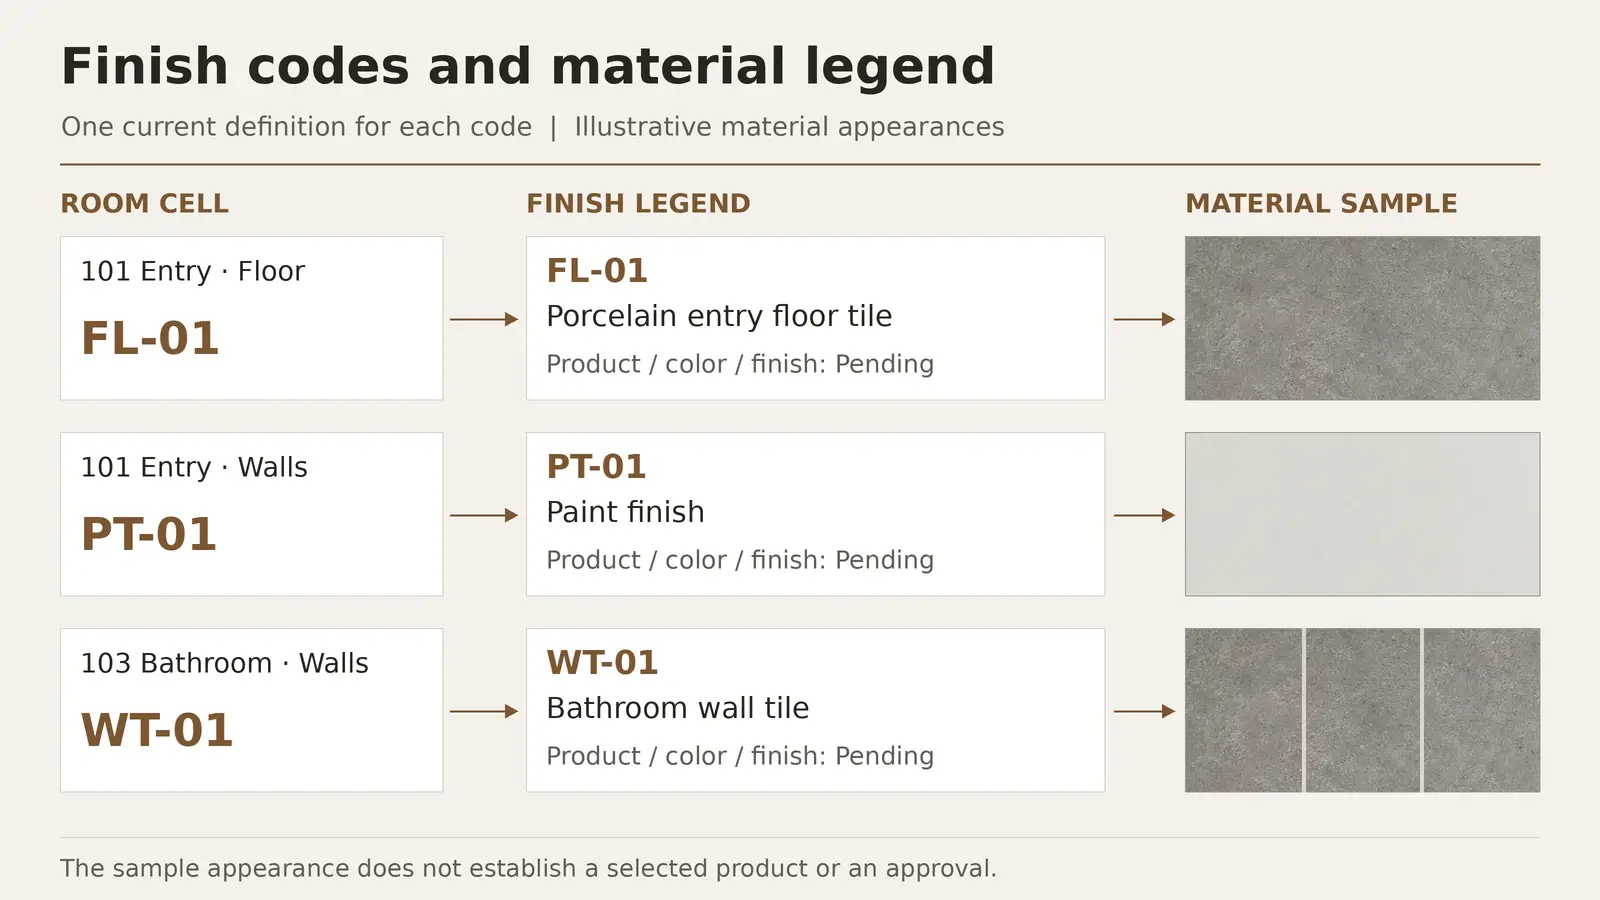
Record each finish once in the legend and reuse its code in the room table. This makes it easier to update a product detail without editing every room that uses it.
| Code | Illustrative finish | Details to confirm before issue |
|---|---|---|
| FL-01 | Porcelain entry floor tile | Product, color, size, thickness, surface, joint and trim |
| FL-02 | Engineered timber living room floor | Species or veneer, construction, thickness, surface and laying direction |
| FL-03 | Bathroom floor tile | Product and required wet-area performance for the intended location |
| BS-01 to BS-03 | Room-specific base or skirting | Material, profile, height, finish and corner details |
| PT-01 to PT-03 | Paint finishes for different locations | Product system, substrate, color code and sheen |
| WT-01 | Bathroom wall tile | Product, size, joint, grout and extent shown on elevations |
| CL-01 and CL-02 | Ceiling finish references | Ceiling construction reference, surface finish and applicable notes |
CL-01 may refer to a painted ceiling assembly while PT-01 defines a paint product. Document that relationship rather than assigning two unexplained codes to the same surface. Add manufacturer and model fields when a specific product has been selected.
What to Include in a Finish Schedule Template
Project Information and Room References
Put the project name, document identifier, revision, issue date and issue purpose at the top of the schedule. Each room row should identify the level, room number and room name used on the current drawings. For repeated room types, also record the type and any exceptions.
This is useful for repeated hotel room types, where a standard finish package may apply to many rooms but an accessible room, suite or public area needs different details. A room type should help organize selections without hiding those differences.
For renovations, state whether a finish is new, existing to remain or subject to alteration. Existing conditions still need a clear scope reference so they are not unintentionally included in a replacement order.
Floors and Base or Skirting
Give the floor and base separate fields. For flooring, identify the material code and refer to the pattern, laying direction and transition details where applicable. For base or skirting, record the profile, height and finish in the legend or related detail.
When completing tile selection and specification, distinguish the field tile from skirting, edge trims and other pieces. Similar appearance does not establish that these are the same product or that all accessories are included in a quotation.
Walls and Finish Extent
Use wall-face fields, wall labels or elevation references to locate different treatments. A single entry reading “tile and paint” does not explain where each material starts or stops. Identify the extent of a splashback, shower wall, feature panel or protective wall finish on a drawing.
Where a wall has two finishes at different heights, keep the finish codes in the schedule and reference the elevation that shows the boundary. Do the same for returns, recesses and surfaces behind fixed cabinetry when those areas are included in the work.
Ceilings and Built In Finishes
Keep ceiling material, surface finish and height separate when the project requires them. Refer to the reflected ceiling plan for layout and service coordination, and use details for bulkheads or changes in level.
Built-in finishes may include cabinet doors, exposed panels, worktops and edge treatments. For cabinetry finishes and hardware, cross-reference the cabinet schedule and shop drawings so board construction, visible finishes and hardware are not reduced to one broad label.
For marble and stone surfaces, identify the stone reference, surface finish and relevant slab or sample record. Use drawings to define panel layout, edges, joints and interfaces. A sample name alone does not define a fabricated countertop.
Product Details and Supporting Documents
The finish legend should include the manufacturer or supplier, product or model, color reference, size, thickness and sheen or texture as applicable. Add grout, trim, substrate or installation-system references where they affect the specified assembly.
Keep a source for the product information, such as a dated data sheet, sample reference or specification section. Label information that still needs confirmation. A marketing photo can help communicate appearance, but it does not establish dimensions, performance or acceptance criteria.
Review Status and Revision Information
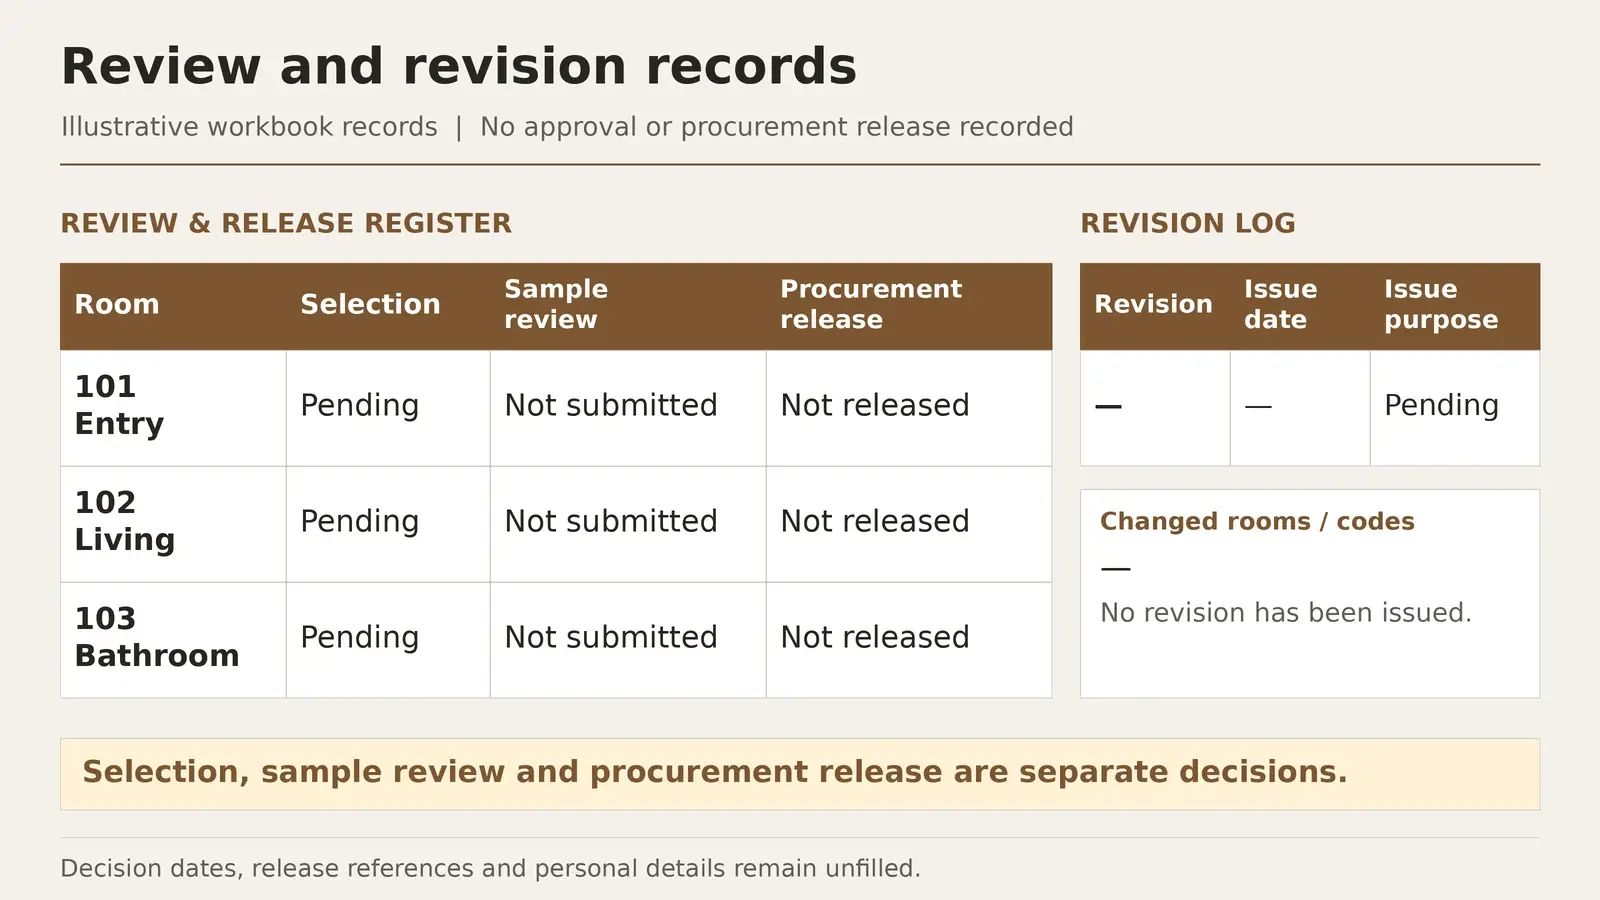
Record the sample or submittal reference, reviewer, review action, date and any limitations. Keep selection status separate from sample review and procurement release. A client may select a color before dimensions or the complete product assembly have been reviewed.
Record who authorizes ordering under the project process and which approved revision applies. The schedule can track those decisions; filling in a row does not itself authorize a purchase.
How to Complete the Template Step by Step
1 Confirm the Current Drawings and Scope
Collect the room plans, finish plans, elevations, specifications and related schedules. Check their issue dates and agree which documents govern the current review. Identify excluded areas and unresolved decisions before populating the room table.
2 Assign Finishes by Room and Surface
Work through each room in the same order: floor, base, walls, ceiling and any included built-in finishes. Give different wall treatments a location reference. Check that every finish code used on a drawing has a matching legend entry.
Define your placeholders. “TBC” means a decision remains open; “N/A” means the field does not apply; “none” means the team has expressly specified no finish of that type. Use “existing to remain” only where that scope has been confirmed. A blank cell leaves its meaning uncertain.
3 Check Product Data and Physical Samples
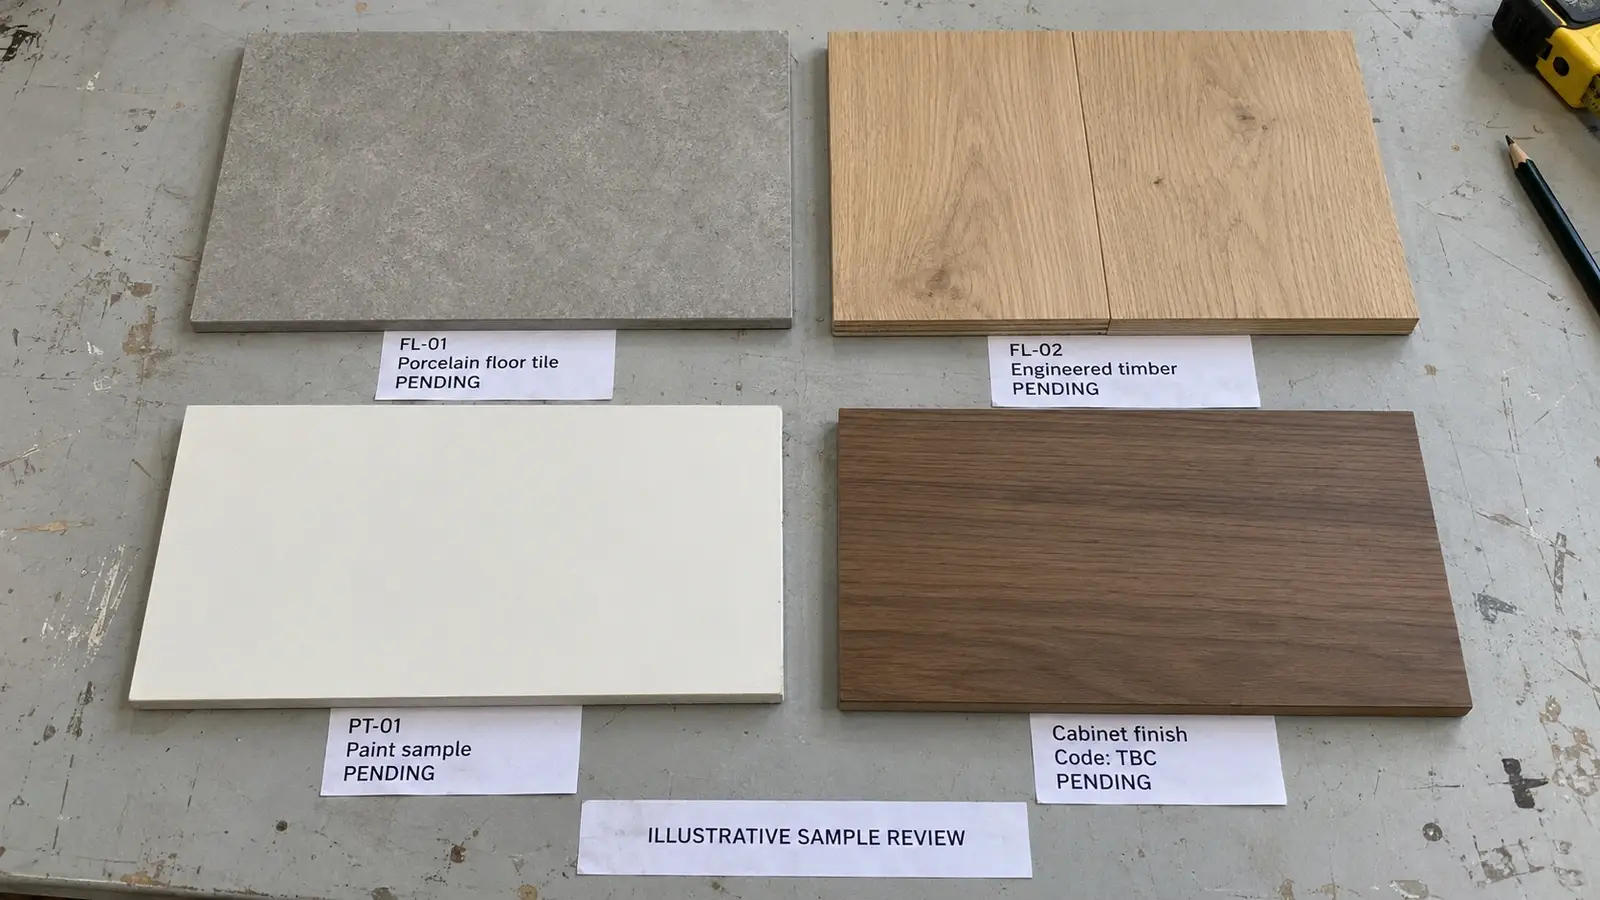
Verify the product, color and finish against the current supplier information. Check physical samples together where adjacent finishes need to relate. A screen image can alter perceived color and cannot show the full texture or natural variation of a material.
When you coordinate furniture with wall and floor finishes, label each sample with its finish code and room reference. Record the sample that was reviewed and any limits on the acceptance, rather than relying on a photograph of an unlabelled material board.
4 Review Interfaces and Installation References
Check floor transitions, base returns, wall finish boundaries, cabinet interfaces and ceiling edges. Refer questions about substrates, fixing, moisture exposure or compatibility to the responsible designer, installer and manufacturer as appropriate.
Keep detailed installation requirements in the relevant drawings, specifications and product documents. The schedule should point to them clearly so a short finish description is not mistaken for a complete installation instruction.
5 Record Reviews and Issue the Revision
Circulate the schedule with the drawings and samples needed for the decision. Record the reviewer and action for each item, then update the affected documents together. Issue a dated revision and identify superseded copies.
For supplier-facing packages, drawing and sample coordination helps connect finish codes to room references, comments and the current product information. Confirm the final release with the responsible project party before production begins.
Using the Finish Schedule for a BOQ or RFQ
A finish schedule helps define what is required and where it belongs. A BOQ or takeoff supplies the measured quantities and units for pricing. Use matching finish codes so a supplier can connect each quoted line to the room schedule and finish legend.
If you add quantities to the workbook, identify whether they represent net installed area, gross measured area or an ordering quantity. Confirm deductions, cutting allowances, spare stock and packaging increments for the particular product and measurement basis. There is no single allowance that suits every material or layout.
Provide the following with a finish-related request for quotation:
- The current room schedule and finish legend.
- Plans, elevations and details showing finish locations and interfaces.
- Quantities and units with the measurement basis identified.
- Product data, sample references and required performance information.
- Current review status, proposed alternatives and unresolved items.
- Delivery destination, required dates and the supplier’s included scope.
Ask suppliers to identify exceptions and proposed substitutions against the same codes. Record an alternative separately until the responsible reviewer accepts it and the related documents are updated.
Common Finish Schedule Mistakes
| Mistake | Why it causes a problem | Better entry or action |
|---|---|---|
| “White paint” with no product or sheen | Different paint systems can share a color description | Record the product system, color code, sheen and substrate reference |
| One wall cell for a mixed finish room | The installer cannot locate the treatment boundaries | Add wall-face fields or an elevation reference |
| Base or trim omitted | Supporting pieces may be missing from pricing | Schedule their codes and profiles separately |
| Blank fields treated as final decisions | An omission becomes difficult to distinguish from an exclusion | Use defined placeholders and follow-up responsibilities |
| Sample approved but ordering conditions unresolved | Color review does not settle dimensions or full order scope | Track review and procurement release separately |
| New product entered under an old code without a revision | Suppliers may use different definitions of the same code | Log the change and issue coordinated documents |
Checklist Before Issuing the Schedule
- Room numbers and names match the current drawings.
- Floor, base, wall and ceiling fields have been checked for each room.
- Mixed wall finishes have clear extents or drawing references.
- Every code has one current definition in the finish legend.
- Product details and supporting documents have been checked.
- Open selections and existing conditions are clearly marked.
- Sample review actions include dates, references and limitations.
- Quantities and units are traceable to the agreed measurement basis.
- Procurement release responsibilities are identified.
- The revision, issue purpose and superseded version are clear.
Get Help Coordinating Your Finish Package
For a project covering tiles, stone, cabinetry and other building materials, send your finish schedule and project drawings with the available quantities, finish references and delivery requirements. George House Material can review the available scope and identify the information needed for a coordinated quotation.
Keep outstanding design choices and approval responsibilities visible in the package. A clear list of open items gives the team a better basis for the next review than a schedule that makes every selection look final.
Frequently Asked Questions
What Is a Room Finish Schedule Template Used For
It organizes the finishes assigned to each room surface and links them to a material legend. Teams use it with drawings and specifications to review selections, prepare quotations and communicate the current finish requirements.
Can I Use the Template in Excel or Google Sheets
Yes. Use the Excel workbook directly or import it into Google Sheets. Check formatting, filters and dropdowns after import, and keep one controlled master rather than editing several independent copies.
What Is the Difference Between a Finish Schedule and a Finish Legend
The room schedule identifies where a finish is used. The legend defines the product and other information behind its code. Linking the two lets one material definition serve several room entries.
Should a Finish Schedule Include Quantities and Prices
They are optional. If included, make the units, measurement basis and estimate status clear. A room finish assignment does not replace a detailed BOQ, and pricing should identify the supplier, scope and quotation revision.
Who Prepares and Approves a Finish Schedule
The project agreement determines responsibility. A designer or architect may prepare the schedule, while the client, consultant and contractor review different aspects. Identify a master-file owner and the parties responsible for selection, technical review and procurement release.
How Do I Record a Change After Approval
Keep the previous selection traceable, record the proposed change and identify the affected rooms and drawings. Obtain the required review, check any order or installation implications, and issue a coordinated revision before the changed information is used.