
A pocket door rough opening is not determined by door width alone. The selected pocket-frame system, door height and thickness, track, wall construction, finished-floor datum and hardware capacity must control the final opening.
As one manufacturer-specific example, the Johnson Hardware 1500PF instructions for an 80-inch door state a rough-opening width of twice the door width plus 1 inch (25 mm) and a minimum height of 2.14 m, about 84¼ inches. Those dimensions apply to that frame series and must not be treated as a universal pocket-door formula.
Pocket Door Rough Opening: Quick Answer
| Question | Planning answer | Final control |
|---|---|---|
| How wide is the rough opening? | Often close to twice the door width plus a system allowance | Selected frame-kit instructions |
| How high is the rough opening? | Door height plus the frame, track and floor allowance | Manufacturer drawing and stated floor datum |
| What wall thickness is required? | It depends on the frame series and finish build-up | Approved wall section and kit specification |
| Can one table cover every pocket door? | No | Exact door, frame, hardware and project condition |
Use an early calculation only to reserve space. Do not release framing, drywall, production or ordering until the exact kit, door panel and measurement reference have been confirmed.
What the Rough Opening Includes
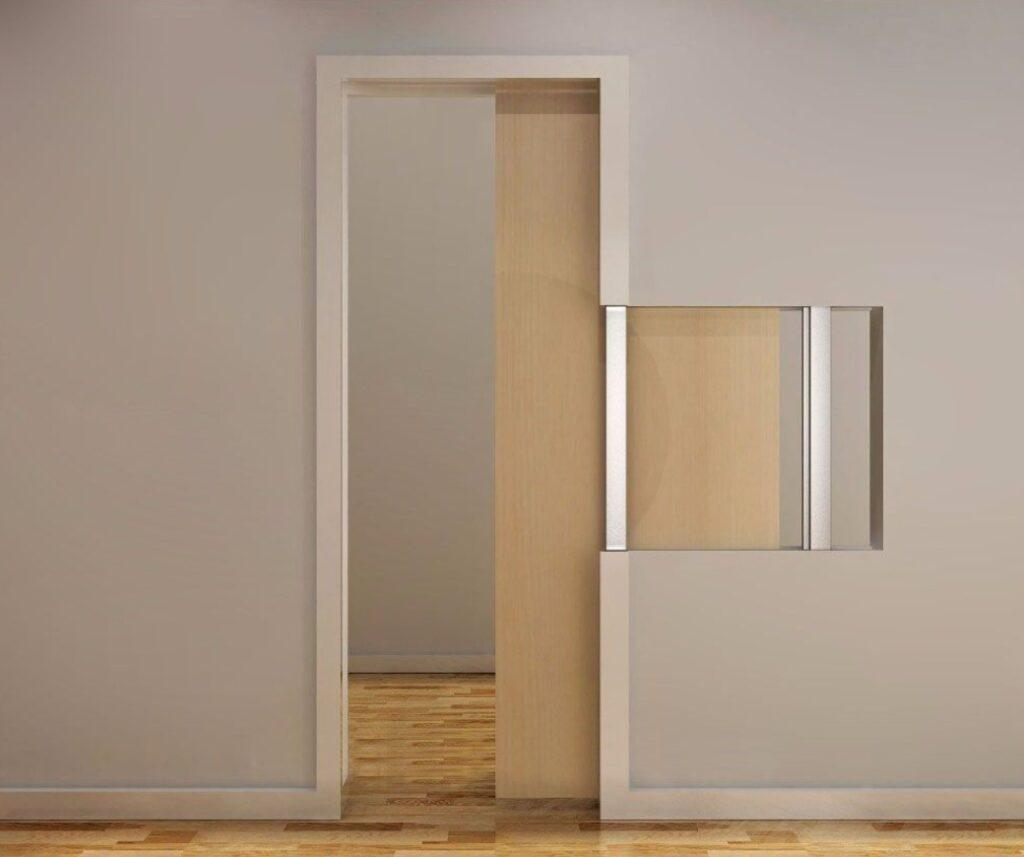
The rough opening is the structural space prepared for the complete pocket-door frame. It includes the passage side, the pocket that receives the open door and the height needed for the frame header and track. It is different from the nominal door panel, the clear passage and the finished opening between jambs.
- Door panel: the moving leaf, described by width, height, thickness and weight.
- Clear passage: the usable opening after the door, jamb and hardware are installed.
- Pocket: the wall cavity that receives the open panel.
- Structural rough opening: the framed space prepared for the selected pocket-frame kit.
- Finished opening: the visible opening after jambs, trim and wall finishes are complete.
- Frame header and track: the manufacturer-supplied assembly that carries and guides the door; it is not a substitute for project-specific structural design.
The broader pocket-door planning guide covers room use and system selection. Keep that general intent separate from this page’s rough-opening and framing intent.
Manufacturer Example for Common Door Widths
The table below applies the Johnson 1500PF instruction of door width × 2 + 1 inch. It is an example for that specific frame series, not a universal schedule. The same instructions are written for 80-inch doors, identify the frame as suitable for 2 × 4 stud walls and list a minimum rough-opening height of 2.14 m.
| Nominal door width | 1500PF example rough-opening width | Height note for the 80-inch instructions |
|---|---|---|
| 24 in | 49 in | Minimum 2.14 m, about 84¼ in |
| 28 in | 57 in | Verify the stated floor reference |
| 30 in | 61 in | Do not substitute a generic 62-inch rule |
| 32 in | 65 in | Do not substitute a generic 64-inch rule |
| 36 in | 73 in | Confirm the exact frame set and door |
See the official Johnson Hardware 1500PF installation instructions before using these figures. A different frame series, taller panel, thicker or heavier door, soft-close mechanism, finish build-up or wall type can change the required opening.
Single, Double and Converging Pocket Doors
A single pocket door slides into one wall cavity. A pair may use two pockets at opposite sides, while converging doors meet at the center. These configurations do not share one rough-opening formula.
- Identify the number of panels and the direction each panel travels.
- Confirm whether the panels meet, telescope or move independently.
- Use the matching frame and connector kit rather than combining unrelated parts.
- Check the total track length, center meeting condition, floor guides and access for future adjustment.
- Coordinate clear passage and panel overlap at the jambs.
Johnson’s 1500PF instructions state that converging doors require two frames and the specified converging-door kit. The selected manufacturer’s drawing should show the complete width and center detail.
How to Measure a Pocket Door Rough Opening
Measure the structural opening before wall finishes conceal it. Record actual dimensions and deviations; do not rely only on the nominal door mark.
1. Confirm the Floor Datum
State whether height is measured from the subfloor, finished floor or another approved level. Include screed, tile, stone, timber, underlay, carpet and transitions that are not yet installed. In the 1500PF example, Johnson gives different header-setting measurements from finished floor and subfloor, demonstrating why the datum must be recorded.
2. Measure Width at the Head, Center and Floor
Measure between the rough studs or structural sides at three locations. Record every reading and the smallest usable dimension. A narrow point, bowed stud or projecting fastener can obstruct the frame even when the average width looks acceptable.
3. Measure Height at the Left, Center and Right
Measure from the agreed datum to the underside of the rough header. Record all three readings and compare them with the selected frame drawing. Do not add an assumed universal allowance to the nominal door height.
4. Check Plumb, Level, Square and Wall Build-Up
Check both sides for plumb, the header for level and the diagonals for square. Record the structural wall thickness plus boards, plaster, tile, panels and other finishes. The related interior door rough-opening guide explains the same measurement controls for other door systems.
Coordinate the Wall, Header and Pocket Zone
Confirm the Structural Condition
Identify whether the wall is load-bearing and follow the structural drawings for the rough header, supporting studs, anchors and load path. Do not size a structural header from a pocket-door article or assume the supplied track assembly performs the same function.
Keep the Pocket Zone Clear
Coordinate plumbing, electrical boxes, switches, outlets, data points, ducts, blocking, grab bars, cabinets, wall panels and trim before framing closes. Services or long fasteners projecting into the cavity can obstruct or damage the moving door.
Match the Frame to the Complete Wall
Select a frame intended for the stud or masonry condition and the final wall thickness. The label “2 × 4 frame” describes a product configuration, not every completed wall. Confirm board thickness, tile or panel returns, jamb details and the fastener length permitted by the frame manufacturer.
Check Door Panel and Hardware Limits
The frame and hardware must suit the panel width, height, thickness and weight. Confirm the hanger capacity, track length, soft-close compatibility, door preparation, floor guide, bumper, pulls and privacy hardware. A heavier glass, solid-core or oversized panel may require another system even when the nominal width fits.
Review the related pocket-door hardware guide for component selection. Keep the hardware schedule tied to the approved door mark so that the frame kit, panel and accessories arrive as one coordinated set.
Add Pocket Doors to the Schedule and RFQ
For villas, apartments, hotels and commercial projects, record each pocket door in the door schedule and RFQ rather than ordering from a room name alone. Include:
- door mark, location, quantity and drawing revision;
- single, paired, converging or telescoping configuration;
- door-panel width, height, thickness, material and weight;
- required clear passage and any accessibility requirement;
- frame series, track, hanger capacity and accessory kit;
- structural rough-opening width and height with the stated datum;
- stud or masonry wall type and complete finish build-up;
- finished-floor materials, levels, undercut and transitions;
- hardware set, pulls, lock, soft close, guides and stops;
- fire, acoustic, security or other performance requirement where applicable;
- shop-drawing, sample, site-verification and approval responsibility.
Installation and Inspection Sequence
- Confirm the approved frame kit, door panel and latest opening schedule.
- Verify the rough opening, floor datum, wall condition and service clearance.
- Check the rough header and sides for level, plumb and square.
- Install the frame header, track, split studs and floor plates exactly as instructed.
- Use the specified fastener type, location and length; protect the pocket from projecting screws.
- Keep the track and rollers free from construction debris before hanging the door.
- Hang and adjust the panel, then check travel, clearance, guides, stops and meeting alignment.
- Complete jambs and removable access details without blocking future adjustment.
- Operate the door before closing the wall and again after finishes are complete.
- Record the inspection result against the door mark and approved revision.
Follow the manufacturer’s sequence where it differs. Product-specific clearances and fasteners take priority over a generic checklist.
Common Pocket Door Rough-Opening Mistakes
| Mistake | Project risk | Control |
|---|---|---|
| Using one formula for every system | The frame or panel does not fit | Use the exact frame-kit instructions |
| Confusing door width with rough-opening width | The pocket and passage are not reserved | Record panel, clear passage and rough opening separately |
| Ignoring the floor datum | Incorrect undercut or header position | State subfloor or finished-floor reference |
| Assuming one wall thickness | Jambs and finishes do not align | Coordinate the complete wall section |
| Allowing services inside the pocket | The moving panel can be obstructed or damaged | Clear the pocket zone before wall closure |
| Using overlong fasteners | Screws can project into the cavity | Follow the frame manufacturer’s fastener limits |
| Skipping pre-close inspection | Hidden alignment and hardware defects remain | Test operation before and after finishes |
Frequently Asked Questions
What Is the Rough Opening for a 30-Inch Pocket Door?
For the Johnson 1500PF example, the width formula produces 61 inches for a 30-inch door. Another manufacturer may require a different dimension, so verify the selected frame schedule.
What Is the Rough Opening for a 32-Inch Pocket Door?
For the same 1500PF example, the formula produces 65 inches. Do not assume that every 32-inch pocket door uses a 64-inch opening.
How High Should a Pocket Door Rough Opening Be?
Use the exact frame-kit drawing and its stated floor datum. Johnson’s 1500PF instructions for an 80-inch door list a minimum rough-opening height of 2.14 m, about 84¼ inches, but taller doors and other systems require their own dimensions.
Can Plumbing or Electrical Services Run Through the Pocket?
Treat the door travel and frame zone as a protected cavity. Coordinate services outside that zone unless an approved system detail specifically accommodates them.
Final Pocket Door Coordination
Protect the opening by selecting the frame system first, recording its exact rough-opening dimensions and floor datum, coordinating the wall and services, and checking the completed frame before finishes conceal it. Do not replace manufacturer information with a universal 62-inch, 64-inch or 84-inch rule.
Review available project door and window systems, then send the door schedule, wall details, drawings, quantities and delivery requirements through the project enquiry page for coordinated quotation and review.




