
Interior Finish Guide
Wall paneling cannot add floor area, but line direction, panel depth, color, joint spacing and placement can change how a compact room is perceived. The best result is usually a controlled feature, not a different pattern on every wall.
How Paneling Can Change Spatial Perception
Emphasize height
Vertical slats, battens or narrow rectangular panels guide the eye upward. Continue the rhythm cleanly to the ceiling and avoid a heavy top trim when the goal is a taller appearance.
Emphasize width
Horizontal boards or wider rectangular modules can make a narrow wall feel broader. Use this approach selectively because too many strong horizontal breaks may also lower the perceived ceiling.
Manage light
Light colors and low-sheen finishes can reduce contrast and distribute reflected light more evenly. Deep grooves create stronger shadows; shallow relief generally reads as calmer in a small room.
Add depth without bulk
Thin battens, routed panels or half-height molding add dimension while preserving usable space. Check the total build-up at outlets, switches, skirting, door casings and cabinetry.
Create a focal zone
A single paneled wall behind a bed, sofa or dining table can organize a room without a partition. Keep adjacent walls quieter to preserve the sense of openness.
Support acoustic goals
Decorative texture alone does not prove acoustic performance. If sound absorption is required, specify a tested acoustic panel assembly and review its backing, joint and installation requirements.
Wall Paneling Ideas by Room
Living room: one restrained feature wall
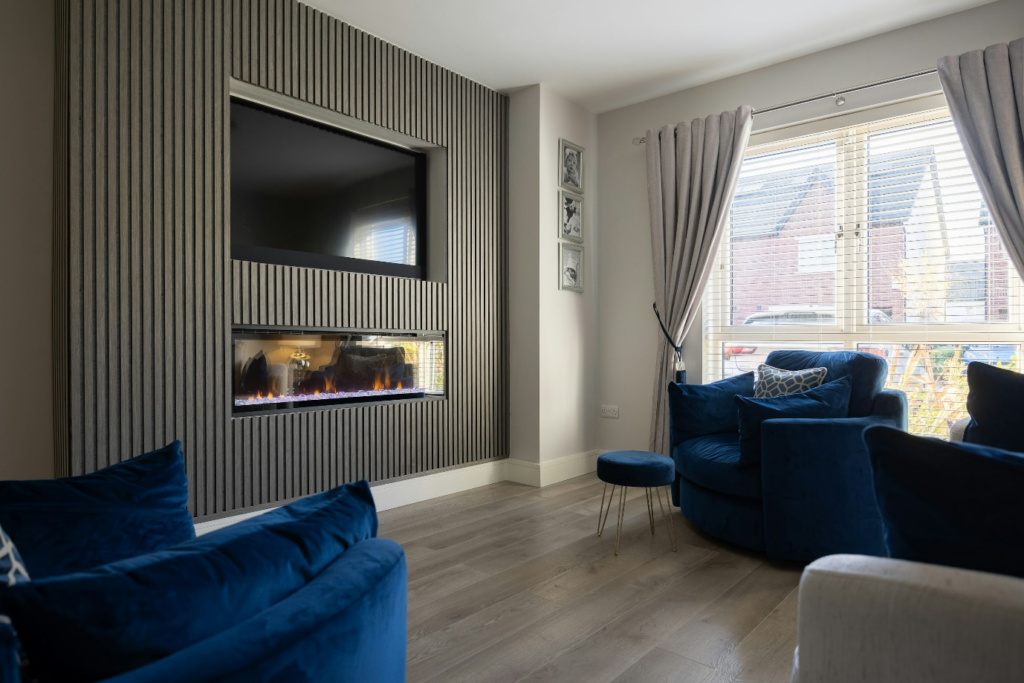
Use narrow vertical slats, shallow fluting or a simple framed grid behind the main seating area. Light wood, warm gray or a tone close to the adjacent paint can add structure without creating a dark block. Align the composition with the sofa, television or fireplace rather than centering it arbitrarily on the wall.
Dining area: vertical rhythm and durable lower panels
In a combined living-dining space, a paneled section can identify the dining zone while maintaining open sightlines. Half-height paneling may protect the lower wall, while full-height vertical lines add perceived height. Coordinate the top line with chair backs, artwork and switches.
Bedroom: frame the bed, not the entire room
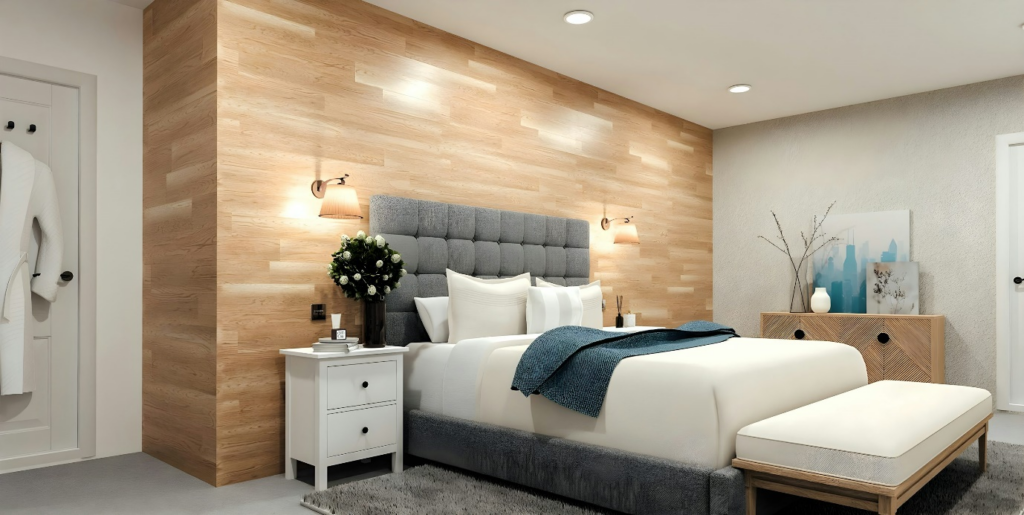
Paneling behind the headboard can create focus with fewer objects. A symmetrical framed layout works for a formal room; fine vertical lines create a quieter contemporary background. Upholstered panels may add softness, but any acoustic, fire or cleanability requirement should be supported by product data.
Kitchen: coordinate with heat, moisture and cleaning zones
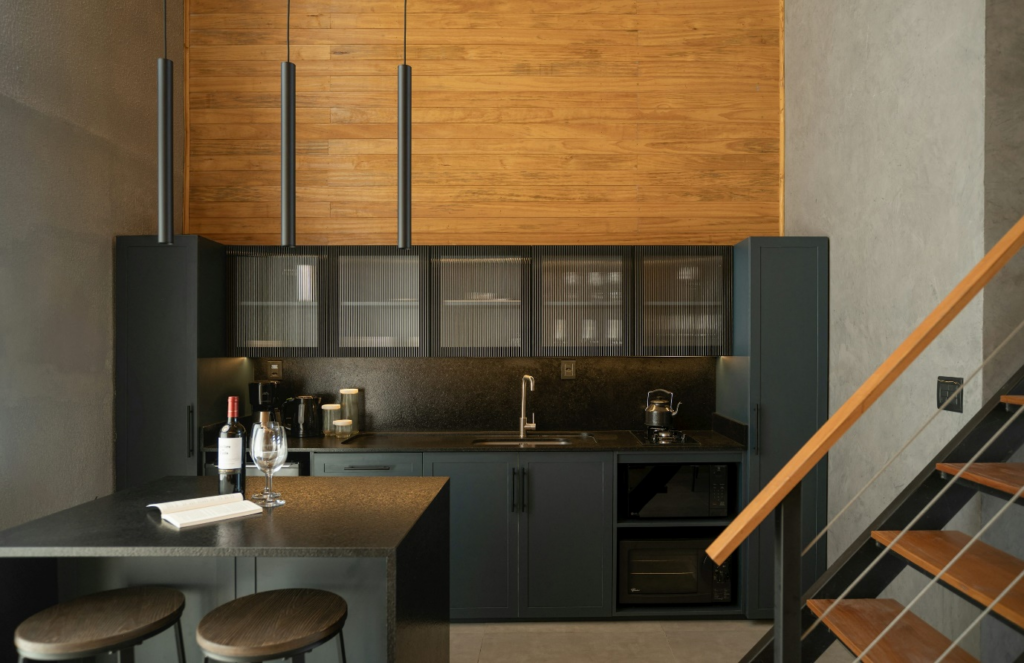
Panels can work on a breakfast nook, island face or wall outside the main splash and heat zones. Near sinks or cooking equipment, confirm water, heat, fire and cleaning suitability for the complete panel system. Coordinate edges with cabinets, countertops, outlets and backsplashes.
Bathroom: use systems approved for the wet zone
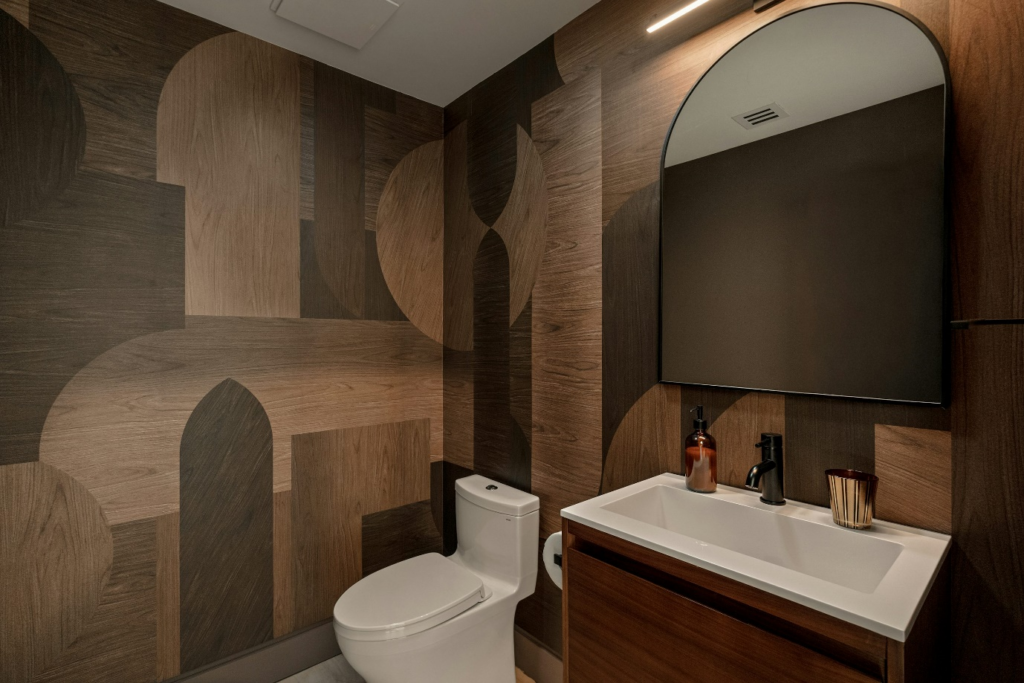
Do not assume a decorative panel is waterproof. Identify direct-wet, splash and dry zones, then select a panel, substrate, joint and edge system suitable for each location. Waterproofing behind the finish, penetrations and ventilation remain separate design requirements.
Choose a Panel Type for the Application
| Panel approach | Visual effect | Questions to confirm |
|---|---|---|
| Slat or fluted panels | Strong vertical rhythm and shadow | Depth, spacing, backing, dust cleaning, edge finish |
| Framed molding or grid | Architectural order with shallow build-up | Module alignment, corners, skirting, paint finish |
| Wood or wood-veneer panels | Natural grain and warmth | Species/veneer, grain matching, color range, substrate and humidity |
| Decorative composite panels | Consistent pattern and broad finish range | Composition, emissions documentation, fire data, wet-area suitability |
| Tested acoustic panels | Decorative finish with defined acoustic function | Test result, mounting method, backing, fire and cleaning requirements |
Common Mistakes in Small Rooms
- Too many patterns: competing panel directions and colors fragment the room.
- Ignoring projections: deep battens can conflict with doors, furniture, outlets and circulation.
- Stopping at awkward points: end the panel composition at a clear corner, opening, cabinet line or designed edge.
- Choosing by appearance alone: material suitability, substrate, fire requirements, moisture, cleaning and installation matter.
- Skipping a sample: approve the real color, sheen, joint, edge and lighting response before production.
Wall Paneling Specification Checklist
- Room elevations, dimensions and panel extents
- Panel material, construction, thickness and finish reference
- Module size, grain/pattern direction and joint spacing
- Substrate, fixing method, edge, corner and termination details
- Interfaces with doors, skirting, cabinets, sockets and lighting
- Wet-area, fire, acoustic, emissions or cleaning requirements where applicable
- Sample, mock-up, shop drawing and variation approval process
Turn the Idea Into a Coordinated Elevation
Send room dimensions, elevations, reference images and performance requirements for a panel layout review. Final materials, interfaces and performance should be confirmed in the quotation, technical data and approved shop drawings.




