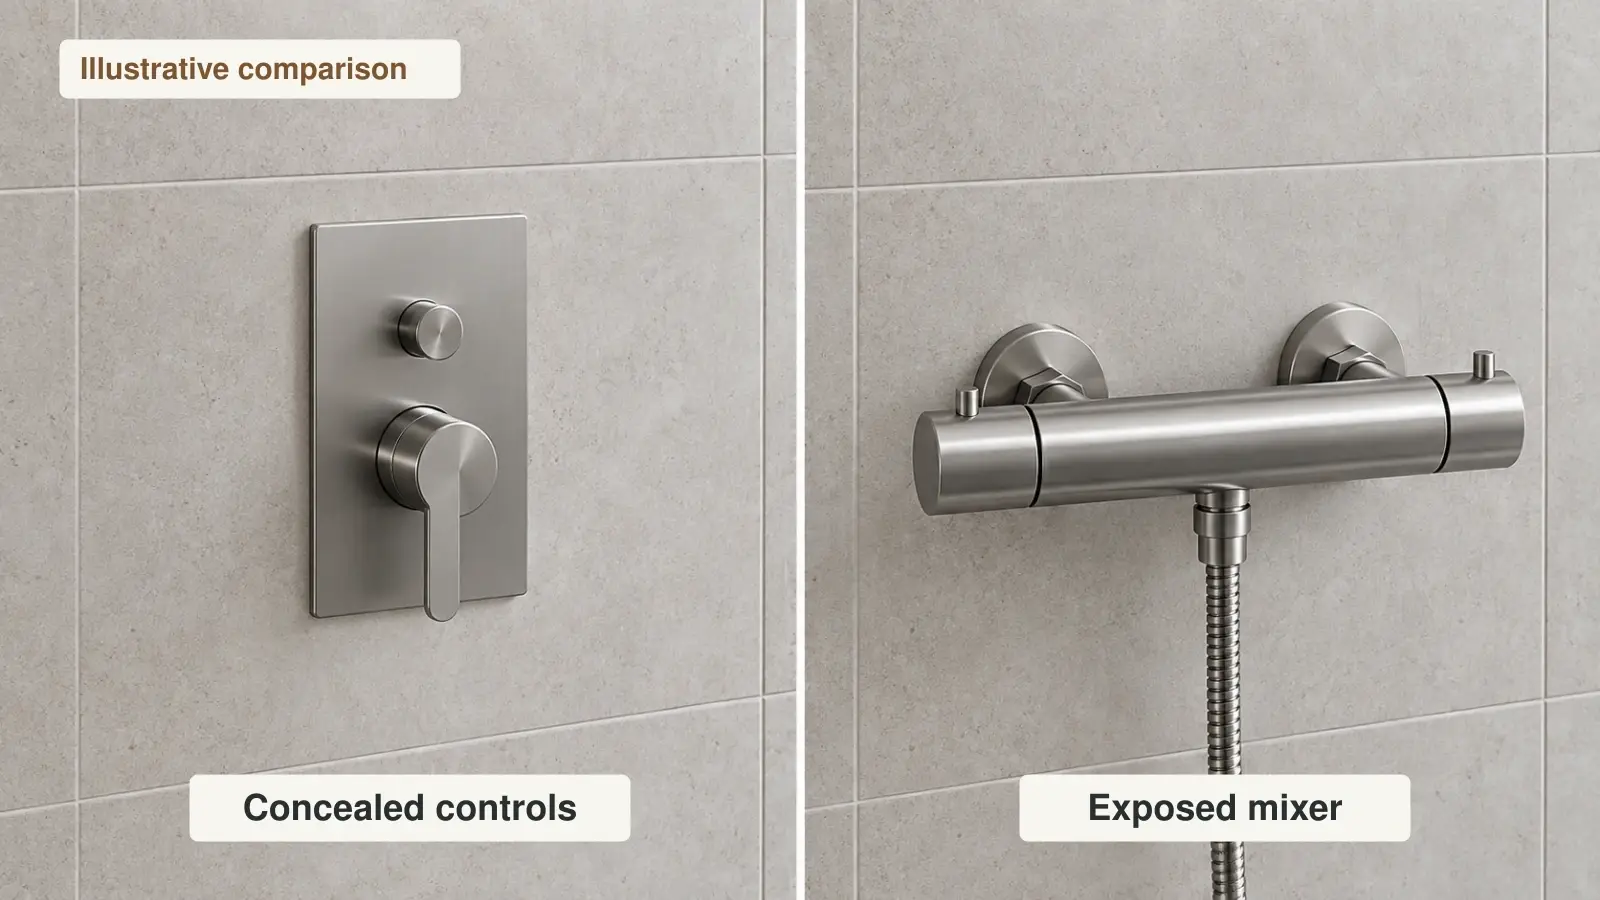
The main difference between concealed and exposed shower valves is the position of the valve body. A concealed valve sits behind the finished wall, leaving the controls and trim visible. An exposed valve keeps its main body on the bathroom side of the wall, although the supply pipes may still be hidden.
For a new bathroom, a concealed system can suit a coordinated wall design when the rough-in depth and service arrangements are confirmed before tiling. For a replacement in an existing tiled shower, an exposed valve may limit disruption if its connections match. The deciding checks are the finished wall build-up, access to service parts and the extent of any future replacement.
Concealed vs Exposed Shower Valves at a Glance
| Decision | Concealed valve | Exposed valve |
|---|---|---|
| Visible components | Controls and trim plate, with the main body behind the finish | Main body and controls project into the shower |
| Wall coordination | Rough-in body depth must suit the finished wall | Supply positions, connections and mounting must suit the selected body |
| Routine service | Some models provide front access to specified service parts | The body is more directly accessible from the room |
| Complete body replacement | May require access behind the finish or from the rear | May be possible from the room if connections remain compatible |
| Hidden pipe repairs | Buried connections may need separate access | Supply tails or pipe connections may still be inside the wall |
| Installed cost | Includes rough-in, wall coordination and finishing | Depends on existing connections and any pipe or finish changes |
Concealed and exposed describe the installation arrangement. They do not, by themselves, tell you whether a valve is thermostatic, pressure balancing or a manual mixer. Compare the specified control function, operating conditions and outlet arrangement as well as appearance.
Rough In Depth and Finished Wall Thickness
Measure against the finished wall face
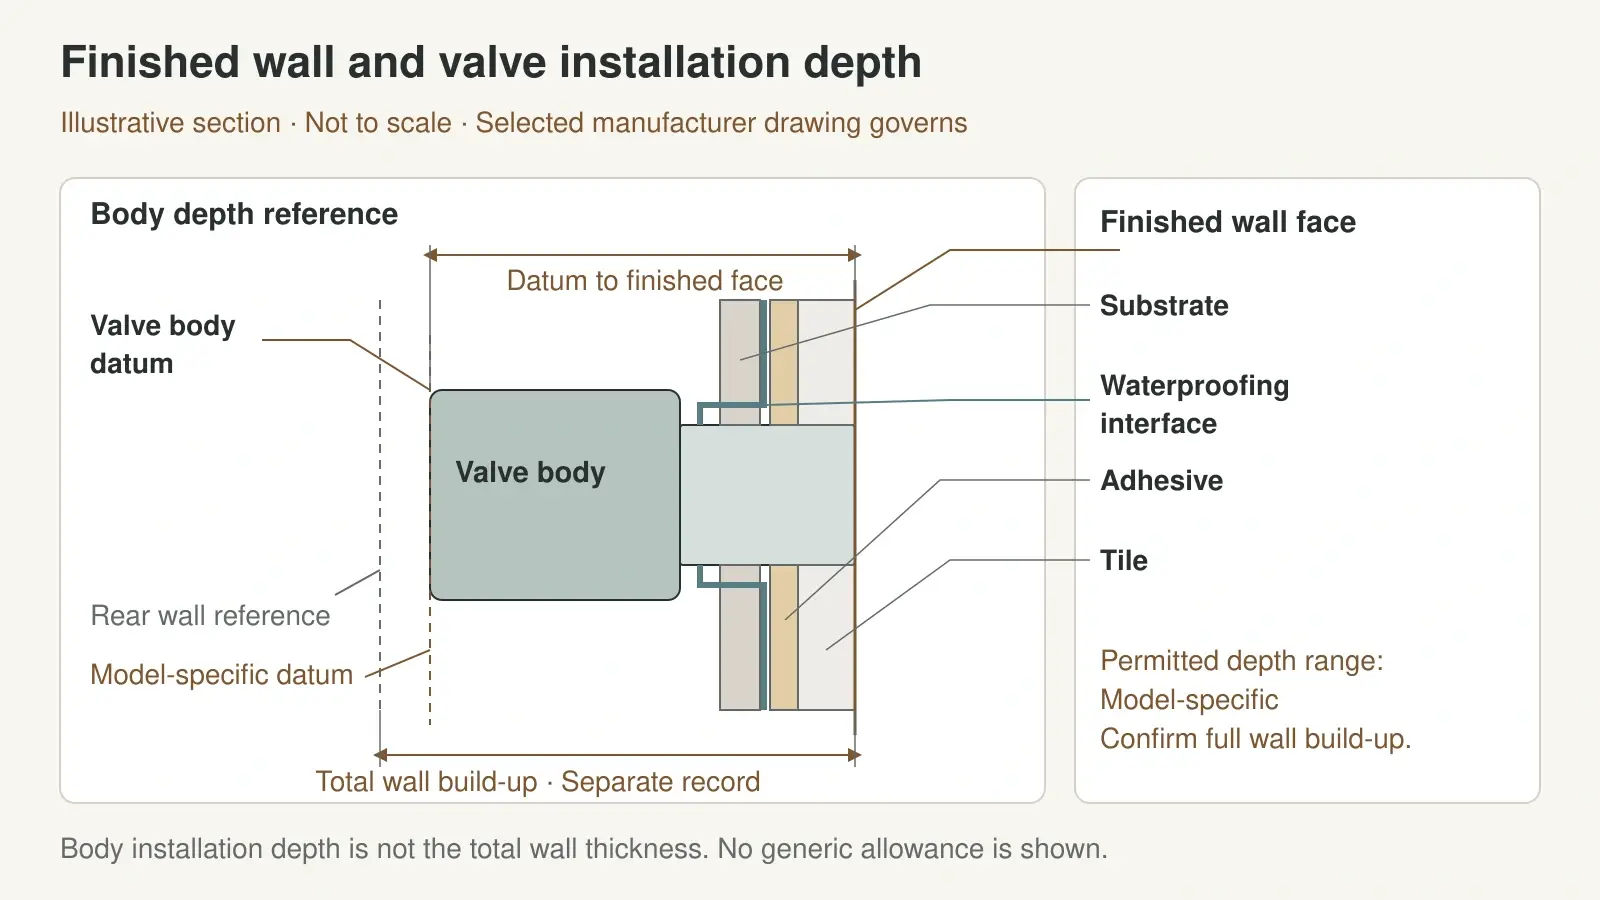
There is no single wall thickness that suits every concealed shower valve. The manufacturer's drawing defines the permitted position of the rough-in body relative to the finished wall face. That is a different measurement from the total wall thickness or the empty cavity behind a board.
Confirm the full build-up shown on the bathroom section, including the substrate, waterproofing system, adhesive and tile or other finish. A change in the finish build-up moves the finished face relative to the fixed valve body. Check that the proposed installation still lies within the manufacturer's depth marks before the wall is closed.
If the body is too deep or too shallow, the trim and controls may not fit as intended. An extension or adjustment accessory is an option only when the manufacturer specifies it for that exact combination. Confirm the available correction before assuming a deeper trim plate will solve the problem.
Coordinate mounting and wall penetrations before tiling
Show the body, inlet and outlet routes, mounting support and finished face on the coordinated drawing. Identify the valve and outlet centerlines from the agreed finished-floor datum. Use the shower outlet and control rough-in guide to coordinate the elevation with the shower head, hand shower and other fittings.
The valve installation and wet-area wall assembly need compatible penetration details. Confirm the specified seals or collars and the waterproofing interface with the responsible installer. Arrange the manufacturer's flushing, connection testing and commissioning requirements at the appropriate stages, and retain the results and installation photographs.
Check the trim outline, tile joints and cutouts together. The wall section of our shower tile layout guide explains why valves, joints and installation details should be coordinated before approving the tile layout. The trim plate should not be treated as a way to conceal an uncontrolled wall opening.
Servicing a Concealed Shower Valve
Identify which parts can be reached from the front
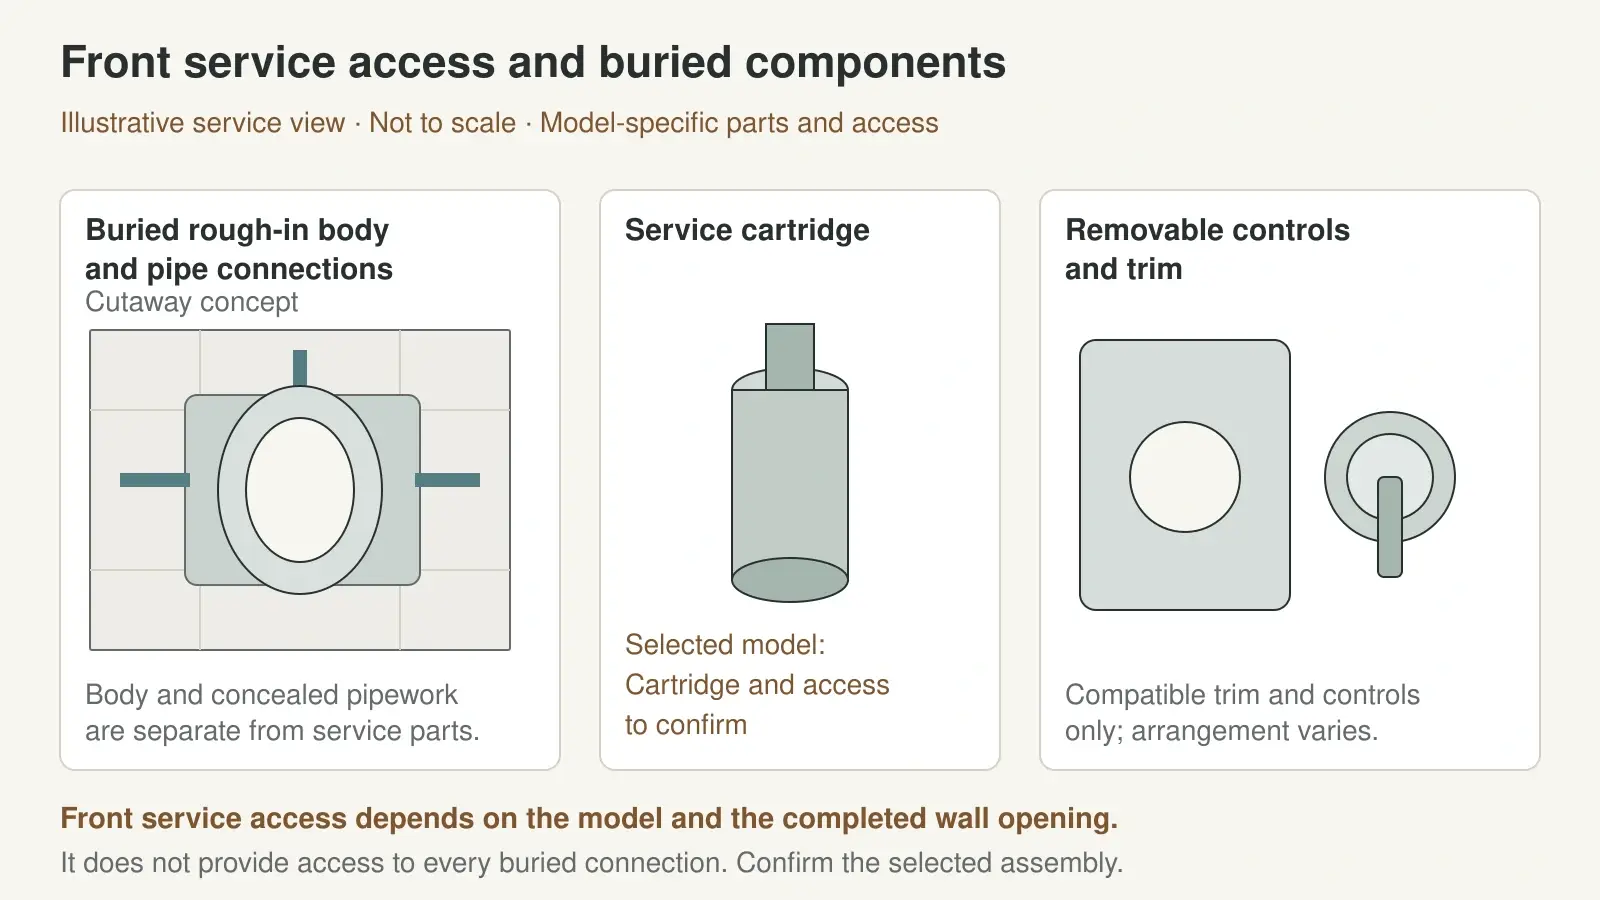
Some concealed valves allow the cartridge, thermostat or other specified service parts to be reached after the controls and trim are removed. Confirm that capability in the service manual for the selected model. The appearance or size of the plate alone does not establish which parts can be removed through it.
Ask for an exploded parts drawing, replacement part numbers and the service procedure before approving the product. Record the required working space and how the water supplies can be isolated. Keep nearby shelves, glass fittings and decorative features clear of the specified service route.
Distinguish service parts from the buried body
A front service opening does not automatically expose every pipe connection behind the wall. A leak at a buried fitting, damage to the rough-in housing or a change to an incompatible valve body may require a different access route. The installer should assess whether work is possible from the front, from an accessible rear wall or by opening the tiled wall.
Where a wet-area wall is opened, include the substrate, waterproofing and finish reinstatement in the repair scope. Replacing the visible tile is only part of that work. Our tile and waterproofing selection guide explains the distinction between the tile finish and the waterproof assembly.
Replacing an Exposed Shower Valve
Check the existing connections and mounting
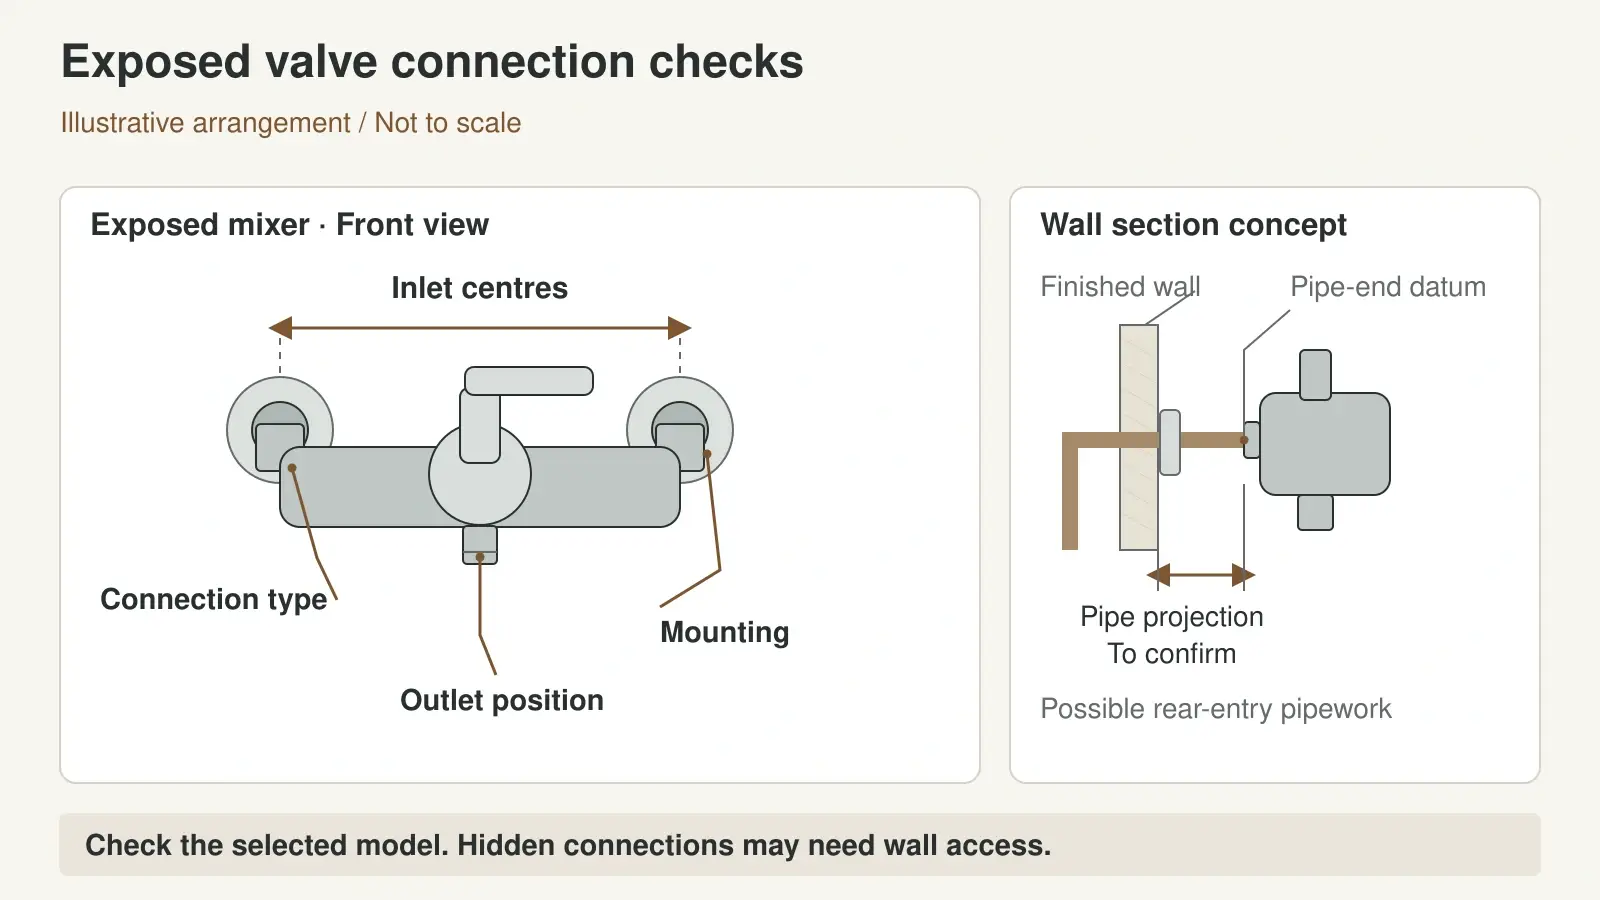
An exposed valve can make a limited replacement more practical when the existing supplies suit the new unit. Check the inlet center spacing, thread and connection type, pipe projection, hot and cold arrangement, mounting method and outlet connection. Similar-looking bar mixers are not proof of a direct fit.
Compare these details with the current installation and the new manufacturer's drawing. Use only the specified connectors or approved adapters. Identify any work needed to correct alignment or support rather than expecting the valve body to accommodate unsuitable supply positions.
Also check how far the body and handles project into the shower. Allow for control movement, hose position, glass and the user's route through the enclosure. The shower layout and finished-dimension guide helps connect those fittings with the usable shower space.
Identify work that remains behind the wall
Exposed refers to the valve body, not necessarily the complete plumbing route. Rear-entry pipes, elbows or supply fittings can remain behind the wall. If those parts are damaged or do not suit the replacement, wall access may still be necessary.
For either arrangement, identify the source of a leak before deciding what to replace. An accessible seal, a service cartridge and a buried connection require different work. Have a qualified installer confirm the fault, compatible replacement and testing requirements.
Repair and Replacement Scope Compared
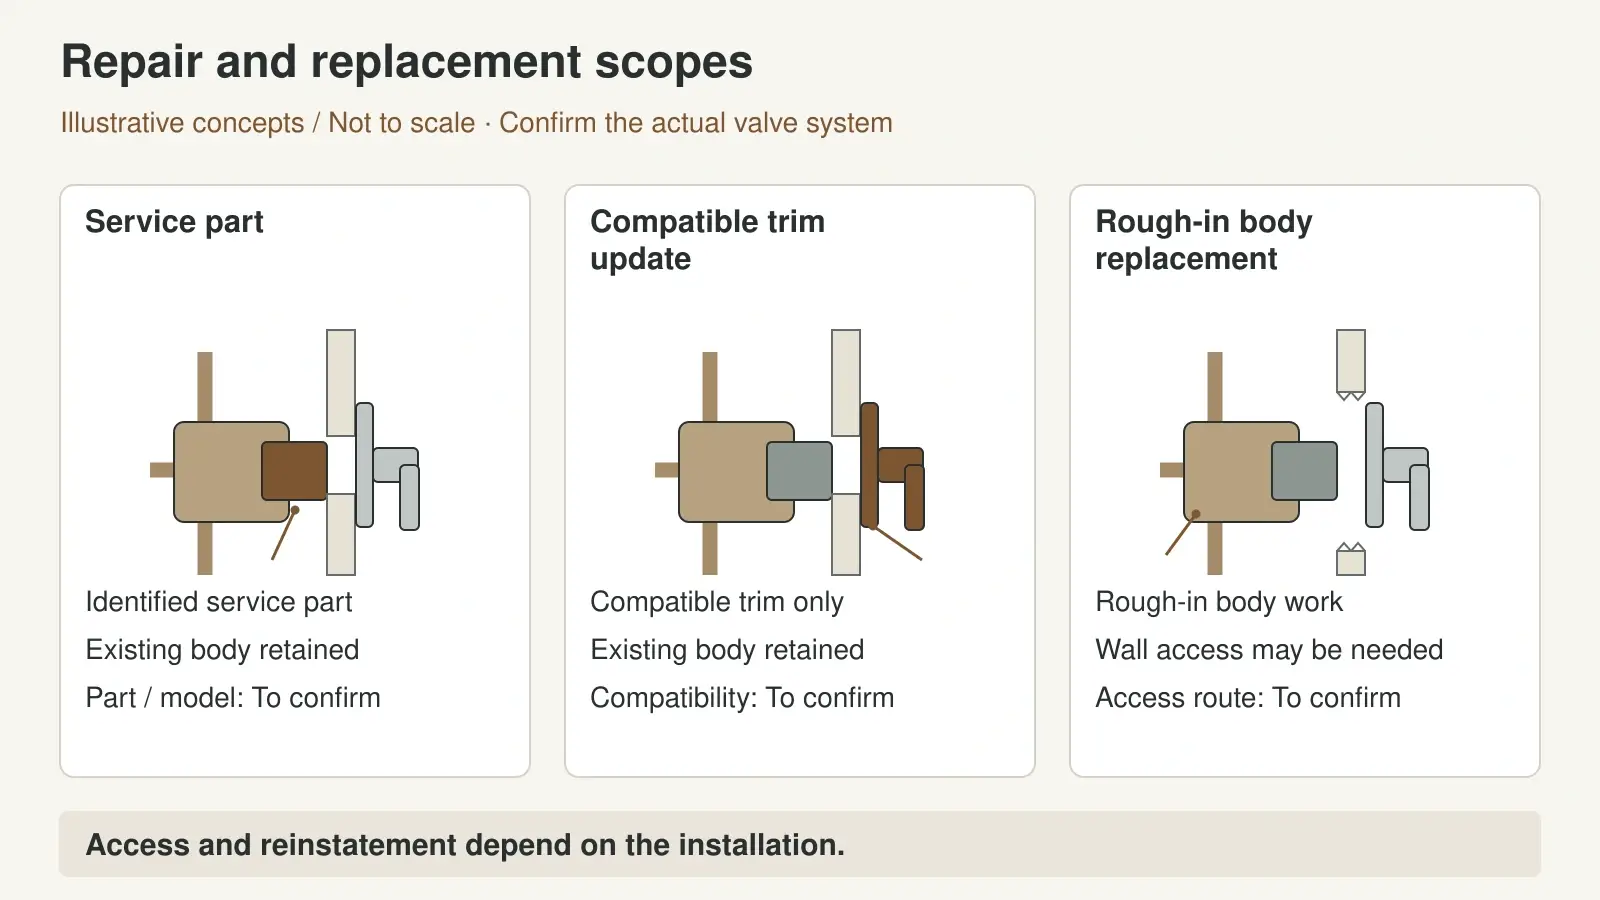
Define the proposed work before describing a shower valve as easy to replace. The following comparison shows why a finish update and a complete valve conversion need separate quotations.
| Proposed work | Main compatibility check | Possible additional scope |
|---|---|---|
| Replace a cartridge or thermostat | Exact service part and manufacturer procedure | Isolation, access, seals and recommissioning |
| Change concealed handles or trim | Existing rough-in model, generation and approved trim combination | Specified adapters and checks of depth, function and coverage |
| Replace an exposed body | Supply centers, connectors, mounting and outlet arrangement | Pipe adjustment or finish repair if the existing points do not suit |
| Replace a concealed rough-in body | New body dimensions, connections and required access | Wall opening, pipe changes and reinstatement of the wet-area assembly |
| Convert exposed to concealed | Wall construction, permitted depth and revised pipe routes | New support, waterproofing details, wall finishes and testing |
A compatible trim change can preserve the existing concealed rough-in, but compatibility must be confirmed by model and generation. Even within one brand, an adapter or a different finish set may be needed. Keep the approved combination in the project records rather than ordering a panel by appearance alone.
Compare the Complete Installed Cost
Compare the same function and installation scope
Request comparable quotations for the required control function and number of outlets. Check whether the price includes the rough-in body, trim, diverter, connectors, wall outlets, hose, shower heads and mounting accessories. Our sanitary ware and shower-system coordination overview explains how these components belong in a defined fixture package.
Separate product supply from site work. List pipe alterations, mounting support, wall opening, waterproofing, tiling, testing and waste removal where they apply. Confirm responsibility for each item. A lower valve price may cover a smaller package or leave more work outside the quotation.
Keep model and service records with the drawings
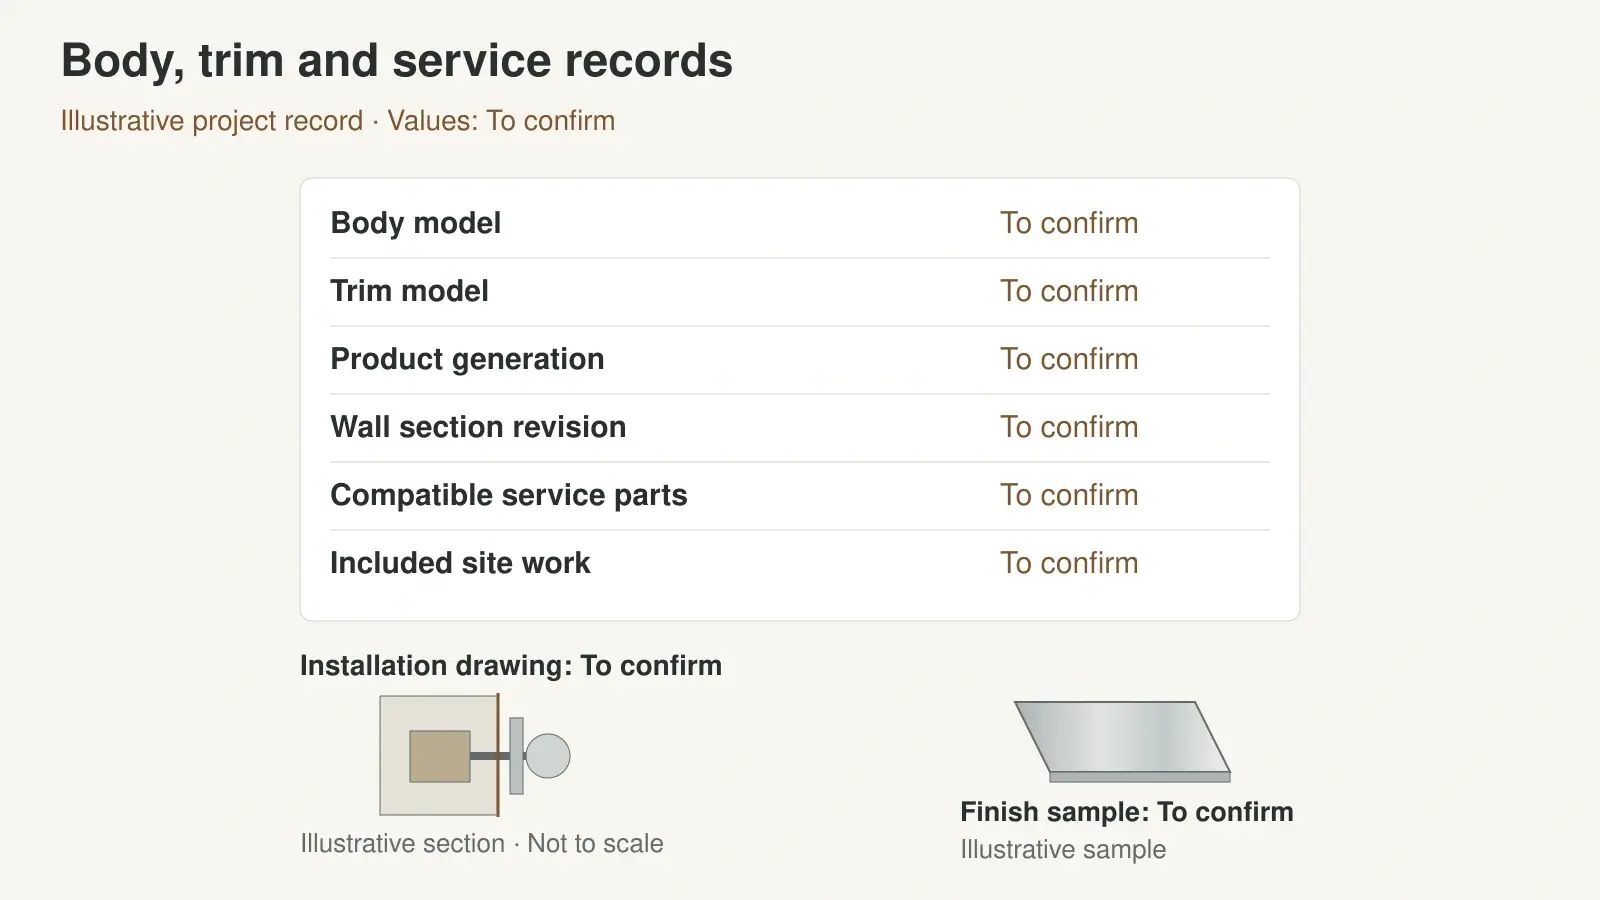
Retain the body and trim model numbers, product generation, approved finish, installation manual, service part references and purchase information. Photograph the completed rough-in before closure and keep the relevant drawing revision with those records. Confirm current spare-part availability without assuming that every component will remain available indefinitely.
For a coordinated material package, our drawing and sample coordination services can help organize the product information and review records. Final dimensions, installation suitability and the agreed responsibilities still need confirmation for the actual project.
Which Arrangement Suits Your Bathroom
New walls or a full bathroom renovation
A concealed valve is worth considering when the wall construction, pipe routes and finish build-up can be coordinated before closure. Confirm front servicing for the expected maintenance tasks and a plan for any work beyond that service opening. Select the rough-in and compatible trim together, even if the visible finish is supplied later.
An existing tiled bathroom
An exposed replacement is worth considering when the supply and mounting points match and the projected body suits the space. If the existing valve is concealed, first identify its model and whether the required repair or design update can retain the rough-in. Replacing a compatible part may involve less disruption than converting the whole system.
To prepare a project quotation, send your shower schedule and bathroom drawings. Include the existing valve details where applicable, proposed body and trim, wall section, outlet arrangement, finish reference, quantities and destination. Mark missing site information for confirmation before ordering.
Frequently Asked Questions
Can a concealed shower valve be repaired without removing tiles
Some models allow specified internal service parts to be replaced from the front. Confirm the exact manual, part and access space. Work on the buried body or pipe connections may need wall access, so front servicing is not a promise that every repair leaves the tiles untouched.
How thick must a wall be for a concealed shower valve
Use the selected body's installation drawing and the complete finished wall build-up. The permitted body depth, mounting arrangement and available space must all work together. A generic cavity or tile thickness cannot confirm that fit.
Can I change concealed shower trim to another brand
Do not assume interchangeability. Identify the existing rough-in and obtain written compatibility confirmation for the proposed trim and any adapter. A different brand or incompatible product family may require replacement of the buried body as well.
Is an exposed shower valve always cheaper to replace
No. A compatible body replacement may reduce wall work, but unsuitable supply points, damaged hidden fittings or changes to the shower layout can add cost. Compare the complete repair and reinstatement scope for the actual installation.