A custom bathroom vanity top should be selected as a fabricated assembly, not as a color sample alone. The finished result depends on the surface material, exact dimensions, sink and faucet data, edge profile, splashes, support, joints, fabrication method and installation responsibility. Each choice affects the others, so the top should be documented before cutting begins.
This guide focuses on the top and countertop scope. Use the custom-made bathroom vanity guide when the project also needs cabinet construction, storage, hardware and full vanity coordination. Use the 36-inch bathroom vanity guide for a width-specific example and the standard vanity height guide for finished floor, counter and basin-rim levels.
Start with verified site information and the exact sink and faucet models. Then compare materials against the required appearance, cleaning routine, cut-outs, edge details, availability and quotation scope. The approved drawing, sample and product data should agree before production release.

Custom Bathroom Vanity Tops at a Glance
The table is a selection map rather than a performance guarantee. Product formulations, finishes and fabrication rules vary by supplier. Request current technical data for the exact product, confirm suitability for the bathroom application and keep the approved sample with the project record.
| Material family | Useful characteristics to compare | Questions before approval |
|---|---|---|
| Natural stone | Individual veining and color variation; several finishes and edge profiles | Exact stone, slab range, finish, thickness, sealing advice, stain or etch sensitivity and repair route |
| Engineered quartz | Repeatable collections and a broad color range | Brand, collection, finish, slab size, cut-out rules, joint limits, care products and fabrication warranty |
| Solid surface | Uniform sheets, coved details and some integrated-basin options | Color and finish, seam plan, support, approved fabricator, heat and scratch care and repair method |
| Porcelain or sintered surface | Thin profiles and stone-like designs | Exact sheet thickness, edge build-up, cut-out fabrication, handling, support and installer capability |
| Cultured marble or molded composite | Factory-formed tops and integrated bowls may simplify the package | Available moulds, bowl positions, overflow, finish, repair limits and replacement availability |
| Laminate | Wide decorative range and lower material cost in many markets | Core, edge build-up, sink compatibility, sealed penetrations, splash detail and water-exposure warranty |
Define the Top Scope Before Choosing a Material
Separate the Top From the Complete Vanity
A vanity top quotation may include only the fabricated surface, or it may also include a basin, tap holes, edge polishing, splashes, sink mounting, wall templating, delivery and installation. The cabinet, mirror, plumbing and electrical work can sit in other packages. List the supply and installation boundary in writing so the same work is not omitted by every trade or priced twice.
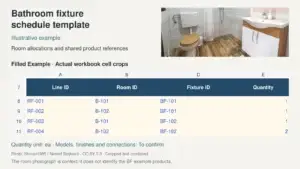
For a coordinated fixture package, connect the top schedule to the sanitary ware and bathroom fixture package. The top fabricator needs the exact basin, faucet, waste and accessory information even when another supplier provides those items.
Distinguish New Work From Replacement Work
A new vanity allows the cabinet and top to be designed together. A replacement top must fit an existing cabinet, finished walls, plumbing and mirror arrangement. Inspect the cabinet for level, rigidity, moisture damage and adequate support before using it as the base for a new top. Record removal, disposal, temporary plumbing shutdown and damage-making-good as separate responsibilities.
Identify the Decision Owners
Record who measures the site, approves the sample, verifies structural support, supplies the sink, releases the fabrication drawing, accepts natural variation, disconnects and reconnects plumbing, installs the top and completes sealant. A custom dimension is not ready for production merely because one party has issued a sketch.
Compare Materials With Product Specific Evidence
Natural Stone
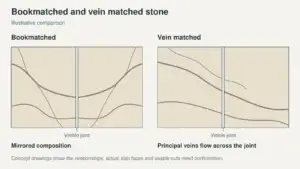
Granite, marble, quartzite and other natural stones should not be treated as one performance group. Confirm the exact geological material, finish and slab range. Review visible fissures, resin treatment, veining, book matching, filled areas and acceptable variation before cutting. The marble for countertops guide provides a project link for marble-specific selection, while the approved slab or sample remains the controlling visual reference.
The Natural Stone Institute care guidance distinguishes calcareous and siliceous stones and recommends cleaning methods that follow the stone type. Its sealing statement also explains that sealing is not an automatic requirement for every stone. Obtain the supplier's written sealing and care recommendation for the selected slab instead of applying one universal schedule.
Engineered Quartz
Engineered quartz is available in many colors and patterns, but the resin system, finish, slab size, warranty and fabrication rules belong to the exact brand and product. Confirm whether the selected finish shows fingerprints, hard-water marks or changes in sheen more readily. Caesarstone care guidance, for example, differentiates polished and textured finishes and instructs users to clean spills and use approved products. Treat that as brand-specific guidance, not a rule for every quartz product.
Solid Surface
Solid surface can support inconspicuous seams, coved backsplashes and some integrated basin designs when the system and fabricator allow them. Specify the brand, color, sheet thickness, finish and seam arrangement. The Corian care bulletin explains that maintenance varies with finish and that some damage may require professional repair. Use the current instructions for the exact supplied product and retain them for handover.
Porcelain Sintered and Molded Products
Porcelain and sintered surfaces can create thin visual profiles, but edge build-ups, drillings and tight cut-outs need product-specific fabrication. Molded composite or cultured-marble products may combine the top and bowl, reducing separate joints but limiting available moulds and repair options. Compare the real thickness, exposed edge, bowl geometry, overflow, color tolerance and replacement route rather than relying on a broad material label.
Laminate and Wood Based Tops
Laminate can be practical when the edge, core, sink opening and wall junction are designed for the stated exposure. Confirm whether the sink type is permitted and how every cut edge is sealed. A timber or veneered top needs a defined species, moisture content, finish system, joint detail and maintenance plan. Do not describe a top as waterproof unless the exact tested system and installation warrant that claim.
Measure the Exact Vanity Top
Record Finished Site Conditions
Measure between finished wall surfaces and from the finished wall to the front edge. Check each dimension at more than one point because walls may not be parallel, square or plumb. Record tile, wall panel, plaster and skirting build-ups, as well as the position of mirrors, outlets, switches, trims and adjacent fixtures. A template taken before the finishes are complete may not represent the final opening.
Separate Cabinet and Top Dimensions
State cabinet width, top width, cabinet depth, top depth, front overhang and each side overhang separately. For a wall-to-wall top, identify any fitting allowance, scribe or side splash. For a freestanding vanity, show which edges are exposed and finished. The nominal cabinet size is not a fabrication dimension.
| Dimension | Record on the drawing | Coordinate with |
|---|---|---|
| Overall width | Finished top width, wall allowances and exposed ends | Finished walls, tile, fillers and side splashes |
| Overall depth | Back line, front projection and handle relationship | Basin depth, faucet, circulation and adjacent fixtures |
| Thickness | Actual sheet or slab and any built-up edge | Edge profile, weight, cut-outs, splashes and support |
| Overhangs | Front, left, right and any unsupported return | Cabinet faces, doors, drawers and fabricator limits |
| Sink position | Centerlines, cut-out, reveal and bowl envelope below | Cabinet rails, drawers, waste, valves and faucet |
| Finished levels | Counter surface, basin rim and splash top from finished floor | Users, mirror, outlets and the approved vanity height |
Confirm Thickness and Edge Build Up
The visible front edge can be thicker than the main slab or sheet. Show whether the edge is the true material thickness, a laminated build-up, a mitred return or another assembly. Record the underside appearance at exposed ends and the clearance above doors and drawers. A thicker visual edge can change weight, jointing, cost and the finished counter height.
Coordinate the Sink Faucet and Accessories
Select the Sink Installation Type
An undermount basin, drop-in basin, vessel basin and integrated basin create different cut-outs and support details. Confirm the exact model, dimensions, overflow, waste connection, mounting method and bowl depth. The cabinet layout below must leave room for the bowl, clips or brackets, trap, valves and maintenance access.
Use the Exact Cutout Template
Do not size a cut-out from a catalogue photograph or nominal sink width. Kohler sink cutout template guidance explains that model-specific templates support accurate positioning, marking and cutting. Obtain the current template or approved CAD file for the selected sink, then record the reveal and mounting details required by both the sink supplier and surface fabricator.
Set Faucet Holes From Product Data
Record hole diameter, number, center spacing and distance from the sink and backsplash. Check the faucet base, fixing hardware, supply hoses, spout reach and handle movement. A thick deck, raised backsplash or closely spaced vessel basin can block installation or operation. Add soap dispensers, filtered-water fittings and pop-up controls to the same drilling schedule.
Choose Edges Splashes Joints and Pattern Direction
Match the Edge to Material and Use
Specify the profile with a drawing or supplier code, not only words such as square or rounded. An eased edge, bevel, bullnose, mitred build-up and decorative profile require different machining and expose different amounts of the material. Soften exposed corners where the design requires it and record the radius. Confirm which edges receive a factory finish and which edges meet walls or splashes.
Design Backsplashes and Side Splashes
Show the splash material, thickness, height, top edge, end condition and relationship to the mirror, faucet and outlets. A separate splash creates horizontal and vertical sealant joints. A coved or integrated splash has different fabrication limits. Where the top meets a tiled wall, decide which trade finishes first and who provides the final sealant.
Place Seams and Natural Patterns Deliberately
Long runs, returns, transport limits and slab sizes may require seams. Locate them away from vulnerable cut-out corners where the fabricator recommends, and show how veins or directional patterns continue. For natural stone and strongly patterned quartz, approve the slab layout or marked photograph before cutting when appearance is material to the project.
Plan Support Fabrication and Safe Handling
Verify Cabinet and Wall Support
The cabinet should be level, stable and capable of supporting the selected top, sinks and imposed loads. Show rails, full panels, brackets or other support where required. Do not copy an unsupported-overhang dimension from another material. Follow the current fabricator and product instructions for spans, overhangs, cut-outs and reinforcement, and obtain project-professional review where structural judgment is needed.
Resolve Cutout Corners and Joints Before Cutting
Sink openings, faucet holes and inside corners concentrate fabrication risk. The approved drawing should show corner radii, distances to edges and seams, reinforcement and polished surfaces. Changes after cutting may require a new top. Keep the sink and faucet model numbers on the drawing so substitutions cannot be made without checking the cut-outs again.
Require Controlled Off Site Fabrication
Stone and engineered-stone cutting can create respirable crystalline silica. OSHA countertop silica guidance describes the hazard for workers who manufacture, finish and install countertop products in the United States. Use a qualified fabrication shop with the controls and training required for its jurisdiction, and avoid planning uncontrolled dry cutting at the occupied site. Local occupational requirements govern outside the United States.
Prepare Fabrication Drawings and Approval Records
Show the Buildable Information
The fabrication package should show the plan shape, finished dimensions, thickness, edge codes, splashes, sink and faucet cut-outs, seams, pattern direction, exposed surfaces, supports and site datums. Add the cabinet and wall interfaces that control fit. AWI shop drawing guidance for QCP projects identifies construction methods, materials, joinery and dimensions as core drawing information. Apply AWI requirements only when the project calls for them, but use the same coordination principle for the vanity-top package.
Approve Samples and Slab Layouts
A small sample can confirm a manufactured color, but it may not show a large pattern or natural variation. Record the manufacturer, product name, code, finish, thickness and sample date. For natural stone, define the approved slab or acceptable range and mark the intended orientation. Keep photographs as supporting records, not as substitutes for the signed physical reference where color control is important.
Control Revisions and Open Items
Give every drawing and schedule a revision and status. List missing sink templates, pending faucets, unconfirmed wall finishes and unresolved seams as open items. Production release should identify the exact approved revision. Messaging-app images and unmarked sketches should not override the controlled record.

Use Cost Guidance With Clear Limits
Dated United States Planning Figures
Cost figures must state their market, date and scope. The Angi bathroom countertop replacement guide, updated August 1 2026, reports a United States planning range of $400 to $4,300 for bathroom vanity countertop replacement and $500 to $2,800 for custom-built countertops. Those figures are broad consumer estimates, not a quotation for one material, city or international project.
The Home Depot countertop cost guide, reviewed for this draft on September 23 2026, lists programme ranges of $19 to $45 per square foot for laminate, $35 to $100 for solid surface, $59 to $130 for quartz and $57 to $170 for natural stone. Small vanity jobs may still carry slab, fabrication, delivery or minimum-order charges. Do not multiply a unit rate by the top area and assume the result includes the complete project.

| Cost input | Why it changes the quotation | What to request |
|---|---|---|
| Material and finish | Slab, sheet, colour, texture and availability differ | Exact brand or stone, code, finish, thickness, quantity and waste basis |
| Size and layout | Area, returns, seams and pattern matching affect material and labour | Dimensioned plan and approved seam or slab layout |
| Sink and faucet work | Each cut-out, hole, polished reveal or integrated bowl adds fabrication | Exact models, templates, reveal, hole schedule and mounting scope |
| Edges and splashes | Profiles, built-ups, radii and splash pieces add machining and material | Edge codes with lengths and splash dimensions |
| Site and installation | Template visits, access, removal, lifting, plumbing and sealant vary | Separate inclusions, exclusions, location, access and responsibility list |
| Packing and delivery | Crates, protection, distance and breakage risk vary by destination | Packing method, delivery term, unloading and damage procedure |
Save Cost Without Removing Required Information
A remnant can reduce material waste for a small top, but it is not automatically free or suitable. Verify dimensions, finish, batch or slab, defects, edge allowance and replacement availability. Standard edges, fewer unnecessary joints and a stable sink specification can reduce fabrication complexity. Compare the same drawings and inclusions across suppliers before treating one price as lower.
Compare Quotations on the Same Basis
Issue a Complete Request for Quotation
Send each bidder the dimensioned top drawing, room or site location, material and finish reference, sink and faucet models, edge and splash schedule, required samples, fabrication drawing expectation, installation boundary, packing and delivery requirements and programme. Mark alternatives separately so the base quotations remain comparable.
Check Inclusions Exclusions and Quantities
Review material quantity, waste, edge lengths, cut-outs, drillings, sink mounting, brackets, splashes, seams, finishing, template visits, installation, sealant, removal, disposal, plumbing, packing and delivery. Confirm taxes, currency, validity, lead time and warranty. A low headline number may omit the exact items that make the top buildable.
Evaluate Supplier Evidence
Request representative fabrication drawings, material data, sample records, packing details and photographs of comparable work. For a natural or directional material, ask how slab layout approval is controlled. For an international package, clarify drawing language, units, inspection points, export packing, delivery term and the party responsible for local installation and final connections. The procurement and coordination services page explains how drawings, samples, inspection and packing can be organized around a project scope.
Plan Installation and Handover
Prepare the Site and Cabinet
Complete the supporting cabinet, wall finishes and agreed template conditions before final measurement. Confirm access routes, lifting space, room protection and storage. Check that the cabinet is level and secured, and that required brackets or supports are installed. Do not force a rigid top into an opening that differs from the approved template.
Assign Plumbing and Sealant Work
State who disconnects and reconnects water and waste, mounts the sink, fits the faucet, tests for leaks and applies sealant at the sink, wall and splash junctions. Protect waterproofing and concealed services during fixing. Allow sealants and adhesives to cure according to the specified products before putting the top into service.
Complete the Handover Record
Handover should include the approved material reference, fabrication drawing, warranty, care instructions, sealer record where applicable, sink and faucet data, spare material if supplied and photographs of the completed installation. Record chips, scratches, staining, joint defects or leaks before acceptance and identify the responsible repair method.
Follow Material Specific Care and Sealing Guidance
Clean According to the Exact Surface
Use the care instructions issued for the supplied surface. The Natural Stone Institute care guidance recommends identifying the stone type and avoiding unsuitable cleaners. The Corian care bulletin and Caesarstone care guidance provide different procedures for their own products and finishes. This difference is why generic claims such as maintenance-free or stain-proof should be avoided.
Treat Sealing as a Product Decision
Some natural stones benefit from a penetrating sealer, while other stones or manufactured surfaces may not require or permit the same treatment. Follow the stone supplier, sealer manufacturer and installer recommendations. Record the product, date, responsible party and future test or reapplication guidance when sealing is part of the project.
Inspect Joints and Wet Area Interfaces
Keep standing water from remaining around the faucet, sink rim and wall joint. Inspect sealant, grout, seams and sink mounting periodically and repair failed interfaces promptly. Surface care does not replace sound plumbing, ventilation, waterproofing or leak response.
Custom Vanity Top Request for Quotation Checklist
- Provide the project location, room reference, quantity, required delivery date and site access information.
- Issue a dimensioned top plan showing finished width, depth, thickness, overhangs, exposed edges and splashes.
- Name the exact material, manufacturer or stone, colour, finish, thickness and sample or slab approval requirement.
- Attach the selected sink, faucet, waste and accessory data with current cut-out and drilling templates.
- Schedule edge profiles, corner radii, seams, pattern direction, support and any underside finish.
- Define who surveys, prepares fabrication drawings, fabricates, packs, delivers, installs, seals and connects plumbing.
- Request separate prices for alternatives, removal, disposal, extra visits, special access and optional accessories.
- Require revision-controlled drawings, stated exclusions, lead time, quotation validity, warranty and care information.
Use the products overview to identify related material categories, then send your project list with the available drawings, quantities and fixture references for a coordinated scope review.
Frequently Asked Questions
Should the Sink Be Selected Before the Top
Yes. The fabricator needs the exact sink model and current template before cutting. The bowl shape, reveal, clips, brackets, overflow and space below the top can affect both the cut-out and cabinet.
Does Every Natural Stone Vanity Top Need Sealing
No universal rule applies to every stone. Confirm the exact material and finish, then follow the stone supplier and sealer guidance. Keep a record when sealing is specified.
Which Material Is Best for a Bathroom Vanity Top
There is no single best material for every project. Compare the required appearance, size, sink type, seams, cleaning products, repair expectations, local fabrication capability, budget and approved technical data. Select the product that meets the full brief rather than the broad material name with the strongest marketing claim.
How Much Does a Custom Vanity Top Cost
A useful estimate needs the market, date, material, dimensions, cut-outs, edges, splashes, installation and delivery scope. The dated United States ranges in this guide are planning references only. Obtain comparable quotations from the same drawing for the actual project.
Can a New Top Be Installed on an Existing Vanity
It may be possible when the existing cabinet is level, stable, dry and suitable for the weight and support requirements. Verify wall conditions, plumbing, drawer clearance and finished dimensions before fabrication. Repair or replace an unsuitable base rather than expecting the top to correct it.
How Do Vanity Width and Height Guides Relate to This Page
This page owns the material, cut-out, edge, fabrication, installation and cost decisions for the top. The 36-inch guide explains a common nominal width and the vanity height guide explains finished vertical levels. The complete vanity guide covers the cabinet and storage package. Keep the scopes separate and use the approved project drawing to coordinate them.
Approve the Top Before Production
| Release item | Minimum approved record | Final check |
|---|---|---|
| Material | Brand or stone, code, finish, thickness and sample or slab range | Matches quotation, drawing and physical approval |
| Dimensions | Finished width, depth, overhangs, thickness and levels | Matches site template and cabinet interface |
| Sink and faucet | Exact models, cut-out, reveal, drilling and mounting | Current templates and service clearances are attached |
| Fabrication | Edges, splashes, seams, pattern, support and exposed surfaces | Every machining item is dimensioned and priced |
| Installation | Access, removal, fixing, sealant, plumbing and testing responsibilities | No task is assumed or duplicated |
| Approval control | Revision, open-item list, approver and release status | Production uses one complete approved revision |
A custom bathroom vanity top is ready for production when the material, dimensions, fixtures, fabrication details, responsibilities and price all refer to the same approved information. That record protects fit and appearance more effectively than a general promise about style, durability or value.