A door schedule template connects each door number on a floor plan to its leaf, frame, opening direction, hardware and finish requirements. It also gives the team a place to record the drawing revision and the decisions still needed before ordering.
Use the Excel workbook in this guide to build that record for your project. It includes a blank schedule, linked detail sheets and a separate example. The main schedule has space for 50 openings, with millimetre dimensions and dedicated records for hardware, finishes and approvals.
Start with the current plans and specifications. Keep each door ID consistent across the workbook, supplier quotations and drawings, and leave unresolved selections visibly pending. A completed spreadsheet still needs the reviews and release instructions required by the project.
Download the Door Schedule Template in Excel
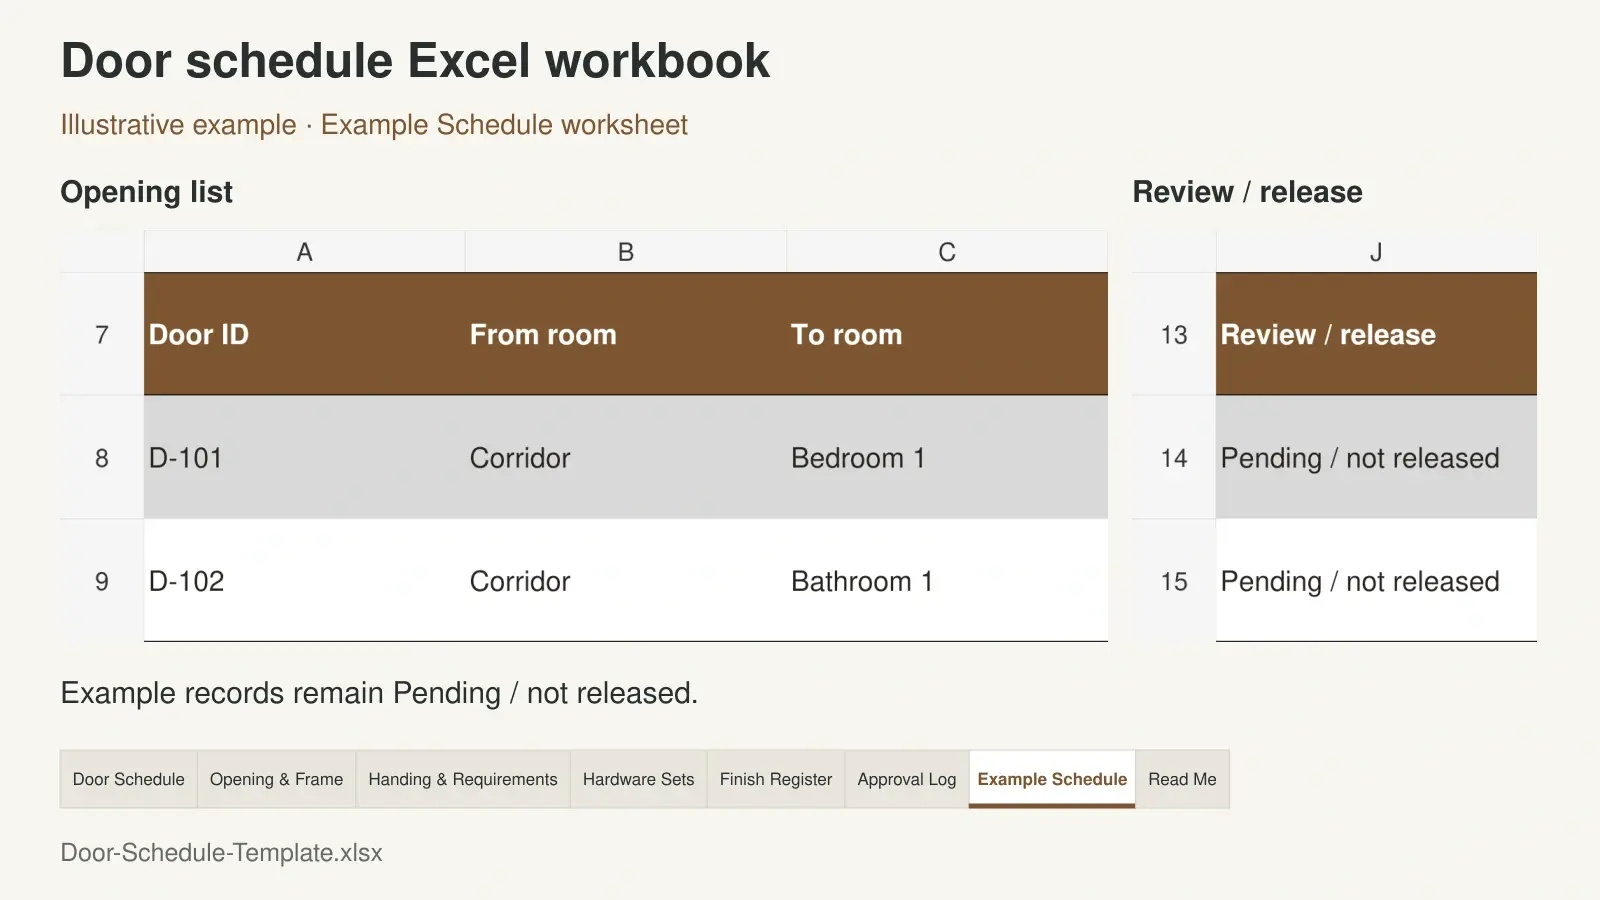
The workbook separates the opening list from detailed coordination records so the main door schedule stays readable. Use the same door ID on the relevant detail sheets. Hardware set and finish codes connect repeated selections without copying their entire specification into every door row.
Download the Door Schedule Template XLSX
| Worksheet | What to record |
|---|---|
| Read Me | Project information, units, field definitions and instructions |
| Door Schedule | Door IDs, locations, operation, leaf dimensions, construction and references |
| Opening & Frame | Rough openings, frame outside dimensions, wall depth and frame details |
| Handing & Requirements | Viewing side, hinge side, swing, drawings and project performance requirements |
| Hardware Sets | Components and quantities belonging to each hardware set |
| Finish Register | Finish descriptions, sample references and review information |
| Approval Log | Submissions, decisions, revisions, unresolved comments and release records |
| Example Schedule | Fictional entries showing how to organize the information |
Filters, frozen headings and selection lists help with data entry. Formula checks identify specified missing fields, duplicate IDs and selected reference problems. They do not check every technical requirement or authorize production. Keep the example separate from the live project records and review the Read Me instructions before extending the prepared ranges.
The schedule can support selection across our project door and window systems. Define the opening requirements first, then compare suitable product proposals against them.
Assign Door Numbers and Locations
Give Each Opening a Unique Door ID
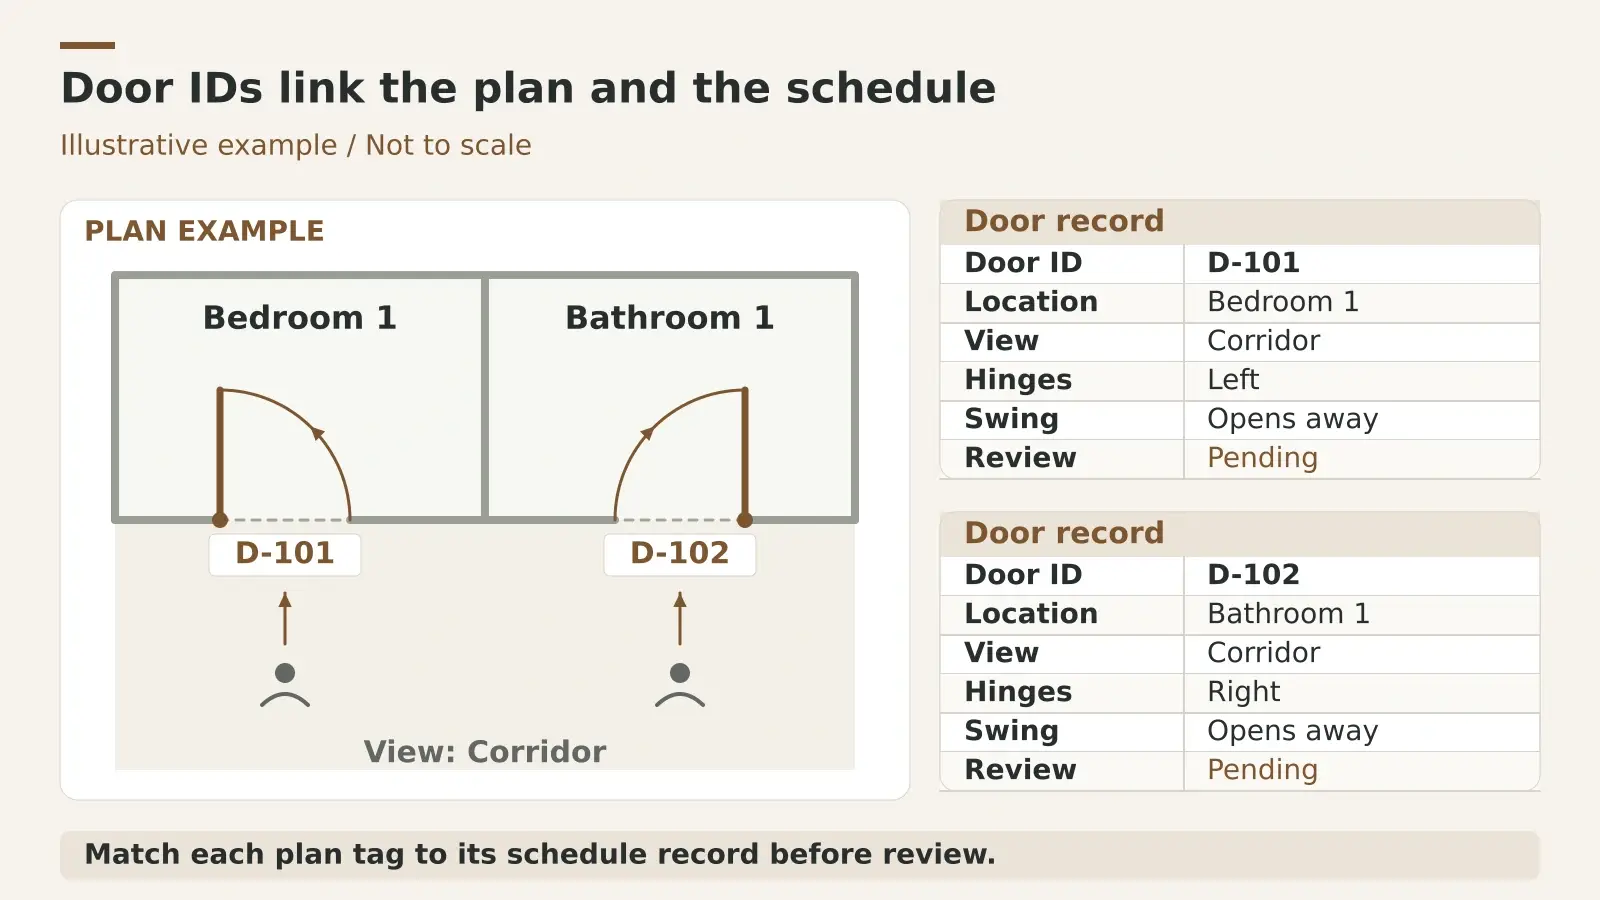
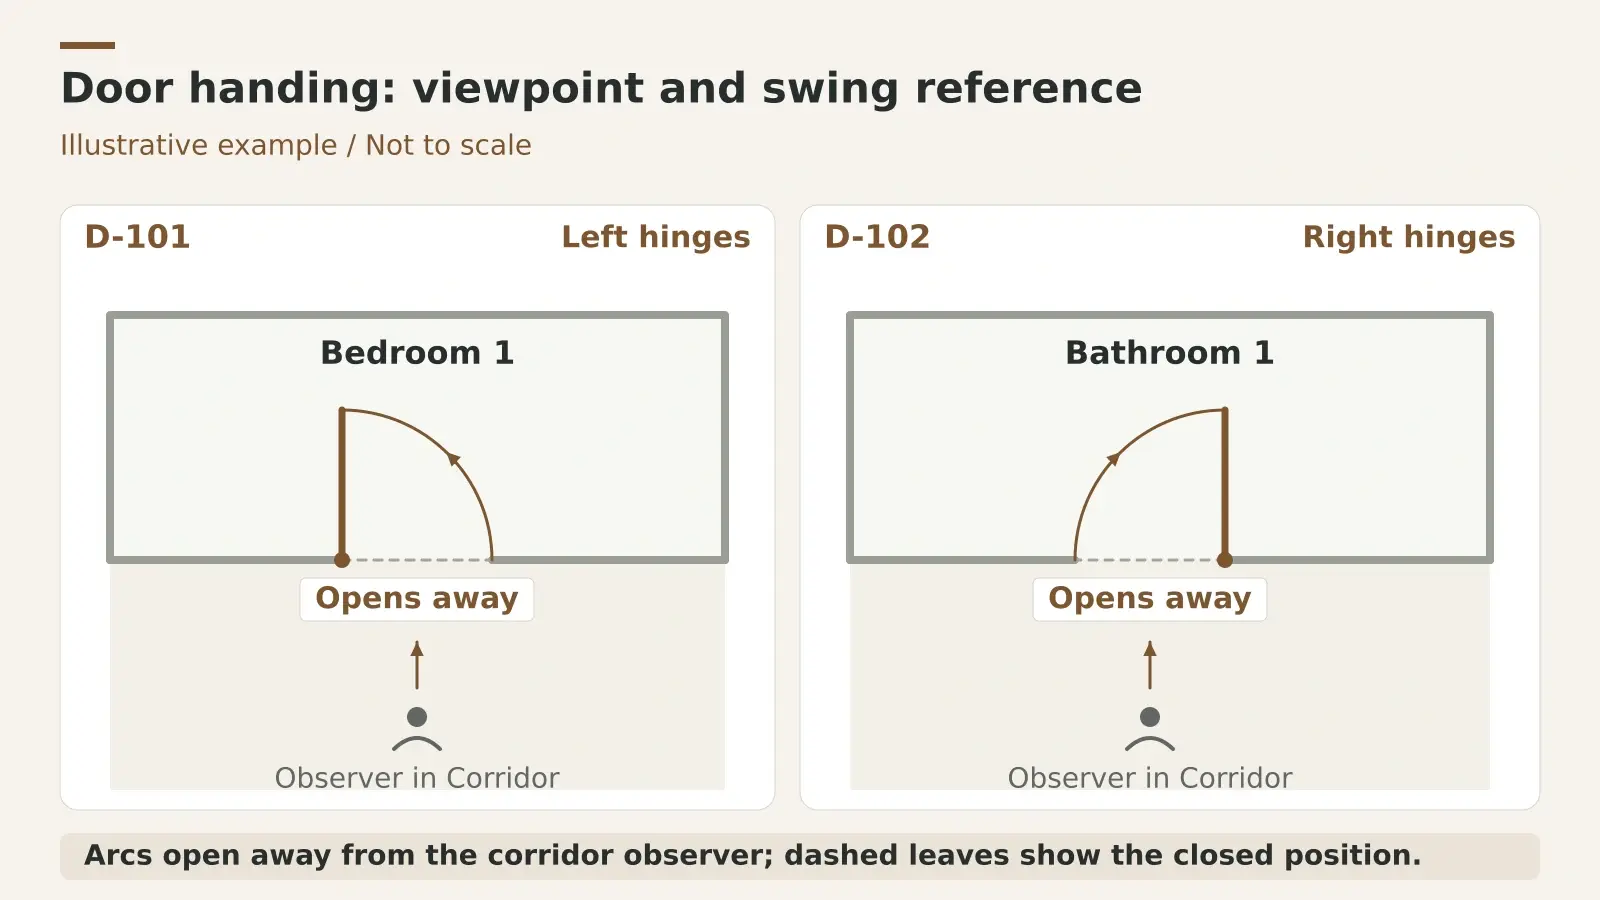
Use one row for each physical opening. For example, D-101 can identify the opening between a corridor and Bedroom 1, while D-102 identifies the bathroom opening beside it. Put the same marks on the plan. Record the level and the spaces on both sides so a reviewer can find the correct opening without relying on a room name alone.
Keep the opening ID separate from the door type. Several openings can share a leaf design, frame type or hardware set while retaining different IDs, handing or review records. A single generic row labelled bedroom doors makes those differences difficult to trace.
Count Openings and Leaves Separately
A paired door normally remains one scheduled opening with two leaves. Record the leaf count and identify the active leaf where relevant. If the leaves have different widths, keep both dimensions rather than assuming the opening contains equal leaves.
Check the opening count against the plan tags. For a renovation, also distinguish new, retained, replaced and modified work. Do not include retained doors in a supply quantity merely because they appear in the opening register. Any procurement summary should explain whether its quantity represents openings, door leaves or individual hardware items.
Record Dimensions Frames and Opening Direction
Separate Leaf Sizes From Opening Sizes
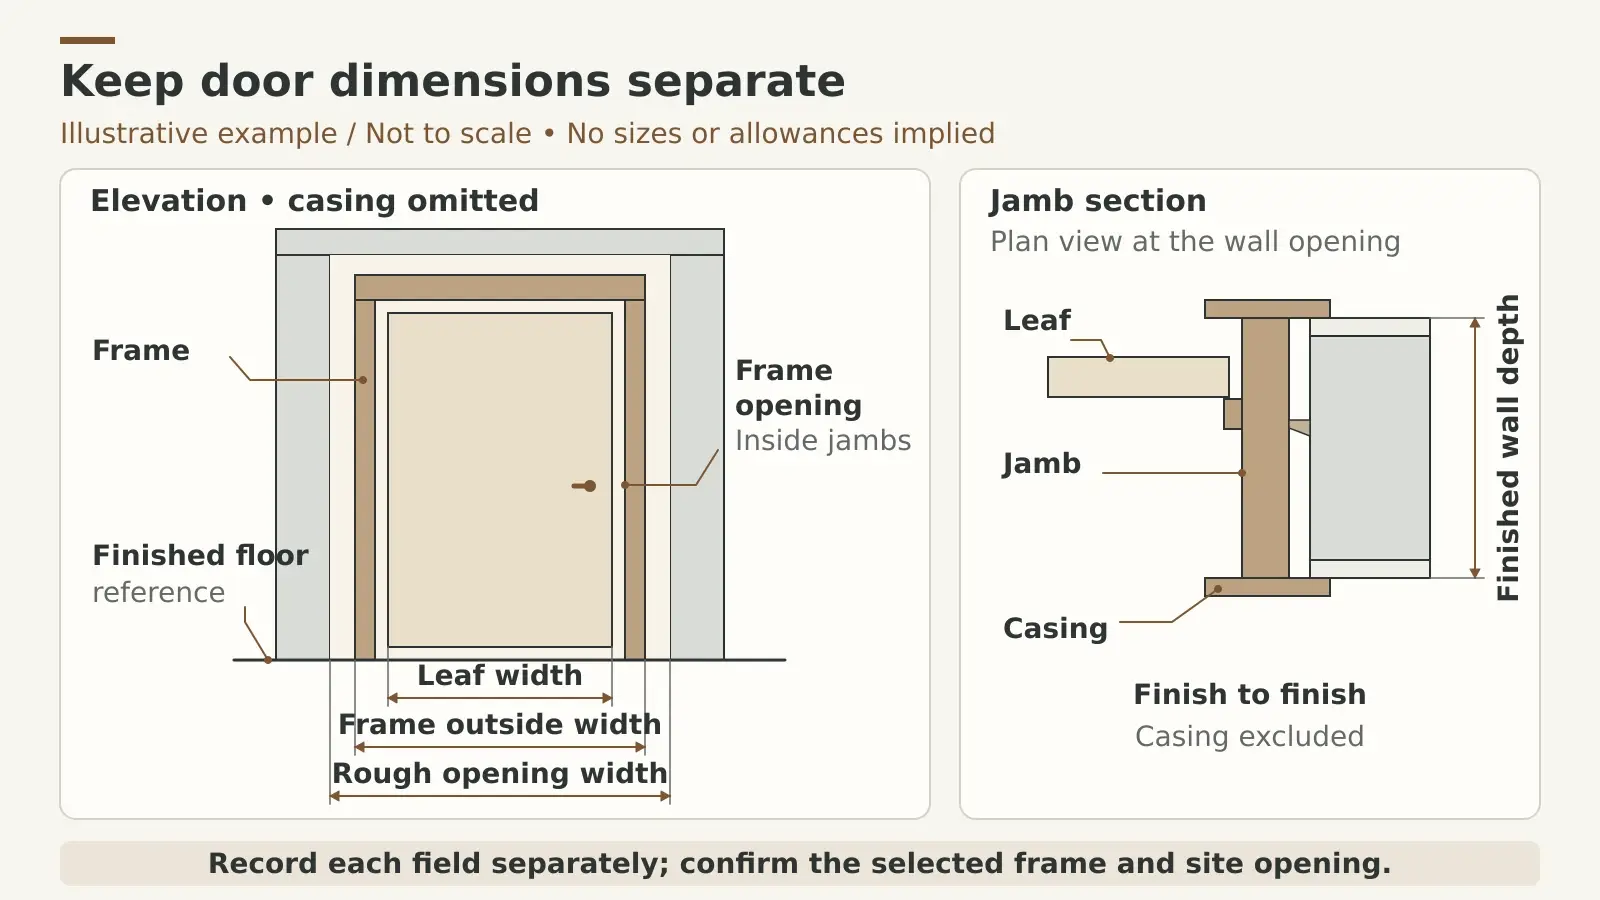
Name each measurement. Door leaf width, height and thickness describe the moving panel. Frame outside dimensions describe the surrounding frame assembly. The rough opening describes the prepared wall opening. Usable clear opening depends on the installed arrangement and should be checked against the project’s requirements.
Enter dimensions in the stated units and keep the measurement basis consistent. The workbook uses millimetres. If a project uses inches, change the field labels, validation and supporting records together rather than placing inch values beneath an mm heading. Avoid an unexplained nominal size because suppliers may use that term for different dimensions.
Our guide to door leaf and opening dimensions explains the distinction. Obtain the rough opening and fitting requirements from the selected system and coordinated details. The template does not calculate every rough opening by adding a fixed allowance to the leaf.
Coordinate the Frame With the Wall and Floor
Record the frame material, profile or type reference, outside dimensions and depth needed for the finished wall. Identify the relevant head, jamb and sill or threshold details. Include trims, seals, anchors and perimeter interfaces in the supporting specification where required.
For replacement work, record which frame remains and verify the existing condition. Hinge preparations, strike positions and the available opening may control what can be supplied. For new work, coordinate floor finishes and threshold levels before treating the leaf height or bottom clearance as final.
Describe Handing From a Stated Viewing Side
Enter the side from which the door is being viewed, the hinge side and whether the leaf swings toward or away from that viewpoint. Reference a plan showing the swing arc. Record the supplier’s agreed handing designation alongside this information when ordering.
LH and RH alone leave room for different interpretations. For example, Allegion’s published lock-handing method uses the outside or secure side; another project or supplier may describe the opening differently. Agree on the convention and check the drawing rather than translating an abbreviation by memory.
For paired leaves, identify which leaf is active and how the other leaf operates. Sliding, pivot and folding systems also need their own operation and drawing references. Use the door swing and handing reference when checking the schedule against the layout.
Connect Door Construction Hardware and Finishes
Define the Leaf Construction and Hardware Set
Record the leaf construction, facing and glazing reference where relevant. A description such as timber door does not identify the core, face material, edge detail or complete assembly. Our comparison of solid core and hollow core door options can help with early interior-door selections. Record the selected system once it is confirmed.
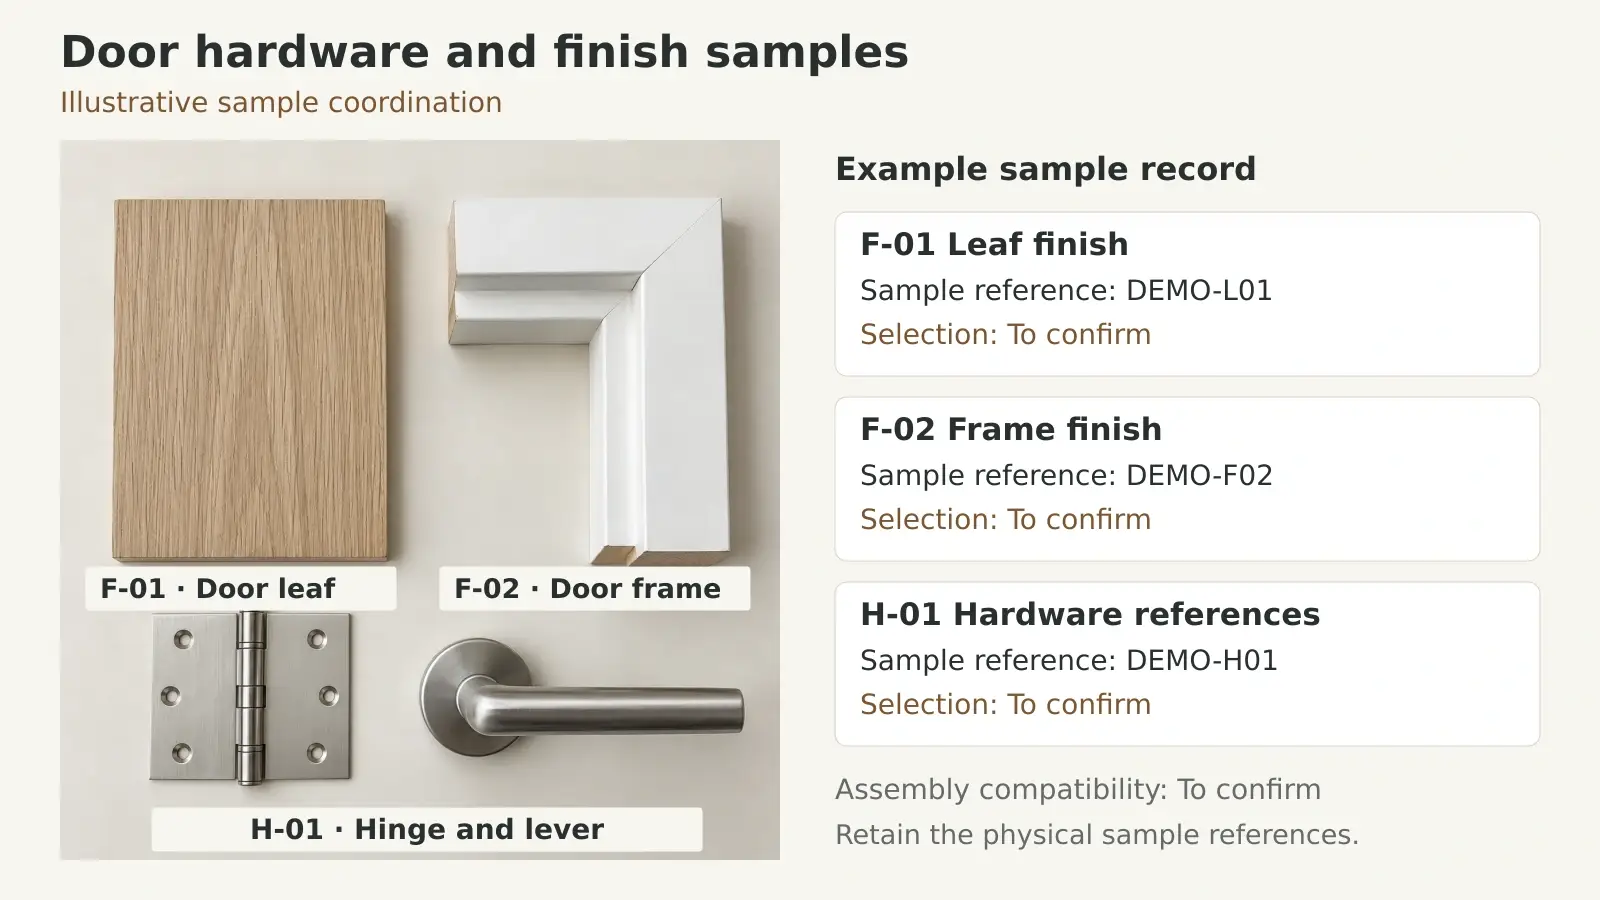
Give each hardware set a code and define its components in the Hardware Sets sheet. Identify the quantity per opening or per leaf, product and function, manufacturer or proposed equivalent, finish and preparation reference. A label such as H-01 is useful only when the referenced set is defined.
Coordinate the selected hardware with leaf thickness and weight, frame construction and operation. Electrified hardware may also need power, cable routes and control interfaces. The door components and hardware guide explains the main parts. Confirm product-specific preparations with the supplier before machining doors or frames.
Identify the Finish on Each Visible Component
Assign finish codes to the leaf faces, frame and hardware as needed. A single color name may conceal differences in substrate, coating, sheen, texture or grain direction. Record the surface system and the physical sample reference so the reviewed appearance can be traced to the proposed supply.
Use the Finish Register to identify each code and its review record. Where the inside and outside faces differ, describe both. Connect door selections with the project’s finish codes and sample records so the door and the surrounding room finishes are reviewed together.
Sample review establishes the agreed appearance within its stated scope. It does not confirm dimensions, hardware compatibility, fire performance or acoustic performance. Keep those requirements and their supporting evidence identifiable in the technical records.
Door Schedule Example
The two fictional openings below demonstrate the recording method. The codes are examples, with product details and approvals still pending. They are not standard sizes, specified hardware packages or instructions to manufacture.
| Record | D-101 | D-102 |
|---|---|---|
| Location | Corridor to Bedroom 1 | Corridor to Bathroom 1 |
| Operation | Single swing | Single swing |
| Viewing side | Corridor | Corridor |
| Hinge side and swing | Left, away from viewpoint | Right, away from viewpoint |
| Leaf dimensions | To confirm in mm | To confirm in mm |
| Frame and opening | Refer to matching detail record | Refer to matching detail record |
| Hardware set | H-01, definition pending | H-02, definition pending |
| Finish references | F-01 leaf, F-02 frame, pending | F-01 leaf, F-02 frame, pending |
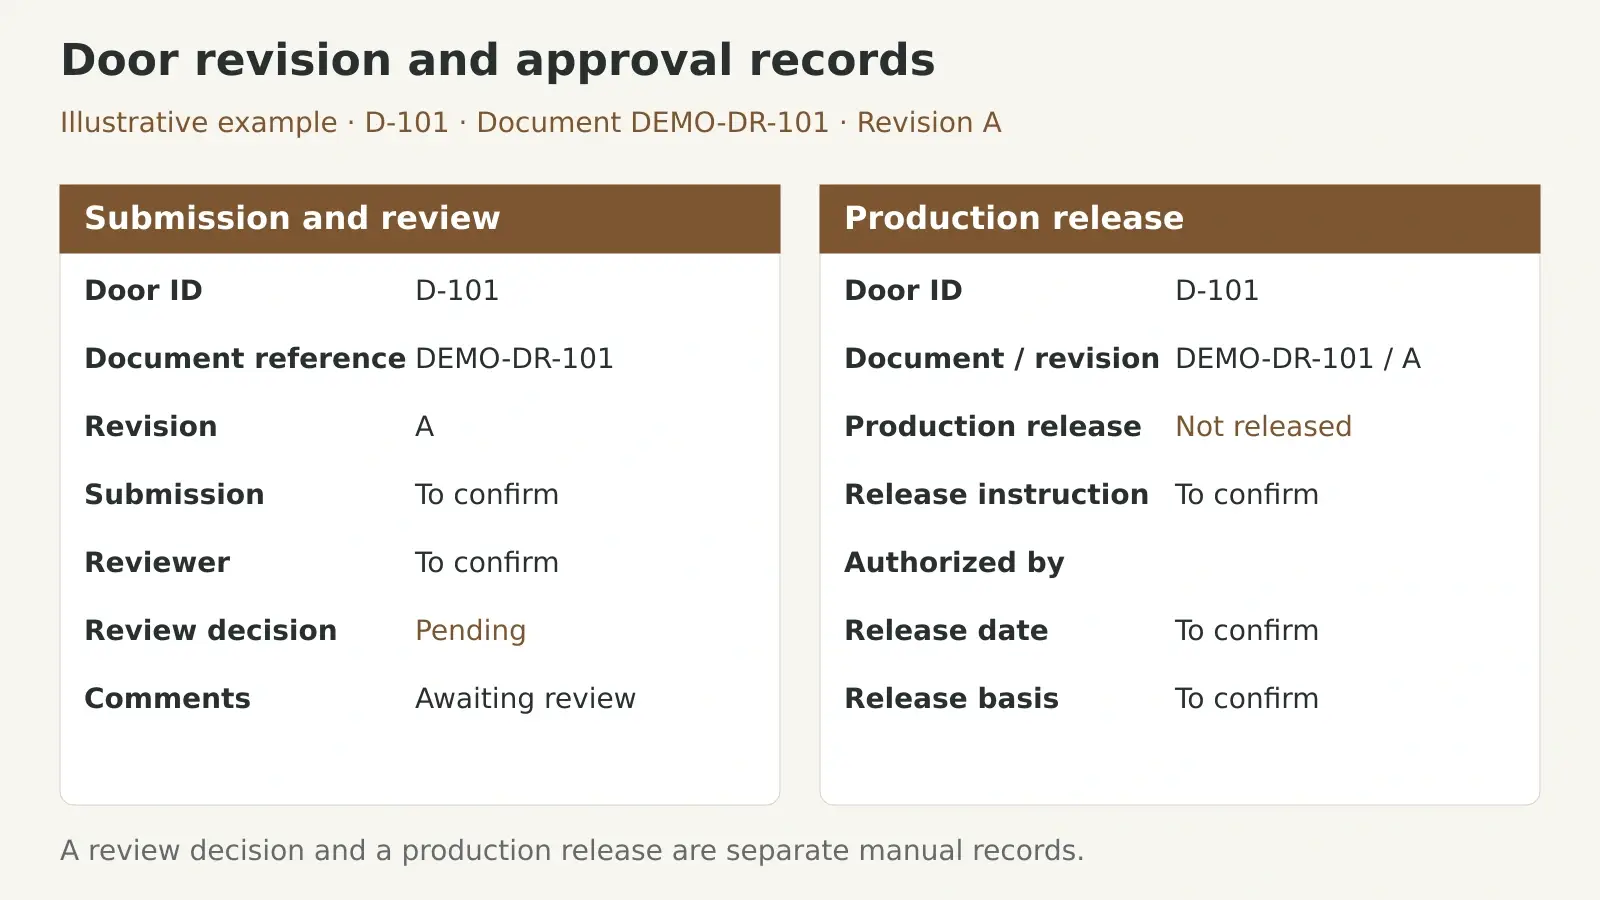
| Review and release | Draft, no production release | Draft, no production release |
Read the records across. A supplier still needs confirmed dimensions, construction, hardware definitions, finishes and the relevant drawings. A door number or an example set code does not supply that missing information. Replace the example labels with project records before using the workbook for a quotation.
Track Revisions and Approval Records
Keep Each Review Tied to a Document Revision
Record a submission or review as a separate entry with its record ID, affected door ID or defined scope, document reference, revision, submission date, reviewer and decision. Keep the returned comments and the reference to the reviewed drawing, sample or product data.
Use the project’s agreed decision labels. A revised frame detail may require another review even if its finish sample was previously accepted. Preserve the earlier entry and add a new record so the team can see which revision a decision actually covered. Do not overwrite an old approval date to make it appear applicable to a changed product.
Record Production Release Separately
Keep the review decision distinct from any instruction to proceed with production. Where the project requires a release, record its scope, responsible authorizer, date and document reference. A circulated schedule, supplier acknowledgement or blank comment cell does not establish that instruction.
Use drawing and sample coordination to keep these documents aligned with the quotation. George House Material can support coordination; the client or appointed consultant remains responsible for final project approvals within the agreed scope. Confirm any substitution before applying an earlier decision to it.
Review the Schedule Before Requesting Quotations
Compare the door IDs with the current plan, then resolve duplicate marks, missing openings and conflicting revisions. Review both the main schedule and the linked records. A complete-looking main row can still point to an undefined hardware set or a finish sample awaiting a decision.
Record required fire, smoke, acoustic, security or accessibility criteria with their governing project reference and review status. Do not assign a fire rating because the leaf is described as solid core, or treat leaf width as proof of usable clear passage. The responsible design team should confirm applicable requirements and the proposed assembly’s evidence.
For an RFQ, state whether the requested scope includes leaves only, frames, hardware, glazing, seals, installation or delivery. Identify pending items and ask suppliers to list assumptions and exclusions against the same door IDs. Keep quotation scope and production release separate so an early price comparison is not mistaken for an order.
You can send your door schedule for review with the current plans, quantities, project location, required performance, finish preferences and delivery information. Include the outstanding questions so they can be addressed before the package is finalized.
Frequently Asked Questions
What Is a Door Schedule Template
It is a reusable table connecting each project opening to its location, leaf, frame, operation, hardware, finishes and document references. A door schedule describes opening requirements; it is different from a programme of installation dates.
Can I Edit the Door Schedule in Excel
Yes. The workbook is an editable XLSX file with blank project records and a separate example. Keep the formulas and linked codes intact, and follow the Read Me instructions when adding rows or changing units.
Is a Door Schedule the Same as a Hardware Schedule
The door schedule identifies the opening and references its hardware set. The hardware schedule defines the components for that set. Keep both references aligned, including quantities, function, finishes and any required preparations.
Does a Filled Schedule Mean the Doors Are Approved
No. Entered values and formula checks do not establish technical approval. Record the responsible reviewers’ decisions against the relevant revisions and retain any separate production release required by the project.
Can I Use the Workbook With CAD or BIM
Use the same door IDs and drawing revisions when exchanging information. The workbook does not automatically synchronize with a drawing or model. Reconcile changes in the maintained source before issuing the next schedule.