
Rustic sage green kitchen cabinets combine a muted green finish with natural textures, framed doors and practical details. The result can feel warm and settled, but the color alone does not create a successful kitchen. Door proportions, paint sheen, wood tone, worktop, hardware and lighting all influence how the finished cabinetry reads in the room.
For a renovation, villa, apartment or hospitality project, the safest approach is to approve the cabinet color as part of a complete finish package. A screen image is useful for direction, but it cannot replace a physical sample reviewed beside the selected worktop, splashback, flooring and metal finishes.
This guide focuses on the rustic and farmhouse use of sage green. For a broader comparison of deep, light and muted greens, see our green kitchen cabinets guide. If the project is still comparing several color families, begin with the kitchen cabinet color ideas guide before narrowing the finish schedule.
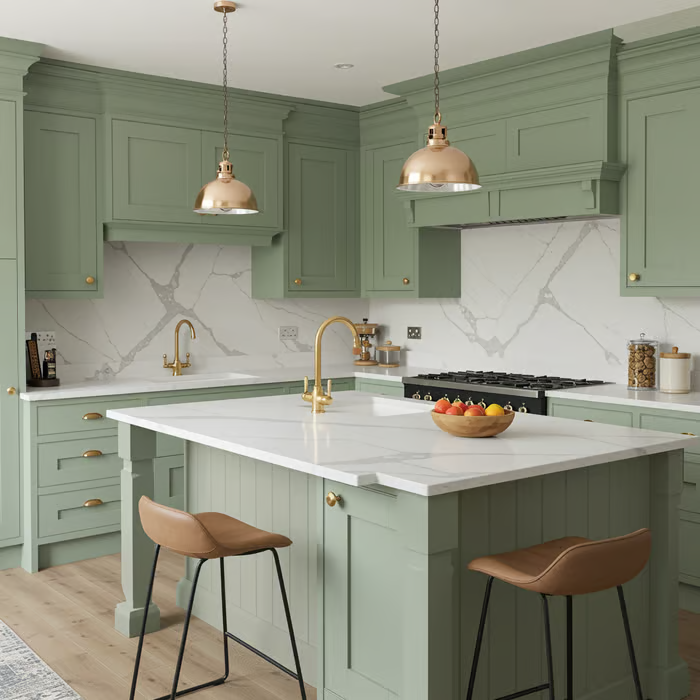
Why Sage Green Works in a Rustic Kitchen
Sage green sits between a clear green and a neutral gray. Depending on its undertone, it can appear warmer beside oak and brass or cooler beside white stone and stainless steel. That flexibility helps it work with rustic materials without making every surface look heavy.
A rustic scheme also benefits from contrast. Painted cabinet fronts create a controlled color field, while timber grain, stone pattern and handmade-look tile add variation. The design feels more coherent when one material carries the strongest texture and the remaining finishes support it.
Undertone Matters More Than the Color Name
Two finishes sold as sage green may look very different. One may lean yellow or olive; another may contain more blue or gray. Review several samples in the actual room during daylight and under the planned artificial lighting. Place each sample vertically because a cabinet door receives light differently from a horizontal worktop sample.
Record the approved supplier reference, finish system and sheen. A description such as sage green is too broad for ordering, production or replacement work.
Natural Texture Keeps the Scheme Warm
White oak, warm-toned timber, lightly patterned stone and textured ceramic tile can soften a muted green finish. Natural materials vary, so the approval package should show the acceptable range of grain, tone and pattern rather than relying on one ideal photograph. Our white oak kitchen cabinets guide explains the visual differences that should be reviewed when timber is part of the cabinet scheme.
Choose the Cabinet Door and Finish as One System
The same sage color can look traditional, contemporary or heavily rustic depending on the door construction. Confirm the door profile, frame width, center panel, edge detail and joint treatment before approving the paint sample.
Framed and Shaker Inspired Doors
A framed or Shaker-inspired door is a practical starting point for a farmhouse kitchen. Narrower rails and stiles usually feel cleaner, while wider profiles and visible molding create a stronger traditional effect. Review a full-size sample door when possible because a small color chip cannot show shadow lines or frame proportions. See the Shaker kitchen cabinets guide for a broader comparison of door styles and layout considerations.
Substrate and Paint System
The visible color is only one part of the front specification. State the door substrate, construction method, primer, topcoat system, edge treatment and intended location. Ask the supplier to identify any limitations related to humidity, heat, cleaning products or touch-up work. Broad labels such as solid wood or MDF are not complete specifications by themselves.
Sheen and Surface Texture
A low-sheen finish often suits rustic sage green cabinets because it reduces sharp reflections and lets the door profile remain visible. Very flat surfaces may show handling differently, while higher sheen can make panel joints and site lighting more prominent. The final choice should follow the tested finish sample and the supplier’s care guidance.
| Decision | Confirm before approval | Risk if left open |
|---|---|---|
| Door style | Profile, frame width, panel construction and edge detail | The finished kitchen may look more traditional or modern than the reference |
| Color | Supplier reference and approved physical sample | Different batches or suppliers may interpret sage green differently |
| Sheen | Named sheen or approved finish sample | Reflections and perceived color can change |
| Substrate | Material, grade, thickness and applicable documentation | Performance and edge quality may not match the intended use |
| Visible edges | End panels, fillers, scribes, plinths and exposed sides | Unspecified areas may receive a different finish |
Coordinate Sage Green With Other Kitchen Materials
A coordinated palette is easier to control than a list of individually attractive finishes. Assemble the cabinet front, worktop, splashback, floor, hardware and wall color in one sample board, then review the combination in the room.
Worktops and Splashbacks
Warm white, cream and lightly veined stone surfaces can keep the scheme bright. Darker stone creates stronger contrast but may make a small room feel more enclosed. Confirm the actual slab or approved pattern range, edge profile, joint positions, upstand and splashback transition. If the material has pronounced movement, check where the pattern will meet the cabinet runs and island.
Timber and Flooring
Timber can appear in the floor, open shelves, ceiling beams, worktop or selected cabinet fronts. Repeating the same wood effect everywhere is not always necessary. Choose one dominant timber tone and use the other wood elements as quieter supporting finishes. Review floor boards and cabinet samples together because red, orange or gray undertones can change the appearance of sage green.
Hardware and Fixtures
Aged brass, dark bronze, black and brushed nickel can all work, but each produces a different contrast. Keep handles, hinges where visible, tapware, sink accessories and lighting finishes on the same schedule. Confirm handle centers and projection on the drawings so doors, adjacent walls and appliances can open without conflict.
Appliances and Metal Finishes
Stainless steel can provide a clean counterpoint to rustic finishes, while panel-ready appliances reduce visual interruption. Use the selected appliance models rather than generic dimensions. Ventilation zones, door swings, handle projections and service access may change the cabinet layout.
Rustic Sage Green Kitchen Design Ideas
Full Sage Green Cabinetry
Using sage green on both base and wall cabinets creates a continuous backdrop. This approach works best when the worktop, walls and floor provide enough separation. Break up a long run with glazing, a timber shelf or a change in cabinet depth only when the added detail serves a clear storage or display purpose.
Sage Base Cabinets With Timber Uppers
Sage base units can anchor the room while white oak or another light timber keeps the upper area visually lighter. Match the timber grain direction and confirm the finish on doors, end panels and open shelves. This arrangement also creates a clear boundary between painted and natural finishes.
A Sage Green Island as the Accent
A sage green island can introduce color without applying it to every cabinet. Coordinate the rear panels, seating overhang, end supports and plinth with the rest of the design. If the island contains plumbing or appliances, review the kitchen island with sink guide and confirm service routes before approving the cabinet construction.
Open Shelving and Display Storage
Open shelves can add timber texture and make a cabinet wall feel less dense. They also expose edges, fixings, lighting routes and stored items. Define the shelf material, thickness, bracket or concealed support, load expectation and cleaning access instead of treating the shelf as decoration alone.
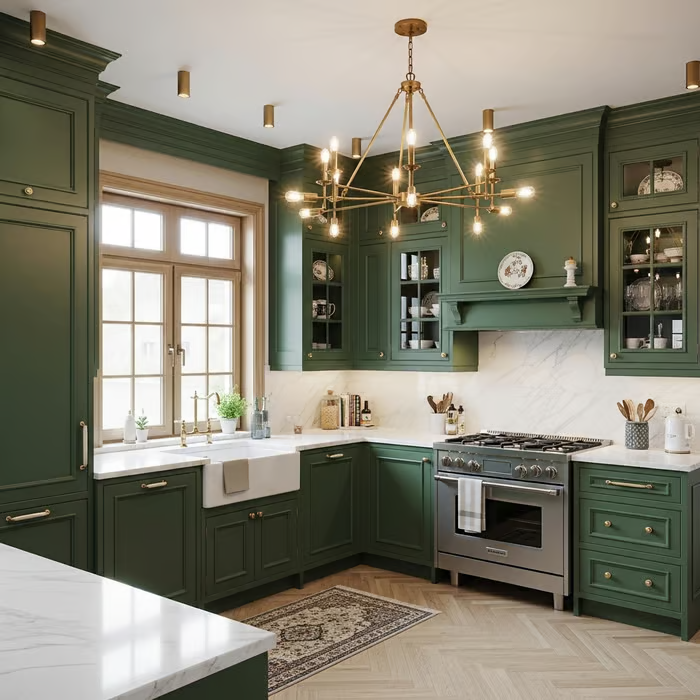
Plan the Layout Before Approving the Color
Color decisions should follow a workable cabinet layout. Start with verified room dimensions, openings, finished floor level, ceiling conditions, appliance models, sink and tap information, plumbing, power and ventilation. The custom kitchen cabinet design page explains how those inputs connect to cabinet construction, drawings and approvals.
Check door and drawer clearances at corners, beside walls and around appliance handles. Corner storage should be selected with the cabinet width and access opening, not added after the elevations are complete. The corner kitchen cabinet guide compares common storage arrangements for these locations.
- Confirm circulation and aisle widths against the actual room and expected number of users.
- Coordinate tall units with ceiling, bulkhead, service access and adjacent door openings.
- Check sink, hob, hood, refrigerator and dishwasher interfaces using model-specific documents.
- Show fillers, scribes, end panels, plinths and worktop overhangs on the elevations.
- Resolve lighting channels, socket positions and cable access before production release.
Build a Physical Finish Sample Board
A finish sample board turns a general design direction into a reviewable selection. It should represent the materials that will meet in the completed kitchen and identify each approved reference.
- Place the sage green cabinet sample in its intended vertical orientation.
- Add the selected worktop and splashback samples or an approved representative range.
- Include the floor, timber, handle and metal finish samples that will remain visible beside the cabinets.
- Review the board in daylight and under the planned warm or neutral artificial lighting.
- Record supplier, code, finish system, sheen, approval date and any acceptable natural variation.
- Keep the approved sample available for production checks and final comparison.
Photographs can support the approval record, but screen settings and camera processing can shift color. Keep the physical sample as the controlling reference when the project scope allows it.
What to Include in the Cabinet Specification
| Scope item | Information to record |
|---|---|
| Cabinet body | Panel type and grade, thickness, surface, back construction, shelf supports and edge banding |
| Doors and visible panels | Substrate, profile, finish system, color reference, sheen, grain direction and edge treatment |
| Hardware | Hinge and runner models, opening angles, load requirements, handles, lift systems and internal accessories |
| Worktop and splashback | Material, thickness, edge profile, joints, upstands, cut-outs and support requirements |
| Appliances and services | Manufacturer, model, installation data, clearances, ventilation, plumbing, gas and power positions |
| Drawings and approvals | Plans, elevations, sections, cabinet references, finish schedule, revision status and approval record |
| Packing and delivery | Room labels, cabinet references, hardware packs, protection method, shipment scope and delivery location |
From RFQ to Design Freeze
A clear process reduces assumptions and keeps the selected finish connected to the cabinets that will be manufactured. The exact deliverables and review stages should be stated in the quotation for the project.
- Project brief and scope. Submit room information, quantities, reference images, preferred layout, delivery location and schedule requirements.
- Layout and specification. Coordinate cabinet runs, storage, appliance interfaces, construction, hardware, worktop and finish direction.
- Samples and shop drawings. Review the physical finish samples together with plans, elevations, sections and cabinet references.
- Design freeze. Record the approved drawings, sample codes, hardware schedule, appliance data and remaining exclusions before production release.
- Production and quality checks. Compare selected dimensions, visible finishes, operation, listed hardware and quantities with the approved information.
- Packing and delivery. Label packages by room and cabinet reference, confirm protection and shipping scope, and retain the agreed records for installation support.
Maintenance and Site Protection
Follow the cabinet supplier’s care instructions for the approved finish. Use a soft cloth and a suitable mild cleaner, remove standing water, and avoid abrasive pads or unapproved chemicals. Do not assume that every painted surface accepts the same product.
During construction, protect fronts from impact, dust, wet trades and adhesive residue. Keep protective films only for the duration recommended by the supplier. At handover, record any touch-up material, adjustment instructions and replacement finish reference.
Common Mistakes to Avoid
- Approving the color from a phone or monitor without a physical sample.
- Writing only sage green on the schedule without a supplier code, finish system or sheen.
- Combining several strong wood grains, stone patterns and handmade textures without a clear hierarchy.
- Leaving end panels, fillers, plinths and visible cabinet interiors out of the finish schedule.
- Selecting handles before checking door, drawer, wall and appliance clearances.
- Changing an appliance or sink model after the shop drawings have been approved without a coordination review.
- Using general durability or cleaning claims instead of the selected supplier’s documented finish guidance.
Frequently Asked Questions
What Colors Complement Rustic Sage Green Cabinets
Warm white, cream, muted stone colors and natural timber are common supporting options. The right combination depends on the sage undertone, room light and actual worktop, floor and metal samples. Review the materials together instead of selecting each one independently.
Does Sage Green Work in a Small Kitchen
It can. A lighter muted sage with a restrained door profile and a brighter worktop may keep the room visually open. The result still depends on daylight, artificial lighting, wall color and the amount of tall cabinetry. Test a larger sample in the space before approval.
Which Door Style Suits a Farmhouse Kitchen
Framed and Shaker-inspired doors are widely used because their rail-and-stile proportions create visible structure without requiring heavy ornament. Confirm the actual frame width, center panel and edge detail on a sample door; the word Shaker does not define one universal profile.
What Finish Is Best for Sage Green Cabinets
There is no single finish for every project. Compare the specified substrate and coating system, sheen, edge treatment, cleaning guidance, repair method and intended environment. Approve a representative finished sample before production.
Can a Supplier Match a Reference Image Exactly
A reference image can establish direction, but camera processing, screen settings, lighting and surrounding materials affect the apparent color. Select from physical samples or develop an approved sample, then record the final supplier reference and acceptable variation.
What Should Be Sent for a Cabinet Quotation
Send available plans or verified measurements, elevations if available, room quantities, storage requirements, appliance and sink models, service locations, preferred door and finish references, worktop requirements, delivery location and required drawings or inspection records. Identify missing information as pending so it can be coordinated rather than assumed.
Prepare Your Sage Green Kitchen Cabinet Package
Rustic sage green kitchen cabinets work best when color, construction and project information are approved together. Begin with the room and cabinet layout, narrow the door and finish options, build a physical sample board, and record the final selection in the drawings and schedules.
For a coordinated review, send your kitchen plan or measurements, appliance list, finish references, quantities and delivery location through our custom kitchen cabinet design service. George House Material can identify missing information and prepare the cabinet, drawing, sample and quotation scope for the project.




