
By George House/24,Jan,2026
Large format tiles can create broad, continuous-looking surfaces, but size alone does not determine whether a tile suits a project. Material, nominal dimensions, actual caliber, thickness, finish, edge condition, substrate, layout, joints and installation method must work together. Use this guide to compare products and coordinate the information needed before ordering or installation.
Define the Product and Application

There is no single practical size threshold that resolves every specification question. A tile may be considered large because one edge or the total face area exceeds a project, supplier or industry definition. Record the exact manufacturer, series, module, thickness, finish and intended location instead of using “large format” as the complete description. The tile and surface hub helps place the selection within the wider floor and wall finish package.
- Floor: confirm traffic, slip considerations, rolling loads, transitions and maintenance.
- Wall: confirm support, fixing method, edge details, penetrations and fixture loads.
- Wet area: coordinate falls, waterproofing, drains, movement joints and suitable finish.
- Exterior: verify climate exposure, substrate, drainage, slip requirements and system approval.
Compare Porcelain, Stone and Other Options
(Source)
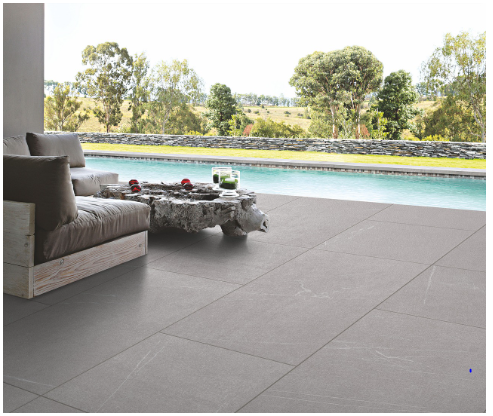
Porcelain products may offer consistent production, varied finishes and comparatively low water absorption, but performance still depends on the declared product properties and installation system. Ceramic, sintered and other manufactured surfaces have different limits. Review the floor tile types guide, then request the current technical data for the exact product rather than transferring characteristics from a material family.
(Source)
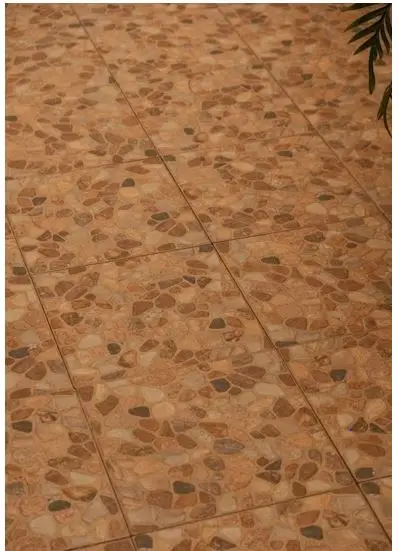
Natural stone has variation in color, veining, porosity and strength. Approve a representative range, not one small sample, and coordinate sealing and maintenance where required. Confirm whether corners, edges and cut-outs need reinforcement or specialist fabrication. For any option, document shade, caliber, batch control and acceptable visual range before production or shipment.
Coordinate Substrate, Flatness and Water Management
Large units reveal substrate irregularities and can be difficult to align when the background is not ready. Survey the base before setting out the work, and correct unsuitable flatness, deflection, cracks, contamination or moisture conditions using the approved system. In wet areas, tile is a finish rather than the waterproofing layer. The bathroom floor tile guide explains why drainage, falls, waterproofing and finish selection need coordinated decisions.
Exterior locations add weather, drainage and temperature exposure. The substrate, adhesive, grout, joints and tile properties must be suitable for the actual project. Use the outdoor patio tile planning guide to review those interfaces before treating an interior product as interchangeable with an exterior one.
Plan Layout, Joints and Edge Details
Set out the grid from verified room dimensions, focal lines, openings, drains, fixtures and transitions. Review cut sizes at both ends of each surface and decide how patterns continue across corners. Joint width, movement accommodation and perimeter conditions must follow the approved project and product requirements. Rectified edges can support a controlled appearance, but they do not justify eliminating necessary joints.
Check Quantities, Batches and Spares
Calculate net surface area from coordinated drawings, then add an allowance appropriate to the layout, cuts, breakage, pattern, access and replacement strategy. A generic waste percentage may be misleading for large modules or rooms with many corners. Confirm how many pieces are supplied per crate and whether different batches can be mixed. Reserve labeled attic stock from the approved production batch, and agree who owns damaged material, replacement lead time and quantity reconciliation before installation begins.
Plan Handling, Installation and Quality Checks
- Confirm crate dimensions, delivery route, storage orientation and lifting equipment.
- Use trained installers, suitable cutting equipment and the approved adhesive and trowel method.
- Check coverage, bed thickness, alignment, edge condition and finished surface as work proceeds.
- Approve a mock-up showing joints, corners, penetrations, profiles, sealant and adjacent finishes.
- Record batch references, spare quantities, cleaning method and maintenance requirements at handover.
Large format tiles should be procured as a coordinated surface system, not as tile dimensions alone. For a comparable quotation, send the finish schedule, room elevations, substrate details, tile references, quantities and delivery constraints.




