
Decorative wall panels should be selected as a complete wall system, not as a surface image alone. The visible face, backing, module, joint, edge, fixing method, substrate, service openings and maintenance plan all affect the finished wall. A successful specification connects those parts before samples are approved or quantities are ordered.
This guide owns the broad, multi-material selection and project-coordination intent. Use the wall paneling ideas guide for compact-room proportion, direction and visual depth. Use the decorative wood panels for walls guide for wood-specific construction, finish and installation decisions. Keeping those scopes separate makes each page more useful and prevents one general article from repeating specialist guidance.
Begin with the room, exposure and required evidence. Then compare exact products, set out the wall modules, coordinate corners and services, approve samples and drawings, and issue one comparable request for quotation. Descriptive terms such as acoustic, fire-resistant, waterproof or low-VOC should be accepted only when current documents support the exact product and installed assembly required by the project.
Decorative Wall Panels at a Glance
The families below are a starting map, not a performance ranking. Products that look similar can use different cores, finishes, edge details and installation systems. Confirm the exact manufacturer, product code, thickness, module, finish, test documents and installation instructions before approval.
| Panel or system family | Common design role | Questions before approval |
|---|---|---|
| Solid wood, veneer and slatted wood-look systems | Warm grain, linear rhythm, feature walls and coordinated joinery | Species or decor, core, finish, grain direction, joint, backing, fire and emissions documents, access and replacement |
| Laminate, compact laminate and finished board | Repeatable colors, prints and durable decorative faces | Core and face construction, exposed-edge treatment, substrate, fixing, wet-area limits, cleaning and replacement batch |
| PVC, composite and proprietary wet-wall systems | Large-format decorative surfaces and reduced visible grout lines | Approved application, substrate, joint and penetration details, sealants, trim, temperature limits, warranty and installer requirements |
| Gypsum, mineral, wood-fibre and cement-based textured panels | Relief, texture, paintable surfaces and selected acoustic applications | Weight, edge profile, support, field cutting, finish, impact zone, fire or acoustic test assembly and repair method |
| PET felt, fabric-faced and perforated acoustic systems | Color, texture and sound absorption where documented | Exact facing and core, mounting depth, tested assembly, fire documents, contamination risk, cleaning and access behind |
| Stone, porcelain, sintered, metal and resin specialty panels | Thin large-format surfaces, metallic effects or distinctive natural pattern | Panel weight, handling, support, joint, edge, movement, fabrication, corrosion or UV exposure, cleaning and safe cutting controls |
Define the Room and Performance Brief
Record the Space and Exposure
Identify the room, wall reference, occupancy, height, traffic level and expected contact. Note direct water, humidity, heat, sunlight, cooking residue, cleaning chemicals, impact, carts, luggage, furniture and public access where relevant. A panel suitable for a dry bedroom feature wall is not automatically suitable beside a shower, cookline, radiator, entrance or hospital corridor.
Separate Appearance From Required Performance
Write the visual brief and the technical brief as separate lists. The visual brief may cover color, gloss, relief, joint rhythm, grain direction and interaction with light. The technical brief may include fire classification, sound absorption, emissions, cleanability, impact resistance, moisture exposure or removability. This separation prevents a sample that looks correct from being treated as evidence for properties it does not document.
Define the Complete Wall Assembly
State whether the proposal includes only the decorative face or the full assembly of panel, carrier, clips, battens, adhesive, insulation, backing, trims and sealants. Record who supplies and installs each part. Where performance matters, verify that the cited test applies to the proposed thickness, facing, backing, air space, substrate and fixing arrangement rather than to a different laboratory build-up.
Compare Panel Constructions With Product Specific Evidence
Wood and Engineered Wood Panels
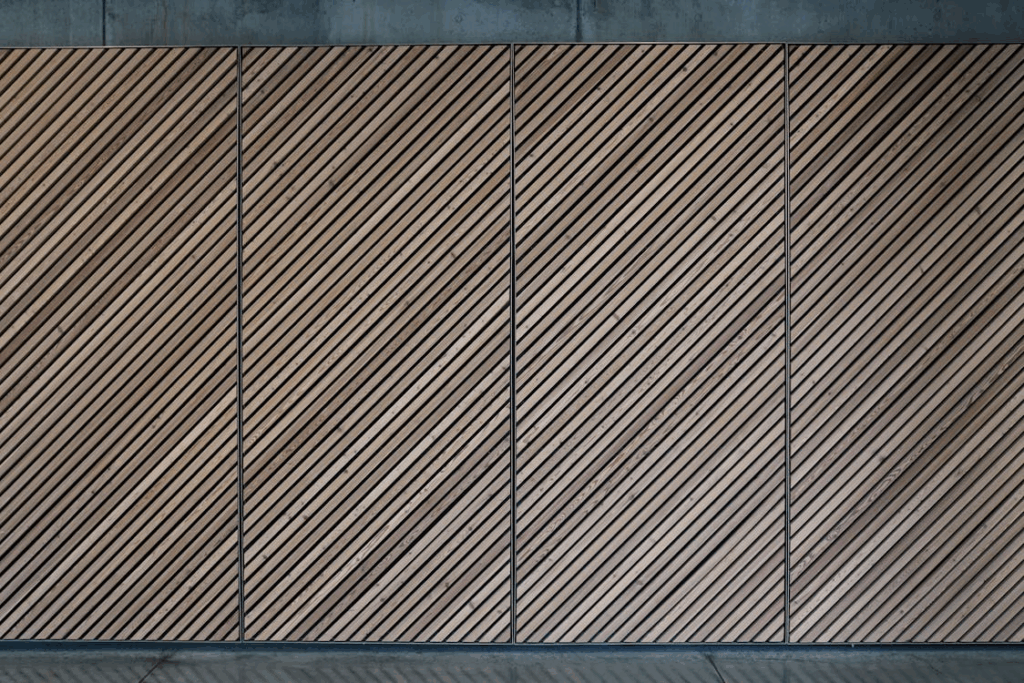
Specify whether the face is solid timber, veneer, printed decor, laminate or foil, and identify the substrate beneath it. For natural wood, agree the species, cut, grade, color range, knots, grain direction, stain and sheen. For slatted products, record slat width, gap, backing color and end treatment. The decorative wood panels for walls guide provides the deeper wood-specific workflow; this broad guide keeps wood as one family among several.
Do not assume that every wood-looking panel has the same emissions, fire response, moisture limits or cleaning method. The Armstrong WoodWorks resource page is one manufacturer example showing how a system may have separate data sheets, installation guides, specifications, environmental documents, cleaning guidance and lighting-integration instructions. Request the equivalent current set for the actual proposed system.
Laminate Compact and Composite Panels
A decorative face can be bonded to particleboard, medium-density fibreboard, plywood, mineral board or another core. Record the face and core separately, then show the edge condition and every exposed cut. Compact panels and proprietary composites may be self-supporting within stated limits, while faced boards may need continuous or closely spaced support. Check thickness, sheet size, tolerances, fastening zones, allowed adhesives, trim compatibility and replacement availability.
Mineral Gypsum Cement Stone and Porcelain Panels
These names cover products with very different weights and handling needs. Confirm the exact composition, density or panel weight, size, thickness, edge, finish, allowable field cuts and support system. Heavy or brittle panels may need engineered backing, mechanical restraint, lifting plans and controlled fabrication. Natural variation, printed repeat and directional patterns should be reviewed across several panels rather than one small sample.
Felt Fabric Perforated and Acoustic Panels
Treat acoustic performance as a property of a tested product or assembly, not as a synonym for soft texture or grooves. Record the face, perforation or slat pattern, acoustic backing, cavity depth, insulation and mounting. Also check fire documentation, fiber or dust retention, cleanability, edge durability and access to services. A product selected for absorption inside a room should not be described as soundproofing unless a separate wall-isolation design supports that claim.
Measure the Walls and Establish the Module
Survey Finished Conditions
Measure between finished surfaces and check the wall at several heights. Record plumb, level, flatness and square conditions, plus columns, beams, steps, skirtings, door frames, ceiling junctions and floor build-ups. Mark the centerlines and sizes of outlets, switches, grilles, sprinklers, access panels, plumbing points and other penetrations. A drawing based only on nominal room dimensions cannot resolve actual edge pieces or service conflicts.
Set Out Panels From the Important View
Establish a datum and decide where full modules, cut modules and joints should appear. Centering on the wall, aligning with a door or furniture axis, or starting from a highly visible corner can produce different edge sizes. Show vertical or horizontal orientation, directional grain and repeated pattern. The modern traditional interior design guide can help frame the intended character, but the shop drawing must convert the concept into exact modules and junctions.
Calculate Quantity With a Stated Waste Basis
List gross wall area, deductions, net cladding area, panel yield, cuts, pattern matching and the proposed waste allowance separately. A percentage copied from another project may be unsuitable for diagonal layouts, book matching, fragile pieces or rooms with many openings. Keep spare and replacement quantities distinct from installation waste and identify the batch or production lot when color continuity matters.
| Set-out input | Record on the drawing | Coordination check |
|---|---|---|
| Wall envelope | Finished width, height, returns, steps and datum | Compare with the current site survey and adjacent finishes |
| Panel module | Nominal and actual face size, orientation and joint width | Confirm manufacturing tolerances and pattern repeat |
| Perimeter cuts | Left, right, top and bottom cut sizes | Avoid unintended slivers and resolve trim or shadow-gap details |
| Openings | Finished opening and cut-out dimensions with centerlines | Check devices, access, fire stopping and removal clearance |
| Corners and ends | Inside, outside, exposed and terminating conditions | Match the selected trim, return, mitre or fabricated edge |
| Quantity | Gross area, net area, waste, spares and batch requirement | Reconcile drawing count with supplier packing units |
Inspect the Substrate and Select the Fixing System
Verify the Existing Wall
Identify the substrate and its condition: masonry, concrete, plaster, gypsum board, framed lining, plywood, tile or an existing finish. Check moisture, contamination, weak coatings, loose plaster, cracks, movement, flatness and concealed services. The installer should not use decorative panels to hide an active leak, unstable backing or unresolved movement joint. Record required preparation and the trade responsible for it.
Choose Mechanical Adhesive Clip or Batten Fixing
Fixing depends on panel weight, size, substrate, access, fire and wet-area conditions and the manufacturer’s tested system. Mechanical fasteners can remain visible or concealed. Clips may allow alignment or removal. Battens can create a cavity but change the wall build-up and perimeter depth. Adhesives depend on surface preparation, compatibility, coverage and cure. Do not substitute one route solely because it looks cleaner on a detail.
Use the Exact Installation Instructions
The Armstrong Tectum direct-attach guide, for example, specifies product-specific furring, fastener placement, edge and joint rules. Those dimensions are evidence for that named system, not a universal wall-panel formula. Obtain the current instructions for the selected product and coordinate them with the substrate, project drawings and local requirements before work starts.
Coordinate Joints Corners Edges and Terminations
Design the Joint Rather Than Hiding It
Show whether adjoining panels are butt-jointed, tongued, shiplapped, expressed with a reveal or separated by a trim. Record joint width, backing color and alignment. Distinguish decorative joints from movement joints in the building or substrate. A decorative panel layout must not bridge a required movement joint unless the approved system detail permits it.
Resolve Inside and Outside Corners
Choose a corner strategy that suits the material: factory trim, metal profile, timber return, formed corner, mitre, overlap or expressed gap. Review the actual thickness and pattern continuation. Mitres can expose fabrication tolerances and impact risk, while a trim can change the visual width and color. Build the most visible corner in the mock-up when appearance is critical.
Finish Floors Ceilings Doors and Open Ends
Coordinate the bottom edge with skirting, flooring, cleaning equipment and any required clearance. Show the top edge at the ceiling or shadow gap, and define returns at door frames, windows and exposed ends. Record whether cut edges are sealed, painted, capped, veneered or hidden. The drawings should make every termination buildable without improvised site trim.
Coordinate Services Lighting Furniture and Access
Map Every Penetration
Place outlets, switches, controls, grilles, detectors, sprinklers, speakers and plumbing points on the coordinated elevation. Show whether devices sit on the panel face, within a reveal or on a separate plate. Confirm fixing depth, box extension, trim clearance and access. Any opening that affects a tested fire or acoustic assembly should be reviewed as part of that assembly rather than treated as a decorative cut-out only.
Integrate Light With the Panel Geometry
Grazing light can emphasize relief, waviness, fasteners and joints. Recessed channels, wall washers and integrated luminaires need clearances, heat management, driver access and coordinated supports. Review the proper lighting in interior design guide for general lighting principles, then use the selected luminaire and panel data to resolve the actual section, wiring route and maintenance access.
Support Furniture and Heavy Objects Independently
Televisions, cabinets, handrails, grab bars and shelving should connect to suitable structure or approved backing, not simply to the decorative panel face. Coordinate anchors before the wall is closed and keep their positions on the elevation. The furniture with wall and floor finishes guide helps frame the visual coordination, while the project detail must define the real support and service interfaces.
Review Fire Acoustic and Indoor Air Documents
Confirm the Required Fire Classification
Fire requirements depend on jurisdiction, building use, location and assembly. The International Building Code Chapter 8 classifies interior wall and ceiling finishes using referenced test methods such as ASTM E84 or UL 723 and applies limits by occupancy and location. A project professional or authority should identify the applicable requirement. Then confirm that the submitted report covers the exact panel, finish, thickness, backing and installation proposed.
Read Acoustic Results as Assembly Evidence
ASTM C423 describes laboratory measurement of sound absorption in a reverberation room and cautions that practical conditions differ from the laboratory. Ask for the full report or traceable data for the exact assembly, including mounting and air space. Do not transfer an absorption rating between different thicknesses, perforations, backings or installation types, and do not use an absorption result as proof of sound isolation through the wall.
Verify Composite Wood Emissions Where Applicable
For products sold, supplied, manufactured or imported in the United States, the EPA formaldehyde standards page identifies hardwood plywood, medium-density fibreboard and particleboard among the regulated composite wood products and explains TSCA Title VI certification and labeling. Other markets and project rating systems may use different criteria. Request current product and chain-of-custody evidence that matches the destination and specified requirement.
Control Dust and Product Safety During Cutting
Cutting stone, concrete, brick, fiber-cement or other silica-containing materials can create respirable crystalline silica, while machining timber and wood-based panels creates wood dust. OSHA silica construction and wood dust resources describe United States workplace hazards and controls. The contractor must follow the product safety data, equipment instructions and occupational rules that apply where the work occurs; local law governs outside the United States.
| Claim or requirement | Evidence to request | Review limit |
|---|---|---|
| Interior finish fire classification | Current test or classification report, product identity, thickness, finish, backing and mounting | Apply the project code, occupancy and location; do not accept a generic fireproof claim |
| Sound absorption | Traceable report for the exact assembly and mounting, including frequency data where required | Absorption inside a room is not the same as sound isolation through a wall |
| Composite wood emissions | Destination-appropriate certification, label and product/core identity | Confirm that the supplied core and finished good are covered |
| Wet-area suitability | Manufacturer application statement, substrate, joints, penetrations, sealants and warranty conditions | A water-resistant face alone does not prove a complete waterproof wall |
| Impact and cleaning | Product-specific test data or written maintenance and damage limits | Match the real traffic, cleaning chemistry and replacement plan |
| Environmental or VOC claim | Current declaration or certificate naming the exact product and scope | Check issuer, expiry, manufacturing location and project acceptance criteria |
Plan Wet and High Exposure Areas
Distinguish Decorative Panels From Wet Wall Systems
A decorative panel can have a cleanable or water-resistant face without being approved as a complete shower or wet-wall system. Where direct water is expected, select a system that expressly covers the application. The Wilsonart Wetwall installation guide is one manufacturer example showing that substrate preparation, dry fitting, gaps, seams and installation sequence are system-specific. Use the actual supplier’s current detail and warranty conditions.
Detail Joints Penetrations and Interfaces
Show the waterproofing or water-management layer, substrate, internal and external corners, tray or tub junction, ceiling edge, panel joints and every pipe or fitting penetration. Name compatible sealants and trims and identify who installs and inspects them. Do not rely on surface coating to compensate for an incomplete interface behind a faucet, shower fitting or accessory.
Check Heat Sunlight Impact and Cleaning
Review clearances from heat sources, exposure to direct sunlight, risk of fading or dimensional change, and the expected impact zone. Confirm cleaning products, disinfectants, abrasion limits and stain-removal procedures for the exact finish. In public or commercial spaces, agree how damaged panels can be removed and whether replacement pieces, trim and matching batches will remain available.
Approve Samples Mockups and Shop Drawings
Use Samples for Identity and Range
Label each sample with manufacturer, product, code, color, finish, thickness, date and revision. A single small sample may not show natural variation, printed repeat, sheen under grazing light or the relationship between face, joint and edge. Request a range or larger panel where those conditions affect approval and retain the signed reference for production and site comparison.
Build a Representative Mockup
A useful mock-up includes more than a flat center panel. Include one joint, a corner or termination, the selected substrate and fixing, a typical service opening and the intended light when those features matter. Agree viewing distance and acceptance criteria. Record whether the mock-up is a workmanship benchmark, a removable sample or part of the permanent work.
Issue Revision Controlled Shop Drawings
Show wall references, datums, modules, cut pieces, pattern direction, joints, edges, trims, substrate, fixing, corners, services, access panels, backing, spares and quantities. AWI shop drawing guidance for QCP projects identifies dimensions, materials and construction information as core coordination content. Apply AWI requirements only where specified, but use the same principle: production should refer to one approved and revision-controlled package.
Prepare a Comparable RFQ and BOQ
Issue the Same Information to Every Bidder
Provide drawings, wall schedule, room use, destination, material and finish references, required samples, technical documents, installation scope, access conditions, packing and programme. Separate the base requirement from alternatives. A supplier cannot price a comparable system if one bidder assumes panels only while another includes trims, backing, fixings, shop drawings and installation.
Separate Areas Pieces Lengths and Accessories
Measure panel faces by area or piece as the system requires, and schedule trims, battens, rails, clips, fasteners, adhesives, sealants and access components separately. State whether waste and spares are included. Reconcile the bill of quantities with panel sizes and packing units so the order is not based on net wall area alone.
Evaluate Supplier Evidence and Responsibility
Request current technical data, installation instructions, sample labels, test reports, representative shop drawings, warranty conditions, packing details and comparable project evidence. Clarify who surveys, designs supports, prepares drawings, approves substitutions, installs, inspects and resolves defects. The procurement and coordination services page explains how drawings, samples, inspection and packing can be organized around a defined project scope.
| RFQ field | State clearly | Quotation check |
|---|---|---|
| Product identity | Manufacturer, product, face, core, color, finish, thickness and module | No unnamed equivalent or changed core without review |
| Wall and quantity | Wall references, net areas, piece schedule, waste, spares and pack basis | Totals reconcile with drawings and supplier modules |
| Accessories | Trims, reveals, rails, battens, clips, fasteners, adhesives and sealants | Each required system component is included and compatible |
| Documents and approvals | Data, tests, samples, mock-up, shop drawings and revision process | Submittal timing and approval responsibility are priced |
| Installation | Substrate preparation, access, cutting, protection, inspection and making good | Inclusions, exclusions and interfaces name a responsible party |
| Commercial and logistics | Currency, taxes, validity, lead time, packing, delivery term and warranty | Alternatives and provisional items remain separate from the base |
Plan Installation Inspection and Handover
Store and Prepare According to the Product
Follow the exact instructions for delivery inspection, flat or vertical storage, environmental conditioning, protection and acclimation where specified. Confirm that wet trades are complete and that temperature, humidity and substrate conditions meet the system requirements. Product-specific instructions control; do not apply one timber or laminate acclimation period to every material.
Approve the First Installed Area
Set the datum and install a representative first area before repeating the wall. Check module, joint width, level, plumb, face alignment, pattern direction, fastener appearance, corners, cut-outs and lighting. Stop and resolve a systematic error at the first area rather than accepting it across the remaining rooms.
Inspect and Record the Finished Work
Use an agreed viewing distance and lighting condition. Record chips, scratches, staining, loose panels, uneven joints, exposed cores, damaged trims and incomplete sealant. Handover should include approved samples and drawings, product data, test evidence, warranties, care instructions, repair contacts, installed photographs and the location and quantity of spare pieces.
Plan Cleaning Maintenance and Replacement
Use the Exact Care Instructions
Name the permitted routine cleaner, dilution, cloth or pad and any prohibited chemicals or abrasives. Trial an unfamiliar cleaner in a concealed area when the manufacturer advises it. Generic advice such as wipe clean can be misleading when one panel is painted mineral fiber, another is laminate and another is fabric-faced.
Inspect Joints Fixings and Interfaces
Include panels in planned building inspections where movement, moisture, public contact or service access creates risk. Check open joints, loose clips, sealant failure, corrosion, impact damage, staining and leaks. Correct the source of moisture or movement before cosmetic repair, and use compatible replacement finishes and sealants.
Keep a Replacement Strategy
Record spare quantity, batch, storage location and the removal sequence for replaceable panels. For printed, stained or naturally varied finishes, a later batch may not match. Where access behind the wall is expected, show which panels are demountable and ensure furniture, trims and sealants do not defeat that access.
Decorative Wall Panel Request for Quotation Checklist
- Provide the project location, room use, wall references, programme, access and environmental exposure.
- Issue measured elevations showing datums, modules, joints, corners, terminations, openings and pattern direction.
- Name the exact panel face, core, product, color, finish, thickness, size and edge condition.
- Identify the substrate, preparation, carrier, battens, clips, fasteners, adhesives, trims and sealants.
- List the fire, acoustic, emissions, wet-area, impact, cleaning or environmental documents required for the project.
- Define sample range, mock-up content, shop drawing format, approval stages and revision control.
- Coordinate outlets, switches, grilles, fire devices, lights, access panels, furniture backing and heavy-object supports.
- Schedule net quantity, pieces, waste, spares, accessories, packing units and replacement requirements.
- State who surveys, supplies, designs supports, installs, protects, inspects, repairs and provides handover records.
- Request lead time, quotation validity, exclusions, warranty, packing, delivery term and separately priced alternatives.
Use the products overview to identify related material categories, then send project details with the available drawings, quantities, room uses and required evidence for a coordinated scope review.
Frequently Asked Questions
Which Decorative Wall Panel Material Is Best
There is no universal best material. The answer depends on the room, exposure, appearance, required documents, substrate, module, maintenance, local installation skill, replacement plan, programme and budget. Compare exact products against one written brief rather than choosing by a broad label such as wood, acoustic or waterproof.
Can Decorative Panels Be Used in a Bathroom
Some systems are approved for stated bathroom or wet-wall applications, while others are intended only for dry decorative areas. Confirm the exact application, substrate, joints, penetrations, sealants, ventilation and warranty. A water-resistant face does not by itself create a waterproof wall assembly.
Do Acoustic Wall Panels Soundproof a Room
Usually that wording is too broad. Tested absorptive panels can reduce reflected sound within a room when the actual assembly matches the evidence. Sound isolation between rooms depends on the complete partition, mass, cavity, insulation, junctions, doors and penetrations. Ask an acoustical professional to define the required metric and assembly where isolation matters.
Can Panels Be Installed Over an Existing Wall
Possibly, if the existing surface is stable, dry, compatible, sufficiently flat and able to support the approved fixing system. Tile, glossy coating, weak plaster or uneven masonry may require testing, preparation, a carrier or removal. Inspect concealed services and verify the resulting depth at doors, outlets, corners and skirtings before approval.
Are Decorative Wall Panels Fire Safe
Safety cannot be established from the material name alone. The project requirement and the exact product or assembly evidence must be reviewed together. Confirm the applicable code, location, classification method, report scope, finish, core, backing, thickness and mounting. Do not rely on an unqualified fire-resistant or fireproof description.
How Does This Guide Differ From the Other Wall Panel Pages
This page covers broad multi-material selection, documentation and project coordination. The wall paneling ideas guide focuses on making compact rooms feel more considered through proportion, direction, light and layout. The decorative wood panels for walls guide goes deeper into wood construction, finishes and installation. Use the three as a hub and two specialist spokes rather than repeating the same advice on every page.
Approve the Panel Package Before Production
| Release item | Minimum approved record | Final check |
|---|---|---|
| Product | Manufacturer, face, core, code, color, finish, thickness, module and edge | Matches the signed sample, quotation and current data |
| Performance | Project requirements and traceable fire, acoustic, emissions or wet-area evidence where applicable | Reports cover the exact proposed product and assembly |
| Layout | Measured elevations, datums, modules, cuts, joints, pattern, corners and terminations | Site conditions and service positions are incorporated |
| Support and fixing | Substrate, preparation, carrier, fasteners, clips, adhesive, trims and backing | Loads, compatibility, access and manufacturer instructions are resolved |
| Quantity and logistics | Pieces, areas, waste, spares, accessories, packing and delivery sequence | Totals reconcile across drawing, BOQ and order |
| Approval control | Sample, mock-up, shop drawing revision, open-item list, approver and release status | Production uses one complete approved revision |
A decorative wall panel package is ready for production when the selected product, required evidence, measured layout, substrate, fixings, interfaces, quantity, responsibilities and approvals all refer to the same revision. That coordinated record protects appearance and buildability more effectively than general promises about trends, durability or performance.




