
Cream colored kitchen cabinets sit between bright white and deeper beige, but cream is not one fixed color. A finish may carry yellow, beige, pink, gray or green undertones, and the same sample can look different beside stone, timber, metal and artificial light. A reliable selection therefore begins with the actual room and a coordinated group of samples rather than a color name or screen image.
The design also depends on more than color. Door profile, substrate, finish system, sheen, hardware, worktop, backsplash, lighting and cabinet layout all affect the result. These choices should be recorded in the quotation, sample approval and shop drawings so the approved appearance can be priced and produced consistently.
This guide combines design ideas with a practical selection process. It explains how to compare cream directions, choose a cabinet style, coordinate surrounding materials, build a sample board and issue the approved finish information for production.

Image source: original photograph.
Cream Colored Kitchen Cabinets at a Glance
Use the table as an early design map. It describes useful starting directions, not fixed formulas. Every pairing still needs to be reviewed with the actual cabinet sample, room light and adjacent materials.
| Design direction | Possible combination | What to verify |
|---|---|---|
| Warm and quiet | Cream with taupe, sand, warm gray or restrained timber | Undertones remain compatible and the room has enough tonal contrast |
| Light and clean | Cream with pale worktops, light walls and simple metal details | Cream does not appear yellow beside cooler whites |
| Natural contrast | Cream with oak or another specified wood finish | Species, cut, stain, clear finish and grain direction are approved |
| Dark accent | Cream with charcoal, black, navy or dark bronze details | The accent is repeated deliberately and does not fragment the elevation |
| Two tone | Cream perimeter cabinets with a colored island or tall unit group | The color transition is shown on elevations and works from key sightlines |
Define the Cream Tone in the Actual Room
Compare Undertones Rather Than Names
Supplier names such as ivory, linen, almond and antique white do not define a measurable match. Place several samples together to reveal their undertones. A cream that looks balanced by itself may become distinctly yellow beside a blue-white wall or unexpectedly gray beside a warm stone. Compare each option with the finishes that will remain in the room, including flooring, wall paint, worktop and appliance fronts.
The Benjamin Moore warm and cool color guide notes that neutral colors can lean warmer or cooler and that natural and artificial light affect how undertones appear. Although the guide addresses paint, the same visual review principle is useful for a painted or solid-color cabinet finish. Treat the cabinet manufacturer's approved sample as the controlling reference.
Check Daylight and Artificial Light
Review the cabinet sample in the morning, around midday and later in the day where practical. Then switch on the proposed task and ambient lighting. A sample placed flat on a table receives light differently from a vertical cabinet door, so view a full door or a large vertical panel in the intended orientation. Photographing the sample can support the record, but screen images should not replace physical approval.
Record the Approved Reference
Write down the manufacturer, collection, color code, substrate, finish system, sheen, sample date and approval revision. If the project allows a range of natural variation, show representative limits rather than approving one unusually uniform piece. Keep one signed sample for comparison with production material and any proposed substitution.
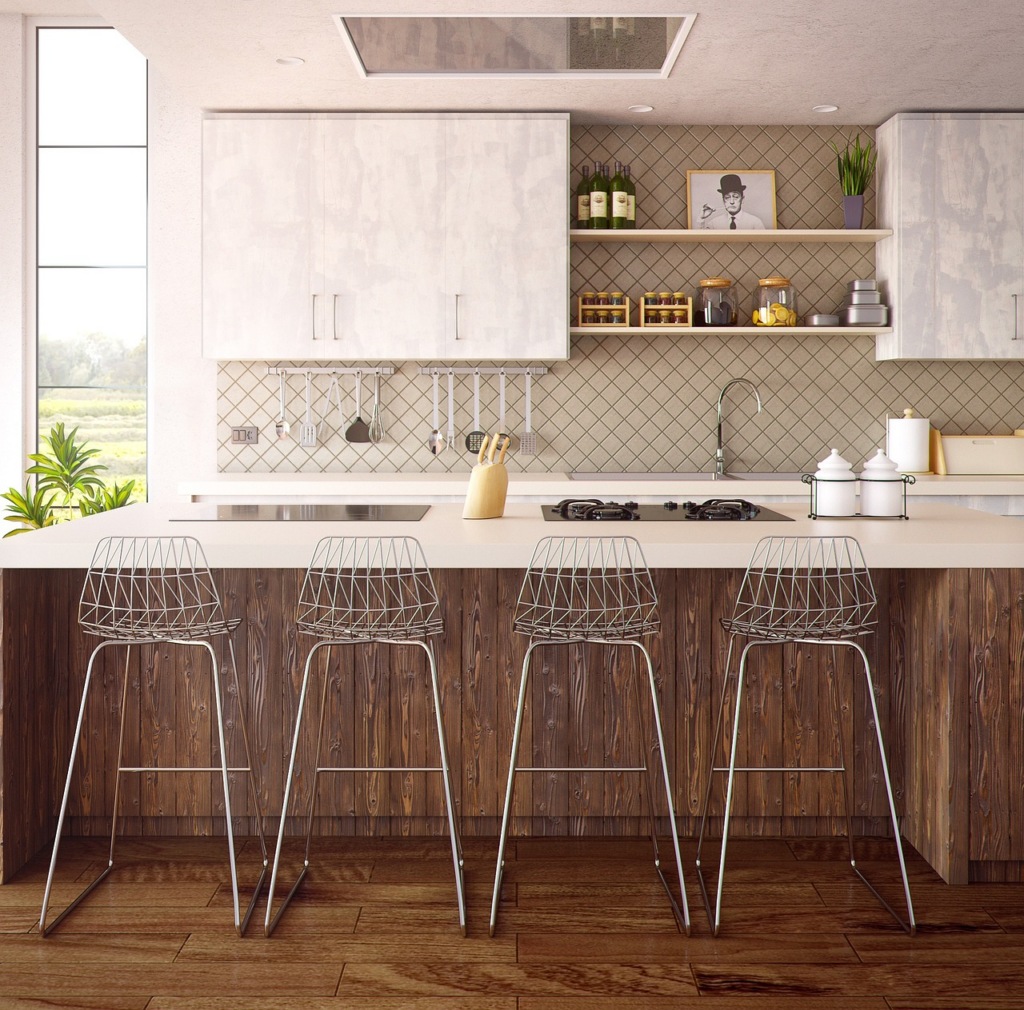
Image source: original photograph.
Choose a Door Style That Supports the Finish
Shaker and Framed Doors
A recessed panel introduces rails, stiles and shadow lines, so the same cream can read darker at the profile edges. Confirm the rail width, panel construction, joint treatment and visible end panels. The Shaker kitchen cabinets guide explains how door construction, finish and sizing need to be coordinated rather than selected as separate decorative choices.
Flat Panel Doors
A flat door makes the color and surface more continuous. It also makes joint alignment, edge quality and reflected light more visible. Specify whether the opening method uses handles, edge pulls, routed grips or a push mechanism, because each option changes the front elevation and the exposed edges.
Decorative and Traditional Details
Crown moulding, glass inserts, pilasters, open shelves and framed end panels can suit a detailed interior, but each item adds junctions that need finish and proportion decisions. Show the exact profile, return, corner condition and top termination. Avoid relying on a style label such as traditional when the quotation needs buildable details.
Two Tone Cabinet Zoning
A two-tone scheme can place cream on perimeter cabinets and a deeper color on an island, base units or tall cabinet group. Select the change point from the room geometry and sightlines, then show it on the elevation and finish schedule. The two-tone kitchen cabinets guide provides additional layout and coordination considerations for mixed cabinet colors.
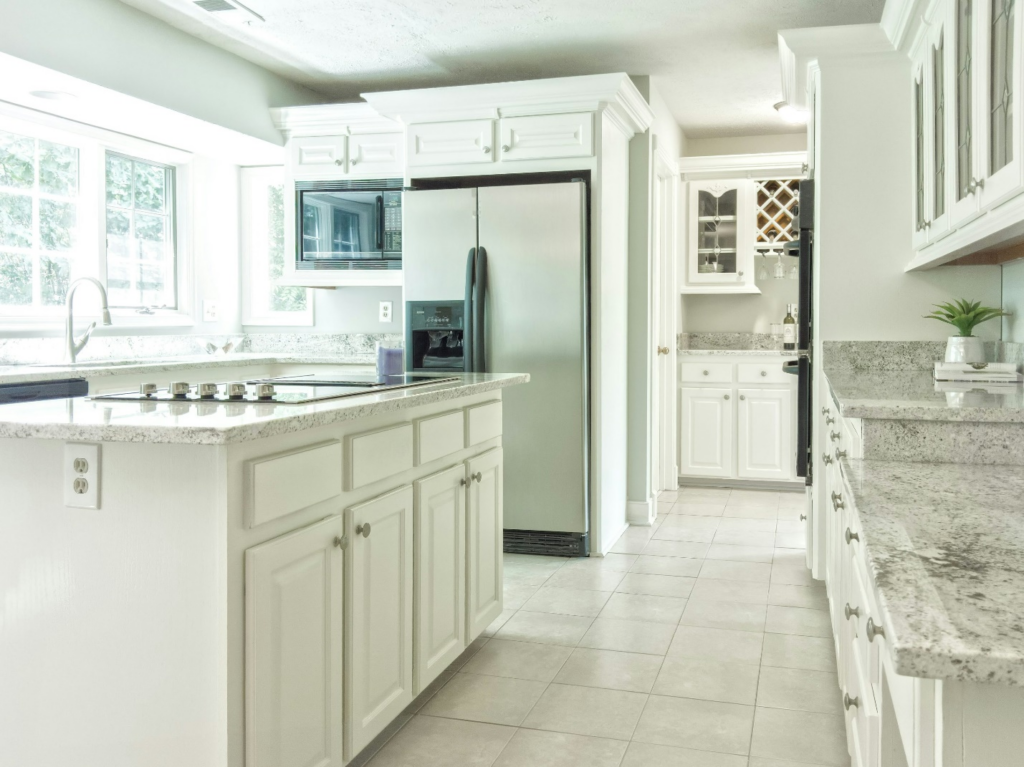
Image source: original photograph.
Specify Cabinet Construction and Finish
Identify the Substrate and Edge
Painted timber, veneered panels, MDF, plywood, particleboard and other engineered products have different construction and finishing requirements. A material family alone is not a specification. Record the grade, thickness, face material, back construction, edge treatment, interior finish and locations where exposed ends or finished backs are required.
Name the Finish System and Sheen
State whether the visible surface is paint, lacquer, laminate, foil, veneer with a clear finish or another system. Confirm sheen on an approved sample because terms such as matte, satin and semi-gloss can vary between suppliers. Lower sheen can soften reflections, while higher sheen can make surface preparation, joint lines and fingerprints more apparent. The choice should follow the required appearance, cleaning method and supplier documentation.
Ask for Relevant Performance Evidence
Where a project calls for North American cabinet certification, verify the exact product and certificate rather than assuming every cabinet from a company is covered. KCMA states that cabinets carrying its A161.1 Quality Certification Seal are tested for structure, drawers, doors and finish. Certification can support a procurement requirement, but it does not replace the project specification, approved sample or warranty review.
Coordinate Worktops Backsplashes and Floors
Control the Transition to Light Surfaces
A light worktop can keep the room restrained, but a blue-white or cool gray surface may exaggerate yellow in a warm cream. View the cabinet door beside the actual worktop sample, not only a small printed swatch. When considering white quartz kitchen countertops, review the base color, aggregate or veining, slab range, edge profile, joints and upstands with the cabinet finish.
Use Warm Neutrals Deliberately
Taupe, sand and warm gray can create a low-contrast palette. Keep the undertones related, then use texture, joint pattern or a controlled darker detail to prevent adjacent surfaces from blending into one undefined band. The taupe cabinet selection guide can help compare warmer and cooler neutral directions.
Pair Cream With Natural Wood
Wood adds grain and variation that can balance a uniform cream finish. Approve the species, cut, veneer matching, stain, clear coat and acceptable range. A generic light wood label is not enough for production because different species and finishing systems can shift from pale yellow to pink, gray or honey. The light wood cabinet guide lists the material and finish information to request.
Backsplash grout, metal trims, sealants and floor transitions also affect the color boundary. Add these small components to the sample board when they remain visible. For broader finish comparisons and a repeatable sampling workflow, use the kitchen cabinet color guide.
Select Hardware Appliances and Lighting Together
Compare Actual Metal Samples
Brass, bronze, black, nickel and chrome can each shift the perceived warmth of cream. Compare actual handles with visible hinges, taps, appliance trims, lighting fittings and nearby metal profiles. Record the manufacturer, model, finish code, dimensions and drilling pattern. Two products described as brushed brass may still differ in color and texture.
Review Lighting at Cabinet Level
Locate under-cabinet lighting before approving the wall cabinets and backsplash. Review the light source, diffuser, reflected glare and shadows at worktop level. Where several reflective materials meet, a corner mockup or one completed cabinet bay can reveal differences that separate samples miss. Keep the lighting specification stable during approval, because a later change can alter how the cream finish appears.
Check Appliance Interfaces
Confirm appliance model numbers, installation dimensions, ventilation, door movement and service access before cabinet production. Integrated panels need the appliance manufacturer's fixing requirements and weight limits. Freestanding metal fronts should be present during the finish review when they occupy a large part of the elevation.
Build a Complete Finish Sample Set
Approve the cabinet color as part of a complete material set. Label every component and show which sample is final, which is an acceptable range and which remains pending. The table below can serve as the sample register for the cabinet package.
| Component | Approval information | Record to retain |
|---|---|---|
| Cabinet face | Color code, undertone, sheen, substrate, profile and acceptable variation | Signed door or large finish sample with date and revision |
| Carcase and edge | Interior surface, exposed ends, edge banding, panel junctions and finished backs | Labeled material sample and location schedule |
| Worktop | Material, slab or range, thickness, edge, joints, upstands and cut-outs | Approved sample or slab range reference |
| Backsplash | Product, pattern, layout, grout, trim and sealant colors | Sample board and elevation reference |
| Hardware | Model, finish, size, drilling pattern and spare quantity | Physical sample and hardware schedule |
| Lighting | Fitting, output data, diffuser, driver and control method | Product data and mockup record where required |
Approve the Set Under Consistent Conditions
Review the grouped samples in the project room where possible. If approval occurs elsewhere, record the lighting and compare again on site before production when color risk is material. Place the cabinet sample vertically and the worktop horizontally to reflect their installed orientation. Mark the retained samples so they cannot be confused with rejected options.
Control Substitutions
A proposed substitution should identify the reason, affected components, cost or programme effect and any change in appearance, construction, performance or warranty. Compare the new material with the complete approved set, not only the cabinet sample. Issue a revised approval record before the substitute is ordered or fabricated.
Coordinate Layout Storage and Interfaces
Start With the Room and Use
The custom kitchen cabinet design process should establish room dimensions, openings, circulation, appliance locations, plumbing, ventilation and storage functions before finishes are released. A cream scheme can support many layouts, but color cannot correct blocked appliance doors, inaccessible corners or insufficient work space.
Resolve Visible Junctions
Show fillers, scribes, end panels, plinths, shadow gaps, cornices, open shelves and transitions to walls or ceilings. State which components receive the cream finish and which use another material. Verify grain direction and sheen at mixed-material junctions, especially on islands and tall unit groups that are visible from several sides.
Place Storage by Frequency of Use
Use drawers, pull-outs, shelves and internal accessories according to the intended items and users. Record the accessory model and cabinet reference so the quotation includes the required hardware. Check handle positions, opening arcs and simultaneous use of adjacent doors, drawers and appliances on the plan and elevations.
Issue the Finish Through Drawings and Schedules
Show the Information Needed for Approval
Cabinet shop drawings should identify dimensions, materials, construction, door and drawer divisions, end conditions, hardware, worktop interfaces and finish references. AWI QCP guidance explains that shop drawings for QCP projects communicate construction methods, materials, joinery and dimensions so conflicts can be reviewed before fabrication. Apply AWI requirements only when the project specification calls for them, but use the same principle of clear, coordinated information on any cabinet package.
Use One Finish Code Across Documents
Reference the approved cream sample code on elevations, the door schedule, finish schedule, BOQ and sample register. The same revision should also list the worktop, backsplash, hardware and lighting selections. If one document changes, update the affected set and identify superseded information so production does not combine different approval stages.
| Approval item | Minimum record | Release check |
|---|---|---|
| Cabinet finish | Manufacturer, code, system, sheen, substrate and signed sample | Matches the sample register and every elevation tag |
| Door and panels | Profile, dimensions, joint detail, edges and finished ends | Matches the cabinet schedule and visible junctions |
| Hardware | Model, finish, drilling, opening angle and accessory references | Clearances and quantities are coordinated |
| Adjacent materials | Worktop, backsplash, floor, wall and visible sealant references | Approved samples are linked to the same revision |
| Appliances and services | Models, openings, ventilation, cut-outs, connections and access | Current installation data is incorporated |
| Release control | Comments, open items, approver, revision and production status | No unresolved item is silently assumed |
Prepare an RFQ That Can Be Compared
Give Each Supplier the Same Scope
A useful request for quotation includes the plans, elevations, cabinet schedule, quantities, appliance list, room or site information, material specification, finish references, sample expectations, required drawings, inspection needs, packing method and delivery location. Identify pending selections so each supplier prices the same assumption or states an exclusion.
Compare More Than the Finish Name
Check cabinet construction, panel thicknesses, visible surfaces, hardware models, worktop scope, drawings, samples, testing or certification, inspection, spare materials, packing, delivery and installation responsibilities. Record alternates separately. A lower price based on a different substrate, finish system or hardware range is not a like-for-like comparison.
Confirm the Approval Sequence
Agree when the supplier will issue drawings, finish samples, revised documents and production confirmation. State who can approve each item and how changes will be recorded. Use the project quotation form to send the available kitchen information and request a coordinated scope review.
Plan Cleaning Care and Handover
Obtain the finish manufacturer's cleaning and care instructions before handover. Test any cleaner on a concealed area and avoid assuming that one method suits paint, lacquer, laminate, foil and veneer. Record how spills, steam and standing water should be handled, and keep abrasive or solvent products outside the approved care method.
The handover package should identify the finish and hardware codes, cleaning guidance, adjustment information, warranty route and any retained touch-up material or spare components. Store touch-up products according to the manufacturer's instructions and note that aged finishes may not match a new batch exactly.
Common Cream Cabinet Selection Mistakes
- Choosing from a screen image or a color name without reviewing a physical cabinet sample.
- Approving cream in isolation and discovering a yellow, gray or pink cast beside the worktop or wall paint.
- Viewing a sample only under one light condition or laying a door sample flat during approval.
- Specifying painted, laminate or wood finish without the substrate, sheen, edge and acceptable variation.
- Treating brass, bronze, nickel or black as exact matches without comparing actual hardware samples.
- Adding a second cabinet color without showing its transition on plans and elevations.
- Releasing production before appliances, visible junctions, samples and drawing revisions are coordinated.
- Comparing quotations that use different construction, finish, hardware, documentation or delivery scopes.
Cream Colored Kitchen Cabinet Questions
Do Cream Cabinets Work With White Worktops
They can, but the undertones need to be compared. A cool white may make a warm cream appear more yellow, while a softer white or warm veining may create a quieter transition. Review the full cabinet door beside the actual worktop sample and any backsplash or wall white before approval.
Which Hardware Finish Works With Cream Cabinets
There is no single correct metal. Brass and bronze can reinforce warmth, black can create sharper contrast, and nickel or chrome can move the scheme cooler. Compare the chosen handle with taps, appliances, hinges where visible and lighting fittings, then record the exact product finish.
Should Cream Cabinets Use a Matte or Gloss Finish
Choose sheen from the desired appearance, surface preparation, cleaning method and supplier system. Lower sheen softens reflections, while higher sheen can make joint lines and surface variation more visible. Approve the sheen on the specified substrate and door profile rather than on a small generic color chip.
Can Cream Cabinets Be Used in a Modern Kitchen
Yes. Flat-panel doors, aligned joints, restrained hardware and a controlled material palette can give cream cabinetry a contemporary direction. Framed doors and mouldings can create a more detailed expression. The deciding factors are the complete door, finish and junction specification, not the cream color alone.
What Should Be Approved Before Cabinet Production
Approve the cabinet construction, door profile, cream finish and sheen, edge treatment, visible panels, hardware, worktop, backsplash, appliance interfaces, sample set, shop drawings, finish schedule and open-item list. Production should use one identified revision and the retained signed sample.
Prepare the Cream Cabinet Project Brief
A clear brief connects the desired appearance with the information needed to quote and build it. Include the room drawings and measurements, cabinet layout, appliance models, storage requirements, cream color reference, door style, construction, finish and sheen, worktop and backsplash options, hardware, lighting, sample requirements, quantities, delivery location and required programme.
Send the available documents even if some selections remain open. George House Material can identify missing information and discuss the quotation, drawing, sample, inspection, packing and delivery scope. Keep all final selections tied to the approved samples and drawing revision before production release.




